

Autumn Spice Cheesecake Shooters Recipe
Honestly, I can’t tell you how many times I’ve reached for this cake when I need a little bit of comfort or want to wow someone with something that feels fancy but is really straightforward. I remember the first time I made it — the smell alone brought my whole family into the kitchen, grumbling about snacks but then ending up with forkfuls of warm, cinnamon-spiced goodness. It’s kind of like a cozy hug in dessert form, and what I love most is how insanely versatile it is. You can enjoy it with coffee in the morning, or serve it as a sweet ending to dinner — and no one feels guilty because it’s loaded with zucchini! That sneaky veggie makes it super moist and tender, and it’s honestly become a family favorite for us. Plus, I tested this recipe with almond milk, and it actually made the texture even creamier — trust me on this one. Whether it’s for a quick snack or a birthday treat, this zucchini cinnamon swirl cake always hits the spot.
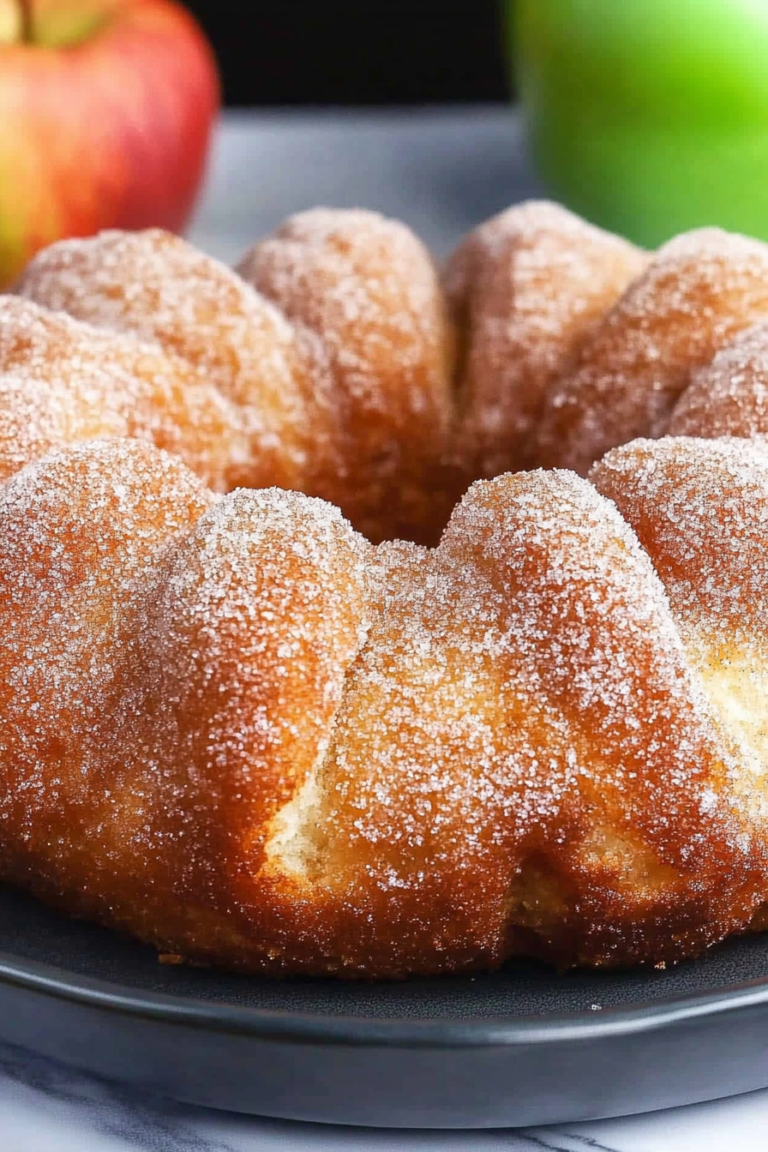
What is a Zucchini cinnamon swirl cake?
This is one of those recipes that I’d call a “secret weapon” in the baking world. Think of it as a tender, moist sponge layered with a swirl of cinnamon-spiced filling, all elevated with the added health of zucchini. It’s essentially a quick bread but with a fancy twist — the cinnamon swirl creates ribbons of spicy sweet flavor that make each bite exciting. The name might sound fancy, but really, it’s just a simple cake made with everyday ingredients, transformed by a beautiful swirl that’s pretty much foolproof. As I’ve made it countless times, I can tell you that the zucchini keeps the cake rich and moist without adding any strange flavor — just that wonderful veggie boost that sneaks in without anyone noticing. This hearty little cake is like a warm hug that you can whip up on a busy weeknight or serve at a brunch with a side of fresh berries.
Why you’ll love this recipe?
What I love most about this zucchini cinnamon swirl cake is how it combines so many good things—moisture, flavor, and a touch of spice—all in one slice. The flavor profile is cozy and inviting; the cinnamon filling adds a surprising burst of warmth that pairs perfectly with a cup of coffee or tea. Plus, it’s crazy easy to make — I always do this when I want something homemade but don’t want to spend hours in the kitchen. I’ve also found it to be quite budget-friendly because all the ingredients are staples I usually keep around — zucchini, cinnamon, sugar, and flour. It’s definitely a win when you want something sweet but don’t want to feel guilty or overindulge, since the zucchini adds some sneaky nutrition (and moisture!). My kids ask for this all the time, especially when I make a double batch for snacks — it disappears in minutes at our house. And what’s more, you can switch up the fillings—add some chopped nuts or even a drizzle of orange glaze if you’re feeling fancy. It’s truly adaptable, and I promise, once you try it, you’ll be hooked.
How do I make Zucchini Swirl Cake?
Quick Overview
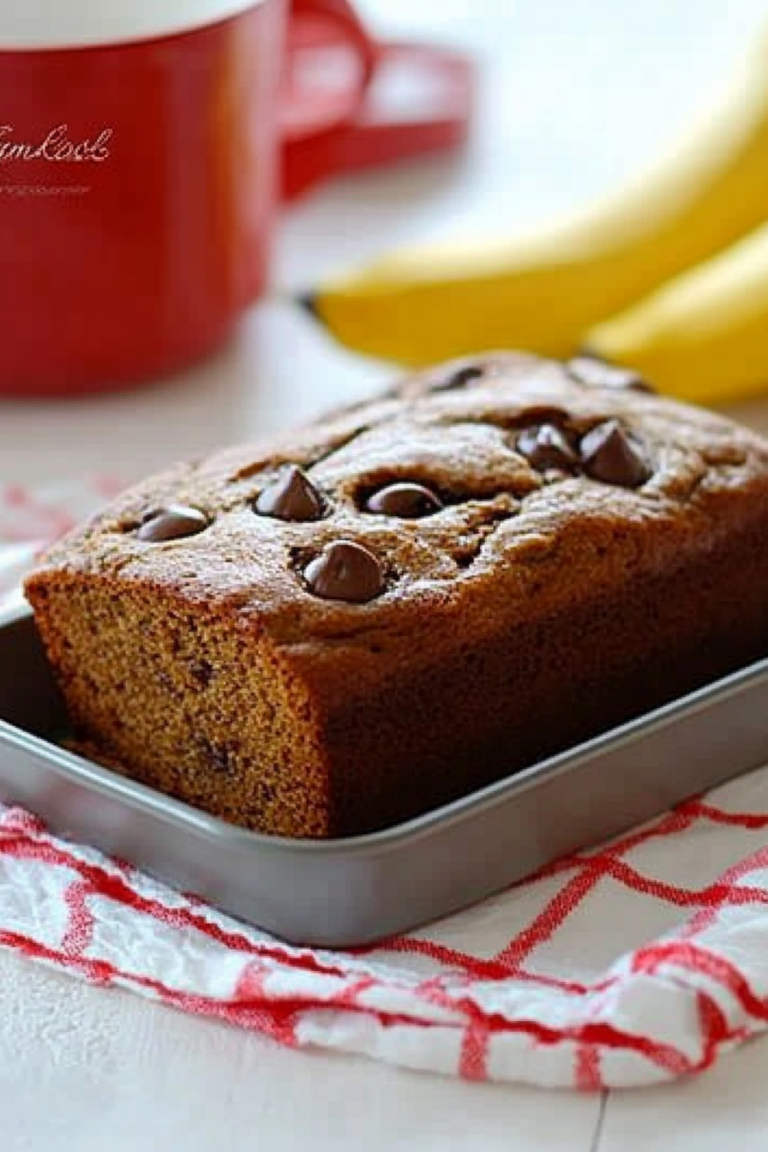
This cake comes together quickly — no fancy equipment needed. You start by grating the zucchini and mixing your dry ingredients, then whisking your wet ones and combining everything just until it’s smooth. The cinnamon swirl is a simple mixture of cinnamon and sugar — layer some batter in the pan, spread the cinnamon goodness on top, then swirl it all together with a knife. Pop it in the oven, and in about 45 minutes, you’ve got this gorgeous, fragrant cake that’s perfect when you’re craving something sweet but still want to keep it kind of healthy. The magic is in how moist and tender it stays thanks to the zucchini, and how that cinnamon-marble effect makes each slice look just a little bit special.
Ingredients
For the Main Batter:
– 2 cups grated zucchini (about 2 small zucchinis, squeezed dry)
– 1 1/2 cups all-purpose flour (or gluten-free flour blend)
– 1 teaspoon baking powder
– 1/2 teaspoon baking soda
– 1/2 teaspoon salt
– 1 teaspoon cinnamon
– 3/4 cup granulated sugar
– 1/3 cup brown sugar
– 1/2 cup vegetable oil (or melted coconut oil)
– 2 large eggs
– 1 teaspoon vanilla extract
– 1/4 cup almond milk (or regular milk) — I love almond milk here because it makes it extra creamy!
For the Filling:
– 1/4 cup brown sugar
– 1 tablespoon cinnamon
– 2 tablespoons softened butter or coconut oil (for spreading)
For the Glaze:
– 1 cup powdered sugar
– 2-3 teaspoons milk
– A drizzle of vanilla or orange zest for extra flavor (optional)
Step-by-Step Instructions
Step 1: Preheat & Prep Pan
Set your oven to 350°F (175°C). Grease a 9-inch round cake pan or line it with parchment paper. I always do this first because it prevents sticking and makes cleanup a breeze. Make sure your pan’s ready before you start mixing — quick tip: I like to dust the pan with a little flour or cocoa powder if I want an extra smooth finish.
Step 2: Mix Dry Ingredients
In a large bowl, whisk together the flour, baking powder, baking soda, salt, and cinnamon. This is the foundation that keeps everything balanced. I’ve made the mistake of overmixing at this stage, which can make the cake dense, so to keep it light, just stir gently until everything’s evenly distributed.
Step 3: Mix Wet Ingredients
In a separate bowl, beat your eggs, then add the sugars, oil, vanilla, and almond milk. Whisk until smooth and a little frothy — this really helps with the cake’s tender crumb. I’ve tested this batter with applesauce instead of eggs, and it’s surprisingly good, but for the best rise, eggs are still my go-to.
Step 4: Combine
Pour the wet mixture into the dry ingredients and fold gently. Don’t overstir, or you risk a tough cake. Just until everything is just combined — it’s okay if there’s a few lumps. That’s how we keep it nice and moist. You’ll notice the batter is fairly thick, which is perfect for holding the cinnamon swirl.
Step 5: Prepare Filling
Mix cinnamon and brown sugar together. For extra richness, I like to soften the butter and spread it across the top of the batter before adding the cinnamon-sugar mix. It creates little pockets of gooeyness when baked. You can also double the filling if you want a more intense cinnamon flavor.
Step 6: Layer & Swirl
Pour half of the batter into your prepared pan, then sprinkle over the cinnamon sugar mixture. Cover with the remaining batter — I like to dollop it in spoonfuls around the pan, then use a butter knife or skewer to swirl the cinnamon through in figure-eight motions. This step is the fun part — visually, it’s so pretty once baked, with those gorgeous ribbons!
Step 7: Bake
Pop it in the oven on the middle rack and bake for about 45-50 minutes. Don’t forget to do the toothpick test — insert it in the center and if it comes out clean, it’s ready. Ovens vary, so start checking at 45 minutes. If the top gets too dark before the middle’s baked through, tent it with foil and keep going.
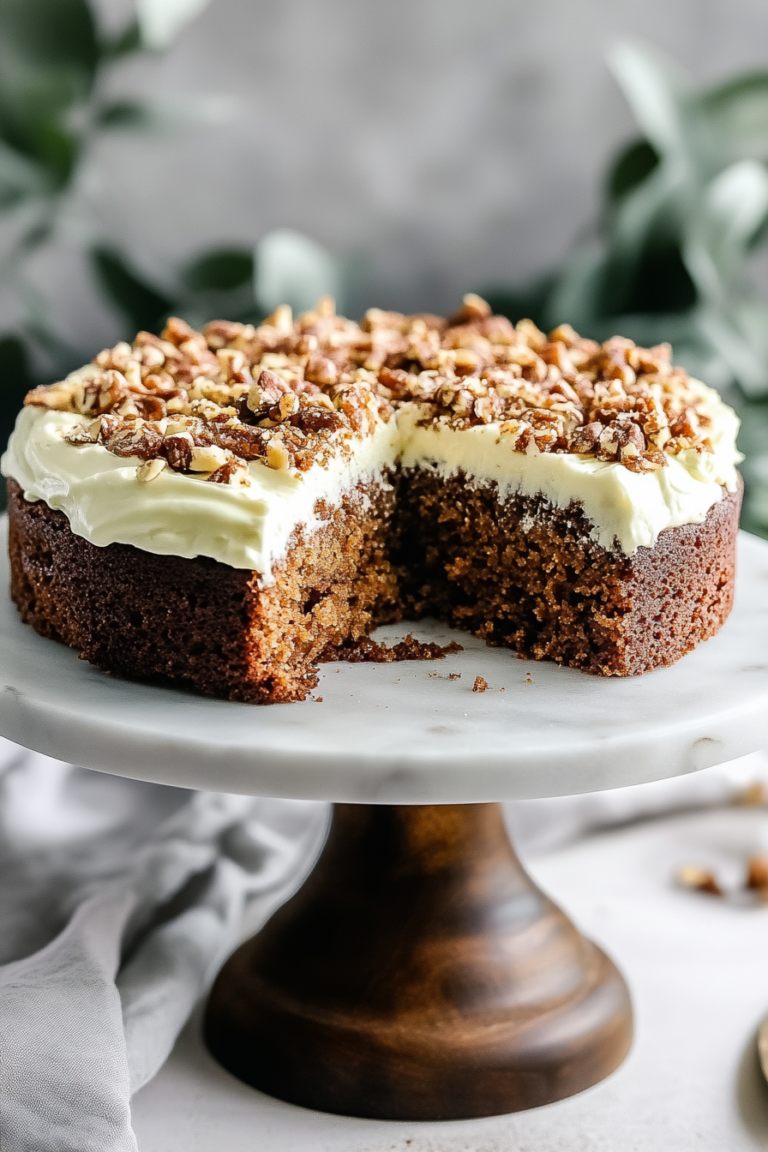
Step 8: Cool & Glaze
Let the cake cool in the pan for about 15 minutes, then transfer to a wire rack. A warm cake is tempting, but this one’s best when slightly cooled so the glaze sets nicely. Mix powdered sugar with a teaspoon or two of milk, add vanilla or a splash of orange zest, and drizzle over the top. Trust me, the glaze makes all the difference — it’s like the frosting on a cinnamon roll but simpler.
Step 9: Slice & Serve
Cut with a serrated knife, and serve slightly warm or at room temperature. I love this with a dollop of whipped cream or a scoop of vanilla ice cream. It’s also just perfect plain — rustic and homey. Honestly, this cake is a showstopper every time I make it, and I swear, once you get the swirl technique down, you’ll want to experiment with different fillings like chopped nuts or even a splash of maple syrup inside.
What to Serve It With
This cake is super versatile, and I’ve served it with all sorts of accompaniments over the years. For breakfast, I love a strong cup of coffee or a latte, and a side of fresh berries or sliced bananas. The sweetness balances out the slight bitterness of the coffee and makes it a nice start to the day. During brunch, I’ll layer slices with fresh whipped cream and a sprinkle of more cinnamon, maybe some crispy bacon on the side. It pairs beautifully with mimosas or a bubbly sparkling cider for a festive touch.
As a dessert, it’s equally happy with a drizzle of caramel or a scoop of vanilla ice cream melting on top. The cinnamon swirl gives it a warm, spicy kick that feels special enough for a dinner finale, yet simple enough for a weeknight treat. My family loves to have it as a casual snack with tea while watching movies, and honestly, I think it’s the cozy comfort food I turn to when I need a little something sweet but still feel good about what I’m eating. It’s become part of our little tradition—baking this together, or sneaking a piece with a cup of tea when everyone’s asleep.
Top Tips for Perfecting Your Zucchini Cinnamon Swirl Cake
In all my baking adventures, I’ve learned a few tricks that make all the difference. First, when grating zucchini, I always do this over a colander and press out excess moisture with a clean dish towel. You don’t want a soggy cake — just moist and tender. I’ve tested this with both grated zucchini that’s been squeezed dry and with frozen zucchini (thawed and drained), and the texture was still lovely, so keep that in mind if you’re in a pinch.
Mixing is key — I used to overmix the batter, and it would turn out dense. Now, I fold gently and stop as soon as it’s just combined. For the swirl, I’ve experimented with different cinnamon ratios; more cinnamon equals a deeper spicy flavor, but too much can overpower the sweetness. I’d say stick with the 1 tablespoon for a nice balance. Also, when layering the batter, I like to use a spatula to smooth out the top so it bakes evenly and with no gaps.
If you want to make this gluten-free, substitute with a cup-for-cup gluten-free flour blend, but expect slightly denser texture — still delicious though! Adjust baking time slightly longer — about 55 minutes — and check for doneness with a toothpick. For a richer flavor, I sometimes add a pinch of nutmeg or cardamom to the cinnamon filling, which makes it feel a little more special. Don’t forget, the glaze can be jazzed up with a squeeze of fresh lemon or a bit of maple syrup mixed in. That little tweak can take it from good to unforgettable.
Personally, I’ve learned that patience is key — let the cake cool thoroughly before slicing, and don’t rush to glaze hot. The glaze sets beautifully, giving each piece that glossy finish that makes it look as good as it tastes. Plus, I’ve found that this cake actually tastes better the next day — the flavors meld and deepen overnight, so my advice is to bake it a little ahead of when you want to serve it. Trust me, it’s worth the extra hour of waiting!
Storing and Reheating Tips
This cake keeps surprisingly well, making it perfect for leftovers or prepping ahead. If you’re not serving it immediately, store it in an airtight container at room temperature for up to two days. Just cover it loosely with foil or a clean towel — that way it stays moist but doesn’t get soggy. I always find it tastes almost better on day two. If you want to keep it longer, pop it in the fridge wrapped tightly in plastic wrap or in an airtight container — it’ll last for about 4 days that way, with the zucchini still keeping it moist.
For freezing, wrap slices individually in plastic wrap, then aluminum foil, or store whole in a tightly sealed container. Thaw overnight in the fridge, then warm slices in the microwave for about 15 seconds or in a low oven for a few extra minutes. The flavor and texture stay pretty much intact, especially if you add fresh glaze once it’s thawed. Speaking of glaze, if the cake has been stored a day or two, just add the glaze right before serving so it’s fresh and gooey again. Remember, a quick reheat makes the cake even more inviting — like a warm, cinnamon-y hug.
Frequently Asked Questions
Final Thoughts
Honestly, this zucchini cinnamon swirl cake has become a staple in my house — it’s cozy, forgiving, and just the right amount of indulgence. Every time I bake it, I feel like I’m sharing a little piece of comfort, a reminder that simple ingredients can turn into something magical. It’s perfect for busy mornings, lazy weekends, or whenever you need a quick spark of homey goodness. My hope is that you give it a try and make it your own — maybe with a splash of ginger or a handful of chopped walnuts stirred into the batter. Whatever you do, enjoy each bite and the warm, sweet aroma that fills the kitchen. Happy baking! And I’d love to hear how yours turns out or any fun twists you add — comment below or share your photos. Baking is all about sharing love, after all.
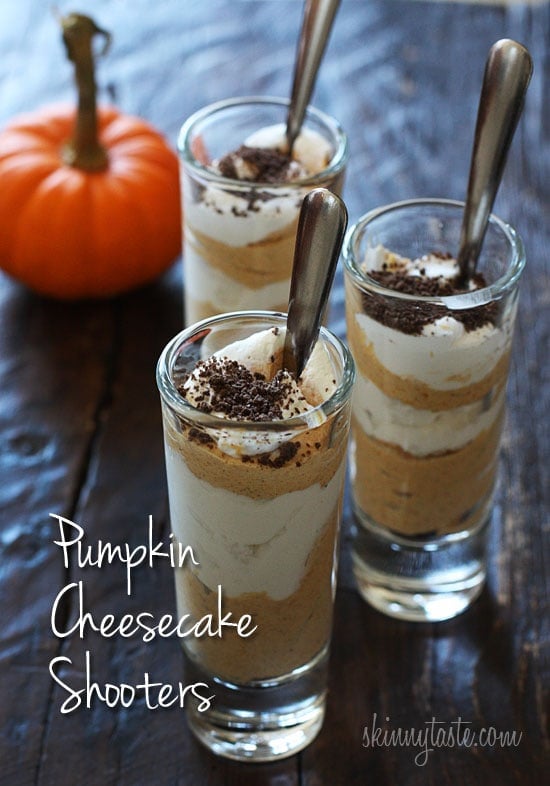
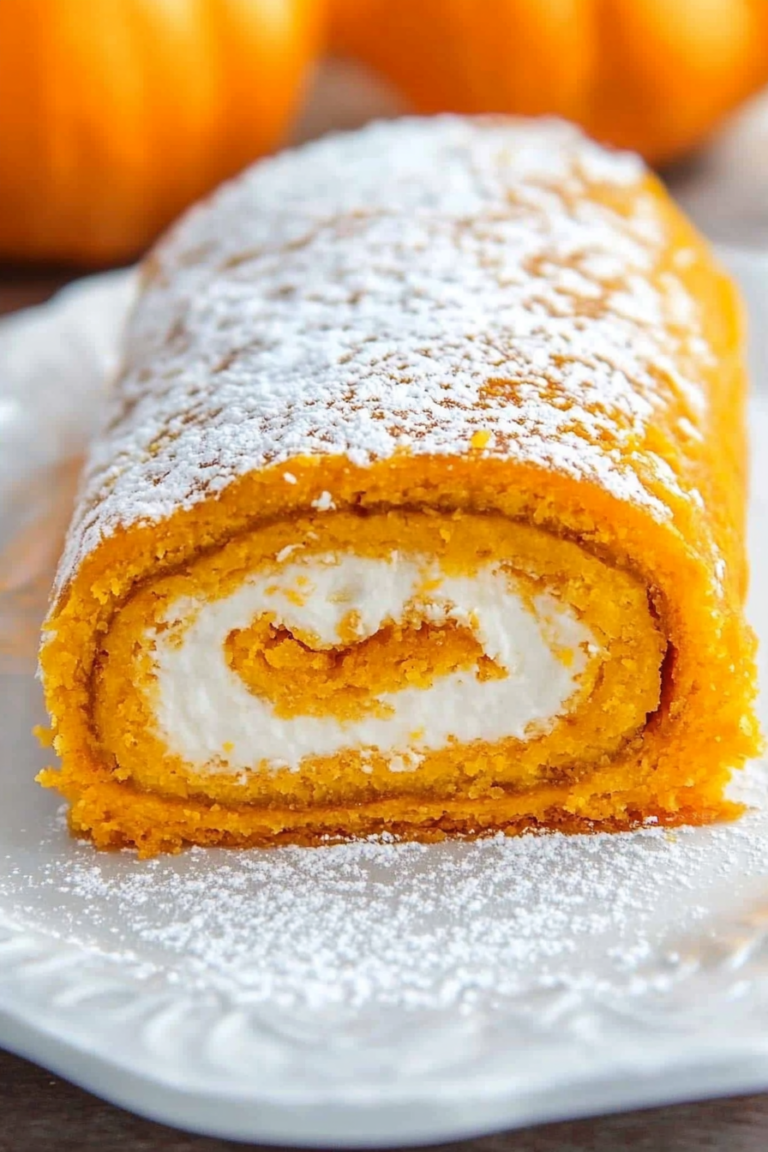
pumpkin cheesecake
Ingredients
Method
- Crush gingersnap cookies in a food processor and press into the bottom of a 9-inch springform pan.
- In a large bowl, beat cream cheese until smooth and creamy.
- Add canned pumpkin, vanilla extract, sugar, pumpkin pie spice, and cinnamon. Mix until well incorporated.
- Fold in whipped topping gently to keep the mixture airy.
- Pour the filling over the crust and smooth the top.
- Bake at 350°F for 45 minutes or until set and slightly golden.
- Allow to cool, then refrigerate for at least 4 hours before serving.

These look absolutely delicious! I love how they’re perfect for sharing—great way to show someone you care without the full cake hassle.
I love how comforting and elegant these cheesecake shooters look—perfect for cozy gatherings or impressing guests without too much effort!
I absolutely love this recipe! The perfect balance of spice and creaminess makes it a go-to for any occasion.
I love how cozy this cheesecake sounds—perfect for autumn gatherings! I’ve made it a few times and it always impresses guests.
I love this idea—perfect for fall gatherings! I’ll definitely be making these soon.