
Why Treat Your Pup to Dried Meat?
There’s something about the smell of baking that instantly takes me back—my grandma’s kitchen full of warmth, love, and that irresistible aroma of something sweet just emerging from the oven. I remember sneaking a peek at her secret recipe book, filled with handwritten notes and doodles, while she hummed softly. Today, I want to share a recipe that’s become a family favorite—my zucchini swirl cake. It’s honestly like a cozy hug on a plate, and what I love most is how simple it is to make, even on those busy nights when you’re craving something sweet but don’t want to spend hours in the kitchen. Plus, it’s great for sneaking in some veggies without anyone noticing. My kids ask for this all the time, and I can’t count how many times I’ve made it just because it’s that good—and because I always do this when I want a little nostalgic comfort. Trust me, once you try it, it’ll become your go-to too.
What is Zucchini Swirl Cake?
Think of zucchini swirl cake as the love child of a moist, tender cake and a sweet, marbled treat. It’s essentially a glorified zucchini bread, but baked in a way that’s prettier and more fun. The name “swirl” comes from the way I layer a simple cinnamon-spiced batter with a ribbon of extra-soft zucchini filling, creating a beautiful marbled effect when sliced. The zucchini itself acts like a secret ingredient—moistening the cake naturally and adding a subtle earthy flavor that balances the sweetness perfectly. This is the kind of dish you make when you want something comforting and heartfelt, but also a little elegant. It’s friendly enough for brunch or snack time, and it’s lovely served warm with a dusting of powdered sugar or a drizzle of glaze. Honestly, it’s like a cozy, edible hug—perfect when you need a bit of homemade love.
Why you’ll love this recipe?
What I love most about this zucchini swirl cake is how effortless it is—no fancy techniques, just straightforward mixing and layering. It’s perfect for when you want to impress without stress, and the smell alone will make your whole house feel like a bakery. The flavor? Oh, it’s just dreamy—warm cinnamon, the subtle earthiness of zucchini, and that soft, melt-in-your-mouth crumb that’s just *so* satisfying. Plus, it’s got this wonderful versatility that makes it a real MVP in my kitchen. You can serve it as a breakfast treat, a casual snack, or even a dessert topped with whipped cream. It’s budget-friendly, too—the ingredients are staples that I always keep on hand. Last but not least, the recipe is super adaptable. I’ve tested it with whole wheat flour, almond milk, and even added some chopped nuts for crunch. It never fails to get rave reviews from everyone who tries it. If you’re looking for something that combines ease, flavor, and that homemade magic, this is it.
How do I make Zucchini Swirl Cake?
Quick Overview
This cake comes together in about an hour, start to finish. The batter is simple—just whisk, fold, pour, and layer. The secret is in the zucchini filling, which gets mixed with a touch of cinnamon and a tiny bit of sugar to make that swirl look and taste divine. Once layered in a loaf or cake pan, it’s baked until the top turns golden and a toothpick comes out clean. The result is a moist, flavorful cake with gorgeous marbled streaks of that cinnamon-y zucchini goodness. Trust me, the hardest part is waiting for it to cool before slicing—because you’ll want to dig right in!
Ingredients
For the Main Batter:
– 2 cups all-purpose flour (or whole wheat for a healthier twist)
– 1 ½ teaspoons baking powder
– ½ teaspoon baking soda
– ½ teaspoon salt
– 1 teaspoon ground cinnamon
– ½ teaspoon ground nutmeg (optional, but delicious!)
– 1 cup granulated sugar (or coconut sugar for a healthier vibe)
– ½ cup vegetable oil (or coconut oil for flavor)
– 3 large eggs
– 1 teaspoon vanilla extract
– 1 cup milk (dairy or almond milk works beautifully)
For the Filling:
– 2 medium zucchinis, grated (try to squeeze out excess moisture)
– 2 tablespoons brown sugar
– 1 teaspoon ground cinnamon
– 1 tablespoon flour (to keep it from being too runny)
For the Glaze (optional):
– 1 cup powdered sugar
– 2-3 teaspoons milk (or lemon juice for an extra zing)
– A sprinkle of cinnamon or vanilla extract for flavor
Step-by-Step Instructions
Step 1: Preheat & Prepare Pan
Set your oven to 350°F (175°C) and grease a loaf pan or 8-inch cake pan. Line with parchment paper for easy removal if you like. This quick prep ensures your cake doesn’t stick and slides out perfectly when ready.
Step 2: Mix Dry Ingredients
In a big bowl, whisk together the flour, baking powder, baking soda, salt, cinnamon, and nutmeg. Mixing the dry ingredients first ensures everything’s evenly distributed and helps prevent clumps when you add the wet stuff later.
Step 3: Mix Wet Ingredients
In another bowl, beat the eggs with sugar until light and fluffy—this usually takes about 2 minutes. Then stir in the oil, vanilla, and milk until combined. The mixture should look smooth and slightly frothy—the eggs help create that tender crumb we all love.
Step 4: Combine
Pour the wet ingredients into the dry and fold gently until just combined. Don’t overmix! Some small lumps are fine—this keeps the cake light and airy. Overmixing can lead to a dense texture, and nobody wants that.
Step 5: Prepare Filling
Here’s a little tip I learned after trial and error: squeezing out excess moisture from the grated zucchini makes a huge difference. Mix the zucchini with brown sugar, cinnamon, and a tablespoon of flour. It should be soft but not watery—that’s key to keeping your swirl neat and flavorful.
Step 6: Layer & Swirl
Spread about half the batter into the pan. Dot with spoonfuls of zucchini filling, then top with the remaining batter. Use a skewer or knife to swirl through the layers gently—don’t overdo it, or the swirl can turn muddy. I love creating a marbled effect like a cake version of tie-dye.
Step 7: Bake
Pop it into the oven and bake for about 40-45 minutes. Check doneness with a toothpick—if it comes out clean, you’re good. If not, give it a few more minutes, but keep an eye so it doesn’t overbake and turn too dry.
Step 8: Cool & Glaze
Let the cake cool in the pan for about 10 minutes, then transfer to a wire rack. If you’re glazing, mix powdered sugar with a splash of milk and drizzle over a slightly warm cake. My kids ask for this part—who doesn’t love a little sweet shine?
Step 9: Slice & Serve
Once cooled completely, slice with a sharp knife. I like to serve it slightly warm for that melt-in-your-mouth feeling, but it’s just as good at room temperature. Pair it with a cup of coffee or tea, and watch how fast this disappears!
What to Serve It With
For breakfast, I love serving slices with a dollop of Greek yogurt and fresh berries—looks pretty and tastes amazing. It’s also fantastic for a cozy brunch when paired with spiced chai or a strong black coffee. When I make this as a dessert, I drizzle the glaze extra generously and add a sprinkle of toasted nuts or a scoop of vanilla ice cream. My family’s favorite is enjoying a warm piece with a pat of butter melting into the crumb—that comforting combo I grew up with. Occasionally, I add a handful of chocolate chips or chopped walnuts into the batter for a little surprise in every bite. This cake is versatile enough to be a snack on the go, or a lovely finish to a casual dinner. It’s one of those recipes that feels like a warm hug at any hour.
Top Tips for Perfecting Your Zucchini Swirl Cake
Over the years, I’ve learned a few tricks that help make this cake picture-perfect every time. First, always squeeze out excess moisture from the grated zucchini—you’ll be amazed how much wetter it can be than you think, and too much moisture can mess with your swirl and crumb. Using fresh, firm zucchinis is also key; avoid those soft or overly watery ones. When mixing the batter, fold gently and don’t overmix—this is the secret to that tender, airy texture that keeps each bite delightful. As for the swirl pattern, try creating a gentle S-shape or figure-eight to get a more artistic look—I promise, it makes everyone think you’re a baking pro! If you want to switch things up, substitute some of the flour with almond meal or oat flour, and test the texture. The baking time might need a slight adjustment, so keep an eye on it. If the top starts to brown too quickly, tent with foil. For the glaze, I’ve experimented with lemon juice instead of milk—it adds a little zing that cuts through the sweetness perfectly. The key is to experiment and find what makes YOU happiest in the kitchen. This recipe is forgiving and flexible, so don’t be afraid to adapt it—every batch builds your confidence!
Storing and Reheating Tips
This cake stays delicious for up to 3 days at room temperature, loosely covered with a clean towel or foil. If you want to keep it longer, wrap it tightly in plastic wrap or store in an airtight container in the fridge for up to 4 days. I’ve tested freezing slices wrapped individually—I find it helps maintain moisture and freshness; just thaw at room temp or gently reheat in the microwave for about 20 seconds. If you plan to add the glaze later, wait until it’s fully cooled to avoid melting or making a mess. For best flavor, serve it slightly warmed or at room temperature—either way, it’s magical. The only thing to watch for is moisture buildup—if it looks soggy, give it a quick reheat in the oven at 300°F (150°C) for a few minutes, and it’ll revive beautifully. This makes it perfect for make-ahead snacking or gifts—and somehow, it tastes even better the next day, as the flavors meld slightly.
Frequently Asked Questions
Final Thoughts
Honestly, this zucchini swirl cake has become a staple in my home—it’s like the warm, inviting friend who’s always there when I need comfort or a little sweet pick-me-up. It’s remarkable how a simple ingredient like zucchini can transform into something so rich and satisfying. Every time I bake this, I feel a wave of nostalgia and gratitude—so many lovely memories baked into each slice. Trust me, whether you’re making it for a quiet morning with coffee, a quick weekend treat, or an impromptu dinner dessert, you’ll find that this cake is more than just delicious; it’s a reminder that sometimes, the simplest recipes are the most special. I can’t wait to hear how yours turns out, and I hope this warms your kitchen as much as it’s warmed mine. Happy baking!
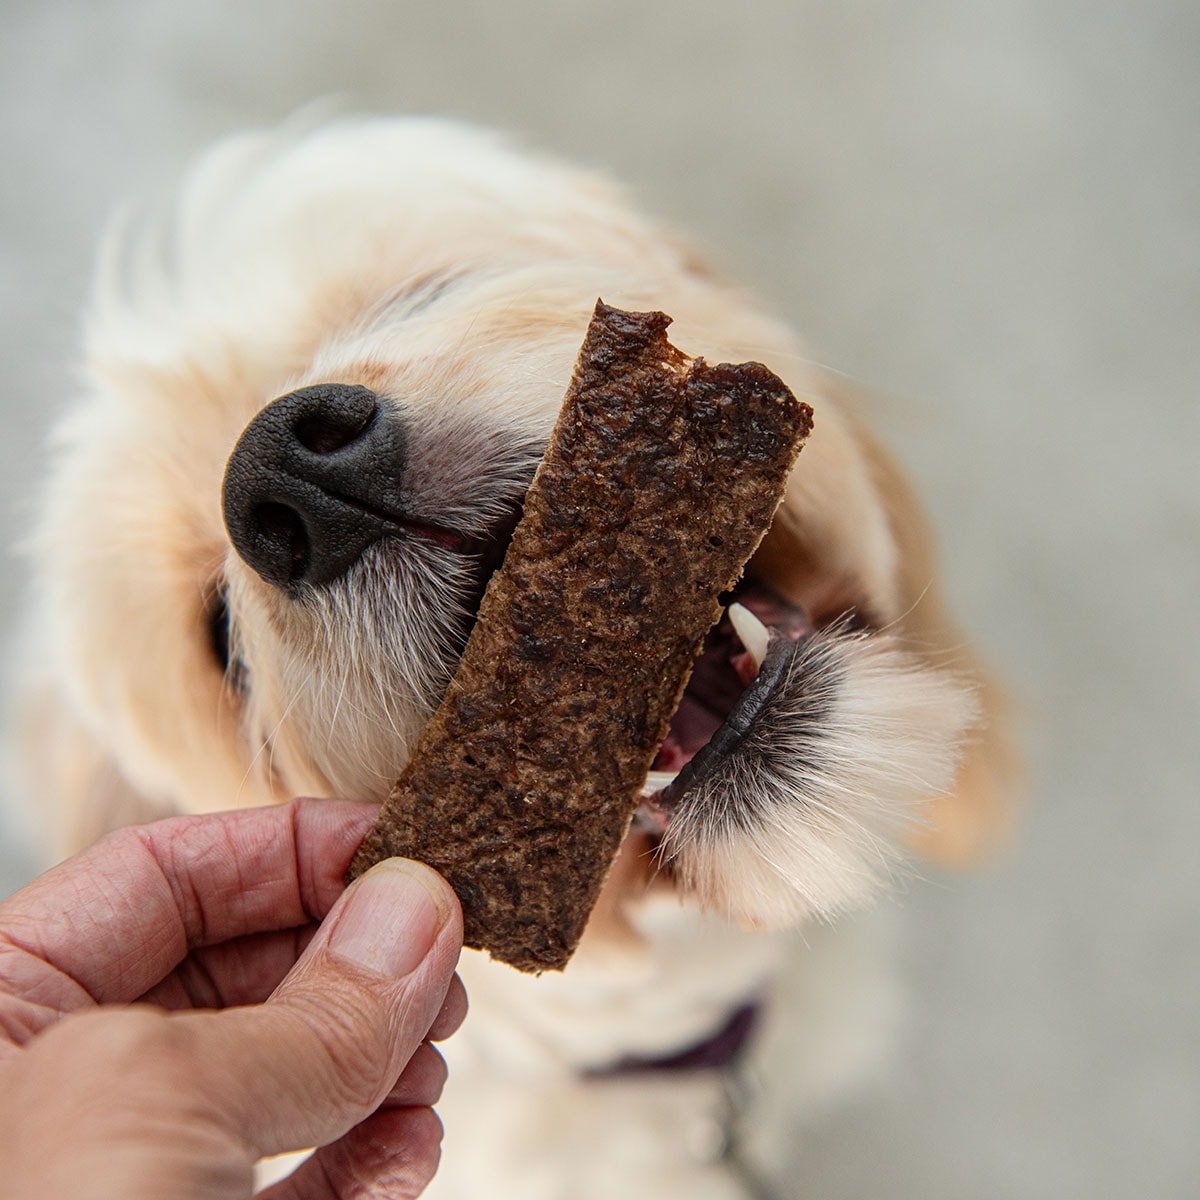
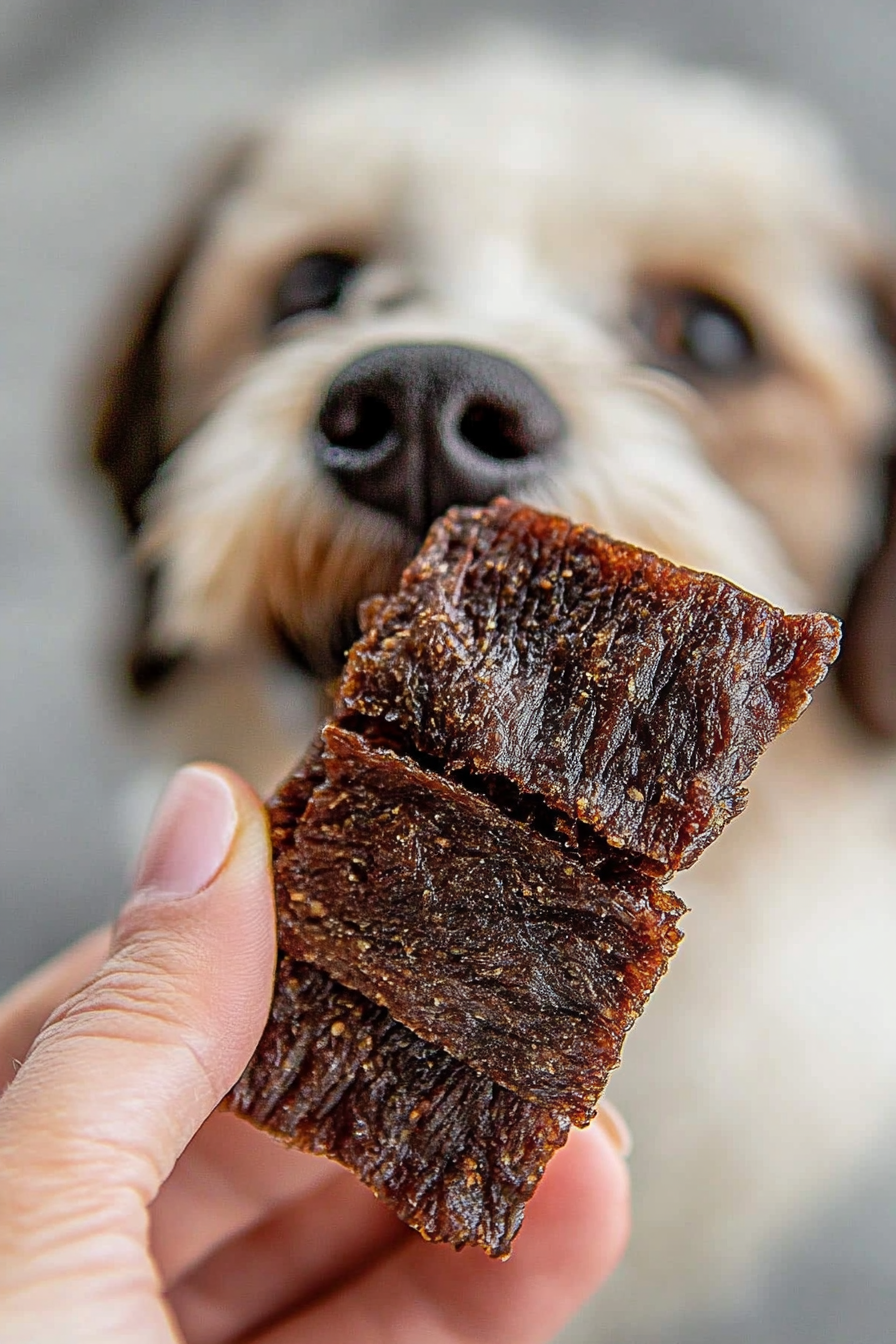
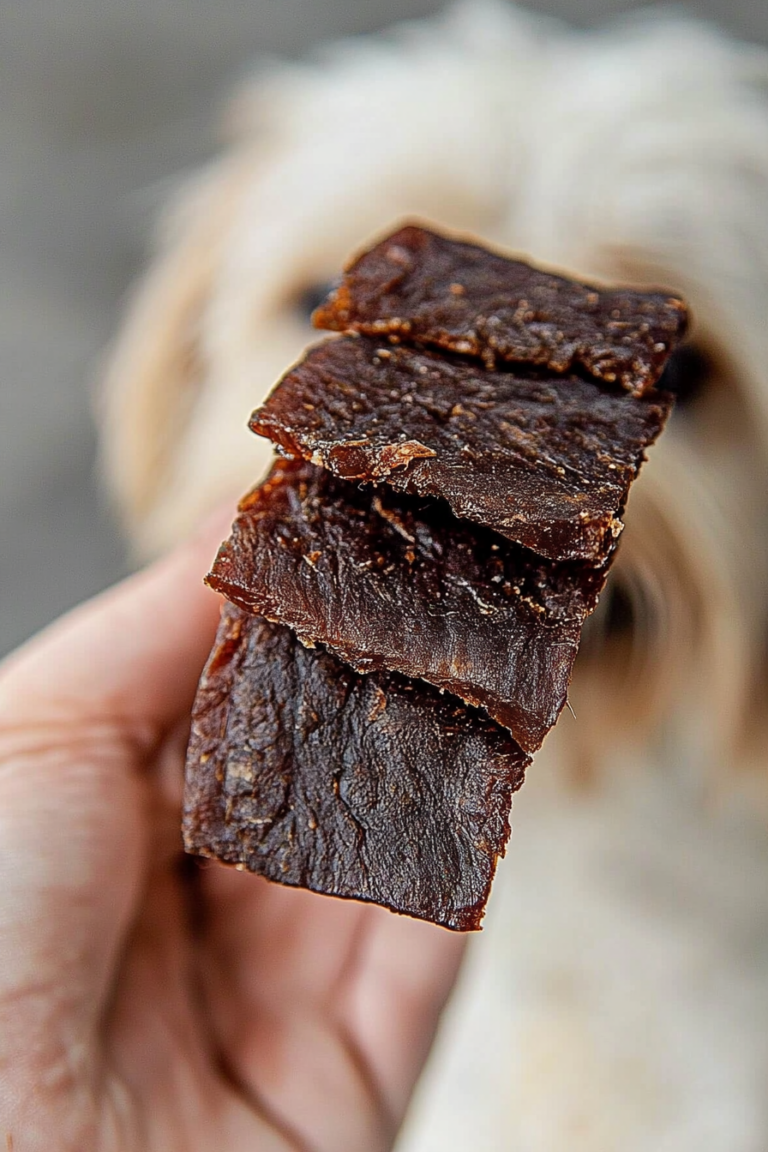
beef jerky for dogs
Ingredients
Method
- Preheat the oven to 200°F. Line a baking sheet with parchment paper and place a cooling rack over the parchment paper. Spray lightly with nonstick cooking spray.
- Lay out 2 pieces of wax paper that overlap about 2 inches on your work surface and place the ground beef in the center of the wax paper. (I suggest wearing a pair of disposable nitrile gloves when handling raw meat).
- Mix the water into the ground beef to ensure even moisture distribution before shaping.
- Shape the ground beef into a rectangle and place 2 more long pieces of wax paper that overlap on top of the ground beef.
- Use a rolling pin to roll the ground beef very thin. (Thin enough to cover the entire cooling rack).
- Use the pizza cutter to slice strips 2 inches wide x 5 inches long. Do not separate the treats.
- Place the sprayed cooling rack upside down on top of the ground beef.
- Use the edges of the wax paper to pick up ground beef and the cooling rack and flip over so that the ground beef is on top of the rack.
- Score a shallow diamond pattern on top of the ground beef.
- Bake for 4 hours. The treats should have a dark brown color and will feel dry and rigid when cooled.
- Allow the beef jerky to completely cool before storing. Break, or cut with kitchen scissors, the jerky into bite size pieces according to your dog's size and dietary needs.

This made me smile—those little treats always remind me of home too!
I totally get that—nothing beats the comforting scent of something baking! Dried meat treats probably bring out similar cozy vibes for dogs.
I totally agree—there’s something so comforting about that smell, just like baking brings back warm memories. My dog loves dried meat too!
I love this memory—it’s so heartwarming! Dried meat must remind you of home too, with its rich, savory scent.
This post brought back such sweet memories—I remember my grandpa’s house filling with the smell of homemade treats every weekend. So comforting!