
Speedy Sausage Cabbage Potato Skillet
There’s something about the soft, fragrant aroma of zucchini baking that instantly whisks me back to childhood summers at my grandma’s house. I remember wandering into her warm kitchen, where she’d be humming her favorite tune and a loaf of something sweet and green cooling on the counter. Over the years, I’ve perfected my own twist on that memory — a zucchini swirl cake that’s light but bursting with flavor. It’s honestly become my go-to when I want something comforting but don’t want to spend all afternoon fussing over complicated desserts. Plus, my kids ask for this all the time—forget cookies or candy; it’s this cake they crave at bedtime! Trust me on this one — it’s incredibly easy, super moist, and the swirl of cinnamon and sugar in every bite is like a warm hug in cake form. The best part? No fancy ingredients here—just good, honest pantry staples that come together in minutes. And I promise, once you make it, it’ll become a beloved staple in your kitchen, too.
What is Zucchini Swirl Cake?
Think of zucchini swirl cake as a cozy, homemade coffee cake with a hidden surprise inside. It’s essentially a tender, sweet cake—made with grated zucchini—that gets layered or marbled with a cinnamon-sugar mixture. The zucchini keeps the cake extra moist and adds a subtle veggie boost that folks maybe don’t even notice — but they’ll definitely love how it tastes. The name is pretty straightforward: ‘swirl’ because of those beautiful, cinnamon-infused ribbons running through every slice, reminiscent of classic coffee cakes but with a sneaky veggie twist. It’s the kind of dessert (or breakfast, let’s be honest) that feels indulgent but actually sneaks in some of those healthy veggies you’re trying to get your family to eat more of. Think of it as a win-win: delicious, a little nourishing, and totally cozy to enjoy with coffee or tea on a lazy Sunday morning.
Why you’ll love this recipe?
What I love most about this zucchini swirl cake is how versatile and forgiving it is—I’ve made it countless times, experimenting with different fillings, and each version turns out beautifully. The flavor combo of warm cinnamon, a hint of vanilla, and the gentle earthiness of zucchini just works. The smell alone when it’s baking is enough to draw the whole family into the kitchen—everyone gathers around, drooling, waiting for that first warm slice. It’s so simple to whip up that I almost feel guilty calling it a “special treat,” because honestly, it feels like I’m cheating. Plus, this cake is budget-friendly—you probably already have everything you need in your pantry. I’ve tested this with almond milk to make it even creamier, and honestly, it’s a game-changer. And, if you’re like me, you’ll appreciate how it can serve multiple roles: a cozy breakfast, a bread for brunch, or a sweet finish to dinner. My kids actually ask for seconds, which is pretty rare in my house, and they LOVE that swirl of cinnamon sweetness—honestly, it’s hard to resist myself.
How do I make Zucchini Swirl Cake?
Quick Overview
This cake comes together in just a few bowls and minutes—no fancy equipment needed. You start by grating your zucchini (don’t forget to squeeze out some excess moisture, or the batter can turn a bit too wet), then mix your dry ingredients separately. In another bowl, you’ll combine wet ingredients and fold everything together gently—being careful not to overmix. The cinnamon-sugar filling is simply sprinkled or swirled through the batter before baking. The real trick is in layering and swirling—trust me on this, the prettier, more marbled it looks, the more your friends will ooh and aah. Once baked to perfection, a quick glaze or dusting of powdered sugar is all you need to finish it off. This is honestly one of those recipes that feels so homey and satisfying—you’ll get compliments every time!
Ingredients
For the Main Batter:
• 2 cups all-purpose flour (or a 1:1 gluten-free substitute)
• 1 cup granulated sugar
• 1/2 teaspoon baking powder
• 1/2 teaspoon baking soda
• 1/2 teaspoon salt
• 1 teaspoon cinnamon (more if you love that cinnamon punch)
• 2 large eggs
• 1/2 cup vegetable oil or melted butter
• 1 teaspoon vanilla extract
• 1 cup grated zucchini (squeeze out some excess moisture)
For the Filling:
• 1/2 cup brown sugar
• 1 tablespoon ground cinnamon
• 2 tablespoons softened butter (or coconut oil for dairy-free)
• Optional: chopped nuts or chocolate chips for added flair
For the Glaze:
• 1/2 cup powdered sugar
• 1-2 teaspoons milk or lemon juice
• A tiny splash of vanilla (if desired)
Step-by-Step Instructions
Step 1: Preheat & Prep Pan
Set your oven to 350°F (175°C). Grease a 9-inch round or square baking pan—trust me, parchment paper makes removal so much easier—and get ready to pour magic into your oven. I always do this the night before, so I don’t forget. It really speeds things up when you’re impatient to taste that first warm slice!
Step 2: Mix Dry Ingredients
In a large bowl, whisk together the flour, sugar, baking powder, baking soda, salt, and cinnamon. This step is crucial because it ensures even distribution of the leavening agents, so the cake rises perfectly and has a consistent texture. I’ve learned the hard way that skipping this step can lead to uneven baking or pockets of flour — not fun!
Step 3: Mix Wet Ingredients
In a separate bowl, whisk eggs, oil, vanilla, and grated zucchini. The zucchini at this stage should be pretty dry—if it’s extra wet, give it a quick squeeze in a paper towel. This is a trick I picked up after a few failed moist cakes; it makes all the difference! When everything’s combined until just smooth, you’re ready for the next step.
Step 4: Combine
Gradually fold the wet mixture into the dry ingredients until just combined. Don’t overmix—this keeps the cake tender and fluffy. I used to go wild trying to get every streak of flour stirred in, but I learned that a gentle fold is the key to perfect texture. It’s okay if a few lumps remain—tiny is better than tough!
Step 5: Prepare Filling
Mix the brown sugar, cinnamon, and softened butter together to form a crumbly, cinnamon-sugar mixture. Feel free to add chopped nuts or chocolate chips here for a different vibe—my kids love when I sneak in mini chocolate bits! The warmth of the cinnamon fills your kitchen with the most inviting smell, so don’t rush this step.
Step 6: Layer & Swirl
Pour half the batter into your prepared pan. Sprinkle or dollop half of the cinnamon-sugar mixture over it. Add the remaining batter on top, then swirl gently with a butter knife or skewer. The goal is to create beautiful ribbons of cinnamon in the batter, making every slice a work of art. I’ve learned that swirling in different directions produces the most hypnotic marbling—trust your instincts!
Step 7: Bake
Pop it into your preheated oven and bake for about 45-50 minutes. You’ll know it’s done when the top is golden and a toothpick inserted in the center comes out clean, with just a few moist crumbs attached. I’ve tested baking at 350°F and 375°F — and honestly, 350 gives me a more even rise and a softer crumb. Keep an eye on it, especially towards the end, because every oven is a little different!
Step 8: Cool & Glaze
Let the cake cool in the pan for about 10 minutes—resist the urge to cut into it immediately unless you want it to fall apart! Then transfer it to a wire rack. When it’s just warm, drizzle with your simple powdered sugar glaze. If you’re in a hurry, dusting with powdered sugar works beautifully too. I personally love adding a splash of lemon juice to the glaze—it brightens everything!
Step 9: Slice & Serve
Use a sharp serrated knife to cut neat slices. Serve warm or at room temperature, with a cup of coffee or tea—perfect for an afternoon treat or a lazy weekend breakfast. My favorite way? Warm, with a pat of butter melting on top. And trust me, leftovers (if there are any) reheat beautifully in the microwave for a quick, comforting snack.
What to Serve It With
This cake is incredibly flexible—around here, it’s the star of every brunch table and a cozy after-dinner treat. For breakfast, I love pairing it with a strong cup of black coffee or a frothy latte. If I’m feeling fancy, I add some fresh berries or a dollop of whipped cream — that cinnamon swirl makes everything feel fancy and special. My family practically fights over the last slice at brunch, especially when I serve it alongside a fresh fruit salad or a glass of fresh orange juice.
As a dessert, it’s perfect on its own or with a scoop of vanilla ice cream. I’ve even sliced it into manageable squares and packed it into lunch boxes — because who doesn’t love a little sweet surprise tucked into their day? The cinnamon aroma alone makes the whole house smell like a warm hug, so I keep a batch handy for impromptu visits from friends or surprise guests. Basically, this cake is your new best friend for all occasions — cozy nights, lazy mornings, or quick gatherings.
Top Tips for Perfecting Your Zucchini Swirl Cake
After making this recipe so many times, I’ve learned a few tricks to make it even better:
- Zucchini Prep: Always squeeze out excess moisture after grating. Moisture can make your batter too runny, and nobody wants a soggy cake. I keep a clean kitchen towel or paper towels nearby, and I gently press out the liquid. It’s simple but makes all the difference for that perfect crumb.
- Mixing Advice: Overmixing the batter after adding wet and dry ingredients can make the cake dense. Fold gently until just combined—think of it as bringing everything together with a gentle hand, not a mixer-wrecking storm.
- Swirl Technique: Don’t be afraid to swirl generously—it creates those beautiful marbled patterns that everyone loves to admire before taking a bite. Use a skewer or a butter knife and zigzag through the batter to get that rustic, artistic look.
- Ingredient Swaps: Want to make it vegan? Swap eggs for applesauce or mashed bananas, and use plant-based butter or oil. For extra flavor, toss in a handful of chopped walnuts or mini chocolate chips. The possibilities are endless!
- Baking Tips: Keep an eye on your cake in the last 5 minutes—every oven bakes a little differently. A toothpick inserted in the center should come out with a few moist crumbs, not wet batter. That’s how you know it’s perfect!
- Glaze Variations: Feeling adventurous? Mix in a splash of bourbon or vanilla extract in your glaze. Or top with a cream cheese frosting for a decadent twist. The glaze adds just the right amount of sweetness and a glossy finish that makes every slice irresistible.
Over the years, I’ve experimented and made my share of mistakes—like overmixing or forgetting to squeeze out zucchini. But every slip-up taught me something new. The key is to stay relaxed, have fun, and trust your instincts. This cake is forgiving and adaptable, so don’t be afraid to make it your own.
Storing and Reheating Tips
To keep your zucchini swirl cake fresh, store it in an airtight container—at room temperature, it’s good for about 2 days. Just cover it loosely so it doesn’t dry out. For longer storage, pop it into the fridge—wrapped tightly, it stays moist and delicious for up to 5 days.
If you want to freeze it, wrap slices individually in plastic wrap, then store in a freezer bag for up to 3 months. When ready to eat, thaw in the fridge overnight or warm slices briefly in the microwave. I like to add a tiny drizzle of milk or a sprinkle of powdered sugar after reheating to revive the texture. The glaze or dusting is best added fresh—keeps it looking shiny and tempting.
Frequently Asked Questions
Final Thoughts
Honestly, this zucchini swirl cake has become one of my most cherished recipes. It’s simple, hearty, and adaptable—everything I want in a dessert that feels like a warm hug. I love how it’s a little unexpected, sneaking a veggie into something so indulgent, and yet, it’s secretly one of the most crowd-pleasing treats I make. Whether I’m serving it at a family brunch or enjoying it myself with a cup of coffee on a quiet morning, I always find comfort in that first slice. I hope you give it a try and find your own cozy moments with it. Remember, cooking should be fun — so don’t stress about perfect swirls or even batter color. Just enjoy the process and watch how your home fills with that irresistible cinnamon smell. Can’t wait to hear how yours turns out! Drop a comment or share your variations — I’d love to hear all about it. Happy baking!
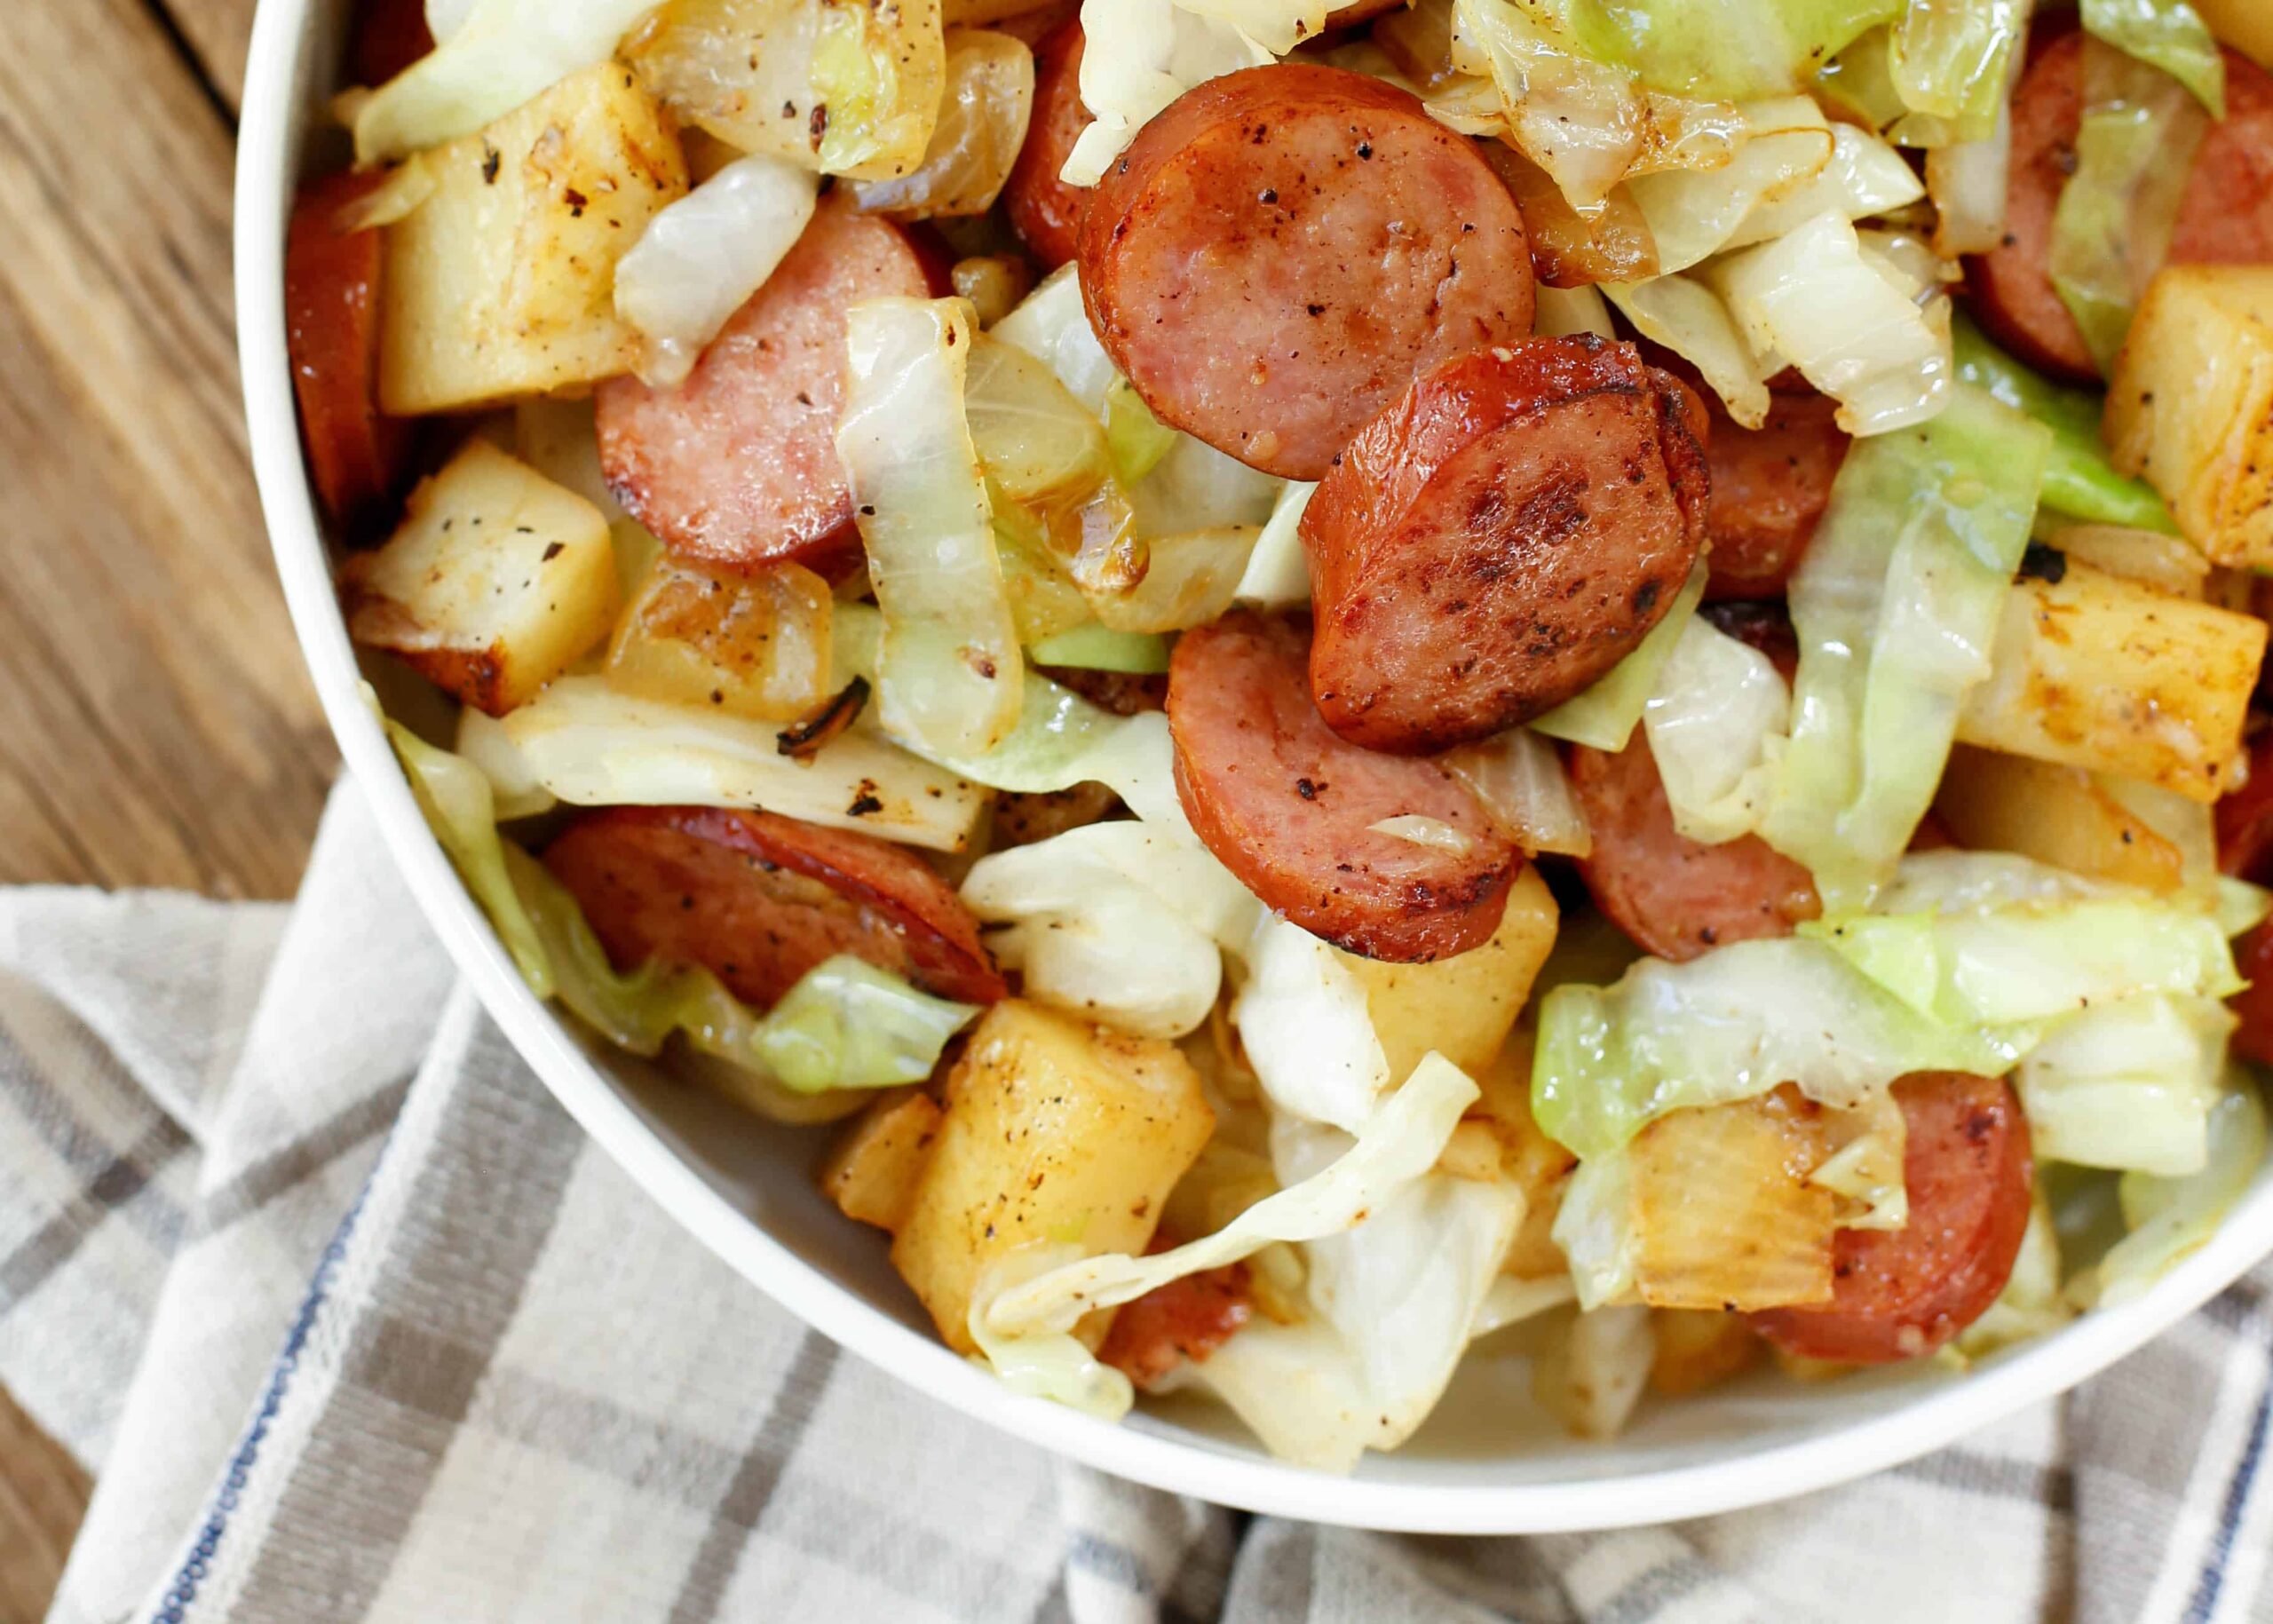
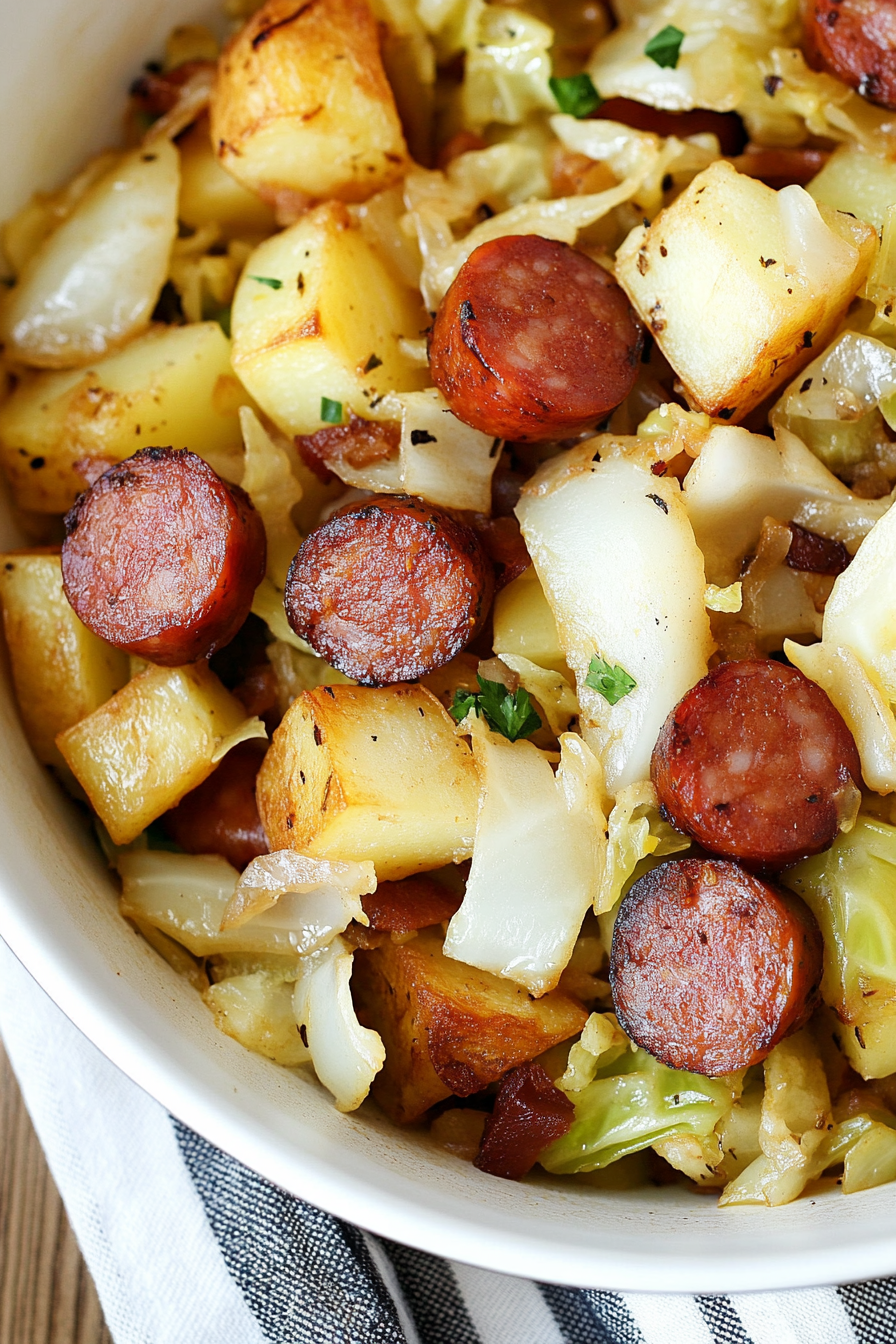
kielbasa cabbage potato skillet
Ingredients
Method
- Peel and chop the potatoes into 0.25-inch pieces. Place in a bowl, sprinkle with 0.25 teaspoon salt and 0.125 teaspoon black pepper, toss, and microwave for 4 minutes. Stir and microwave for an additional 2-4 minutes until fork tender.
- In a large skillet over medium-high heat, add 1 tablespoon oil. When shimmering, add chopped onions and sauté until lightly browned. Add minced garlic and sliced kielbasa; cook for 3 minutes, stirring.
- When potatoes are cooked, add them to the skillet. Toss to coat and cook for 2-3 minutes until lightly browned.
- Add sliced cabbage, sprinkle with 0.25 teaspoon salt and 0.25 teaspoon pepper. Toss to combine, add 2 tablespoons water, reduce heat to medium-low, cover, and cook for approximately 2 minutes until cabbage bright green and barely wilted. Taste and adjust salt if needed. Serve hot.


Love this recipe—it’s so comforting and brings back such sweet memories. The combination of flavors sounds perfect for a cozy dinner!
This reminds me of my grandma’s kitchen too—those simple, comforting meals always tasted the best. Thanks for the sweet memory!
That sounds so cozy! I love how food can bring back such sweet memories.
That recipe brought back such sweet memories too—grandma’s kitchen always smelled like home.
This reminds me of my grandma’s kitchen too—those comforting, hearty meals always made everything feel better. Thanks for the sweet memory!