

Zesty Chicken Slow Cooker Recipe
There’s something about baking that feels like a warm hug, isn’t there? I remember the first time I made this zucchini chocolate swirl cake—It was a rainy Sunday afternoon, and I was craving something sweet but didn’t want to turn on the oven for a full-blown dessert. That’s when I decided to experiment with zucchini—yes, zucchini!—and, honestly, it turned out even better than I expected. The subtle moisture that zucchini adds keeps this cake ridiculously tender, and the swirl of chocolate makes every bite feel like a celebration. Plus, my kids ask for this all the time; it’s become a family favorite. This one’s a lifesaver on busy nights when I want something homemade but don’t have hours to fuss. The smell alone—the rich cacao and fresh zucchini—fills the whole kitchen and just makes everyone come running. I always do this when I want something cozy but still a little indulgent. Trust me, once you try this, it’s going to be your go-to “healthy-ish” treat that tastes like a million bucks! Okay, enough teasing—let’s get into the good stuff.
What is Zucchini Chocolate Swirl Cake?
This zucchini chocolate swirl cake is like a little secret weapon in my baking arsenal. Think of it as a classic loaf, but with a sneaky punch of added veggies that adults and kids alike will never notice—well, unless you tell them, of course! It’s essentially a moist, dense cake with a beautiful ripple of rich chocolate running through the center. The name says it all: zucchini, which keeps it super moist, and swirl, which gives it that stunning marbled effect. The origins are a bit fuzzy—probably a clever way to sneak in some greens without anyone noticing—but I like to think of it as a cozy twist on those traditional chocolate loaf cakes we all grew up with. It’s perfect for breakfast, brunch, or a lovely afternoon treat. Think of it as a balanced indulgence—crave-worthy but still packed with nutrients, thanks to that sneaky zucchini.
Why you’ll love this recipe?
What I love most about this zucchini chocolate swirl cake is how effortlessly cozy it makes my house smell. The sweet, earthy aroma of zucchini paired with rich cocoa is honestly one of my favorite sensory experiences. And the best part? It’s ridiculously simple to put together. I’ve tested this countless times, and I swear, I’ve never had a soggy or fail-y loaf. It’s budget-friendly, too—the ingredients are staples most of us already have lying around. Plus, you can switch things up—try swapping out the chocolate for chunks of white chocolate or add a handful of chopped walnuts for extra crunch. This cake is such a versatile canvas. I’ve made it for family brunches, as an I-need-something-sweet-now treat, and even as a gift. It’s especially great because you can make it ahead and the flavor just deepens overnight. Trust me on this one—once you make it, you’ll see why it’s become a staple around here.
How do I make Zucchini Chocolate Swirl Cake?
Quick Overview
This cake comes together in just a few simple steps. First, you grate the zucchini and squeeze out some moisture—don’t skip this, or you might get a too-wet crumb. Then, mix your dry ingredients in one bowl, and your wet ingredients in another. Combine everything carefully, then pour half the batter into your loaf pan. Swirl in the chocolate (or your favorite meltable chocolate mixture), add the remaining batter on top, and swirl again for a pretty marbled effect. Bake until a toothpick comes out clean, cool, then glaze or dust with powdered sugar. It’s honestly a foolproof process that’s more about enjoying the aroma and the process than stressing over perfection. Plus, the entire thing takes about an hour, so it’s perfect for a spontaneous bake that really wows.
Ingredients
For the Main Batter:
– 2 cups all-purpose flour (or a gluten-free blend if you prefer)
– 1 teaspoon baking soda
– ½ teaspoon baking powder
– ½ teaspoon salt
– ½ cup unsweetened cocoa powder (trust me, the good stuff makes all the difference)
– ¾ cup granulated sugar
– ½ cup packed brown sugar
– ½ cup vegetable or neutral oil (I’ve tested with almond oil too—delicious!)
– 3 large eggs
– 1 teaspoon vanilla extract
– 1 ½ cups grated zucchini (squeezed dry—this keeps the cake moist but not soggy)
For the Filling:
– ½ cup chopped dark chocolate or chocolate chips (pick a nice quality one for that melt-in-your-mouth feel)
– Optional: a sprinkle of sea salt or a dash of cinnamon for a flavor boost
For the Glaze:
– ½ cup powdered sugar
– 1-2 tablespoons milk or cream
– A splash of vanilla or a pinch of cinnamon if you want extra flavor
– Optional: a drizzle of melted chocolate for extra decadence
Step-by-Step Instructions
Step 1: Preheat & Prep Pan
Set your oven to 350°F (175°C). Grease a standard loaf pan with butter or non-stick spray, and line it with parchment if you’re feeling fancy. I always do this—makes removing the cake so much easier and keeps it looking perfect for slicing. Also, make sure your zucchini is grated fresh; I do this right before mixing because pre-grated zucchini can get a little watery if left too long.
Step 2: Mix Dry Ingredients
In a big bowl, whisk together the flour, baking soda, baking powder, salt, cocoa powder, and sugars. I always sift the cocoa first—trust me, it keeps the batter smooth and avoids lumps. This part feels like magic—powdery, chocolatey goodness all coming together seamlessly.
Step 3: Mix Wet Ingredients
In a separate bowl, beat the eggs, then stir in the vanilla, oil, and zucchini. I’ve tested with almond milk instead of oil—made it a bit lighter and still super moist, so feel free to experiment! Combine until smooth. The batter will look a little thick but that’s perfect.
Step 4: Combine
Add the wet ingredients to the dry. Stir gently—don’t overmix! Overmixing can make the cake dense and tough. Just fold until everything looks combined, with no streaks of flour. The batter will be thick, and that’s exactly what you want.
Step 5: Prepare Filling
Chop your chocolate or chocolate chips into small pieces. If you like, toss a little sea salt or cinnamon with the chocolate for a flavor surprise. Setting this aside, we’ll add it in a minute.
Step 6: Layer & Swirl
Pour half of the batter into your prepared loaf pan. Spread evenly, then sprinkle or dollop the chocolate pieces over the top. Cover with the remaining batter, then use a knife or skewer to swirl through the layers. That marbled look is what makes this cake so pretty—and delightful to eat.
Step 7: Bake
Pop it into the oven and bake for about 50-55 minutes. Check for doneness with a toothpick—insert in the center, and if it comes out clean, you’re good. My oven sometimes runs a little hot, so I start checking at 50 minutes. Let it cool in the pan for about 10 minutes, then transfer to a wire rack to cool completely. Trust me, racing to slice it while it’s still warm is tempting, but waiting until it’s cooled makes the slices look so much prettier.
Step 8: Cool & Glaze
If you’re glazing, whisk together powdered sugar with a splash of milk and vanilla. Drizzle over the cooled cake and let it set for a few minutes. You can also dust it lightly with cocoa or powdered sugar for a simple, elegant finish. I’ve even melted some extra chocolate and drizzled that on top—absolutely divine.
Step 9: Slice & Serve
Use a sharp serrated knife to cut into beautiful slices. This cake tastes even better the next day once the flavors meld. I like to serve it with a cup of hot coffee or a glass of cold milk—weekend perfection! And if you’ve made a little extra, it keeps well wrapped in plastic for a couple of days, or freezes beautifully for those busy mornings when you need a quick snack or breakfast.
What to Serve It With
This cake is incredibly versatile. For breakfast, I love pairing it with a dollop of Greek yogurt and a drizzle of honey—it feels like a treat but still keeps me energized. At brunch, serving slices alongside fresh berries and a splash of cream makes it look so elegant. As a dessert, warm slices with a scoop of vanilla ice cream or a dusting of powdered sugar are pure heaven. My kids especially love this with a glass of cold milk or even a tiny bit of whipped cream on top. It’s such a cozy, family-friendly dessert that brings everyone around the table.
Top Tips for Perfecting Your Zucchini Chocolate Swirl Cake
This cake is forgiving, but a few insider tips can make it even better:
- Zucchini Prep: Squeeze out as much moisture as possible—super important! Grate, then press between paper towels or a clean dish towel. Moisture is the enemy of fluffy cake. You want the zucchini to be just moist enough to whisk into the batter without adding water.
- Mixing Advice: Overmixing is my biggest mistake—causes dense, gummy textures. Fold gently and only until combined.
- Swirl Customization: Use a skewer or a butter knife to make gentle swirling motions; avoid over-aggressive stirring, which can blend everything into one boring color. Aim for beautiful streaks.
- Ingredient Swaps: Tried coconut sugar? Works great! Or swapped half the flour with almond meal for more nuttiness. Just keep the batter moist and adjust baking time slightly.
- Baking Tips: Center rack is best. Keep an eye on the cake starting around 50 minutes—ovens vary, and you don’t want it overbaked. Use a toothpick for testing—little bits of moist crumbs are OK, wet batter means more time needed.
- Glaze Variations: Lemon glaze, caramel drizzle, or even a sprinkle of sea salt flakes on top turn this into a showstopper. Play around and find what makes your heart happy.
Over the years, I’ve learned to tweak baking times based on the moisture of my zucchini and my oven’s quirks. This cake is pretty forgiving, but don’t skip draining the zucchini—that step saves you from sad, dense slices. Also, a quick tip I’ve picked up: if the top browns too fast, tent with foil for the remaining bake. It prevents burning and keeps the inside moist. The more I make it, the more I tweak it, and honestly, every batch feels like a little personal masterpiece. Just remember: the best results come from patience, gentle mixing, and loving every step.
Storing and Reheating Tips
This cake keeps beautifully at room temperature, covered lightly with foil or plastic wrap, for up to 2 days. After that, I pop it into an airtight container and stash it in the fridge—it’s perfect for breakfast or afternoon snacking. Reheating slices in the microwave for about 15-20 seconds revives the moistness, and if you like a gooey chocolate touch, a quick minute in the microwave with some extra melted chocolate on top works magic. For longer storage, wrap individual slices tightly in plastic wrap and freeze for up to a month. Thaw at room temperature or gently warm in the microwave. Just an important note: add the glaze after re-heating for the best presentation. It might lose a tiny bit of shine in storage, but it still tastes divine, I promise.
Frequently Asked Questions
Final Thoughts
This zucchini chocolate swirl cake is one of those recipes that hits all the right notes: surprisingly healthy-ish, incredibly comforting, and downright delicious. Every time I bake it, I’m reminded that good food doesn’t have to be complicated or overly indulgent to be satisfying. It’s become our little weekend treat, my sneaky way of sneaking veggies into dessert, and a guaranteed crowd-pleaser. I love how the chocolate marbling looks almost too pretty to cut but tastes even better when you do. If you give it a try, I’d love to hear how it turns out—add your twists, share your photos, and most of all, have fun experimenting. Happy baking, friends! And remember, the best kitchen adventures come from just diving in and enjoying every moment of it. Can’t wait to hear how yours turns out!
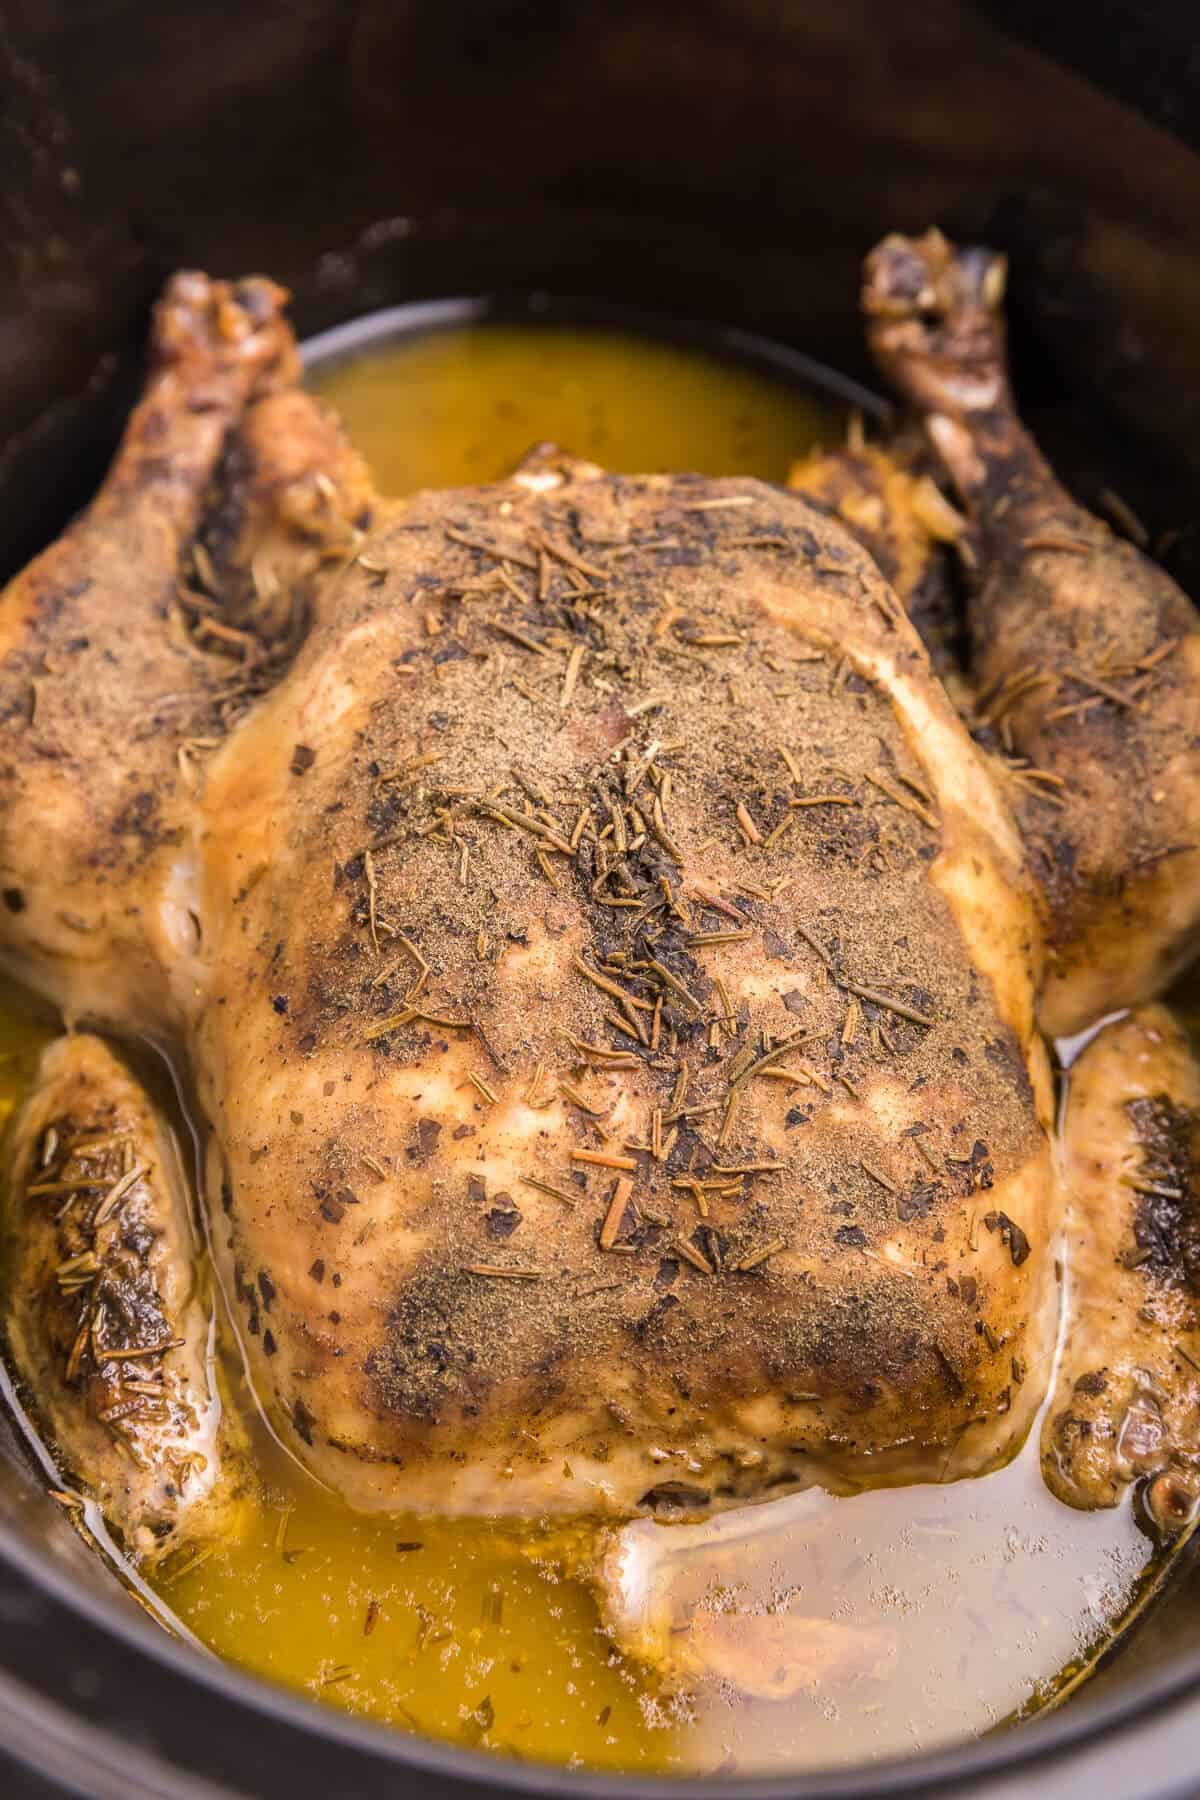
slow cooker chicken
Ingredients
Method
- Loosen the skin of the chicken with your clean fingers by sliding it under the skin. Place the pieces of butter under the skin.
- Place your whole chicken in your slow cooker. Squeeze lemon juice all over the chicken and then put the lemons inside the chicken’s cavity.
- In a small bowl, mix together the spices. Sprinkle the spices all over the chicken.
- Cover and cook on low heat for 8 hours. Use a meat thermometer to test when chicken has reached the proper temperature.
- Remove the lemons from inside the cavity and serve hot.


This sounds amazing! I love how comforting slow-cooker meals can be—perfect for a cozy evening at home.
That sounds cozy! I love how slow cooker meals bring comfort, especially on rainy days.
I love slow cooker recipes—they’re perfect for busy days! This one sounds delicious; I’ll definitely try it this weekend.
I love how this slow cooker recipe brings warmth and flavor—perfect for cozy days!
I love how this recipe combines comfort and flavor—it’s perfect for those cozy slow cooker nights!