
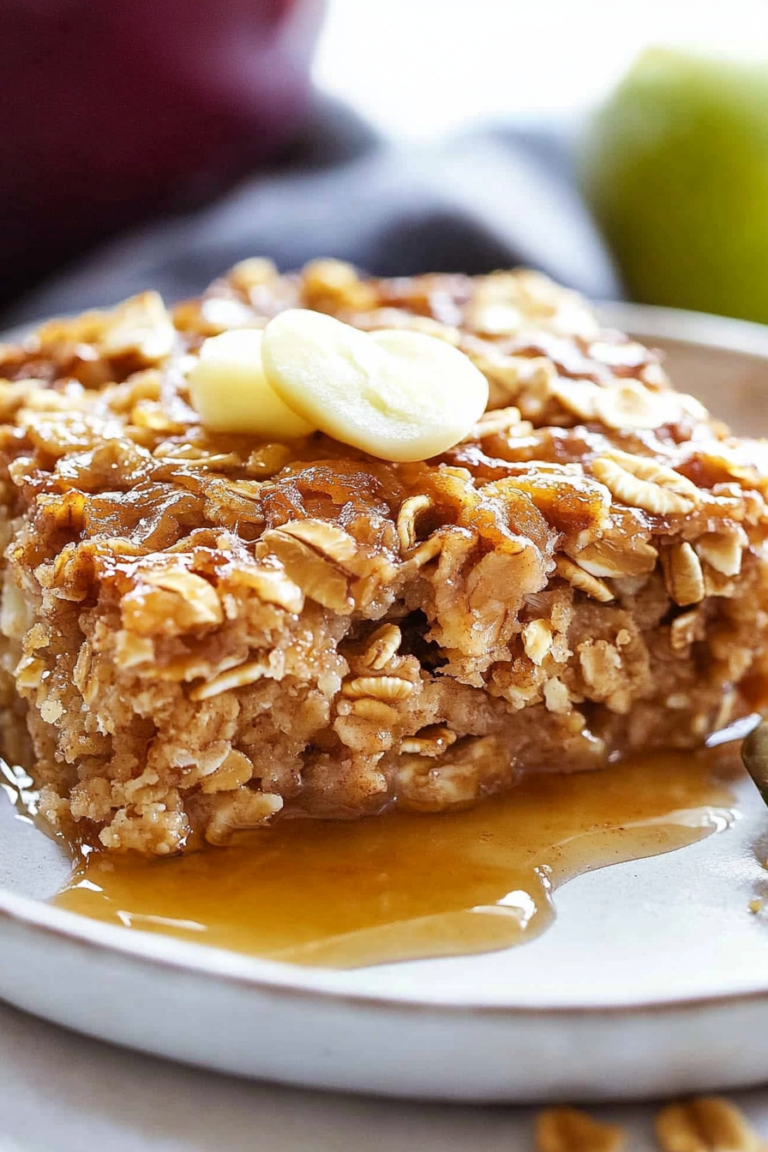
Autumn Spiced Coffee Cake How to Bake
There’s something about the smell of a freshly baked loaf that instantly makes a house feel warmer, cozier — like a hug in bread form. I’ve got a soft spot for this zucchini swirl loaf — it’s honestly one of my most-loved family recipes. I always do this when I’ve got a handful of zucchinis hanging out in the fridge and a craving for something sweet but wholesome. And let me tell you, this one’s a lifesaver on busy nights when I don’t want to fuss over complicated dessert or snack options. It’s light, moist, with just enough sweetness, and that beautiful swirl of cinnamon and zucchinis makes every bite feel special. My kids ask for this all the time, especially when I hide a little extra zucchini in the batter — they’re none the wiser, and they devour it! Plus, it’s so easy to whip up; I promise, it’s made in no time. It’s like a warm hug for anyone who’s lucky enough to taste it. Trust me on this, once you try it, it’ll become a go-to comfort treat in your kitchen too.
What is Zucchini Swirl Loaf?
This zucchini swirl loaf is essentially a soft, tender bread with a delightful cinnamon-spiced zucchini mixture swirling through it. Think of it as a cozy cross between a quick bread and a coffee cake — moist and flavorful, yet light enough to enjoy any time of day. The “swirl” part is what makes it so pretty and fun; I love watching the batter turn into a marbled masterpiece just before it goes into the oven. The name might sound fancy, but it’s really just a celebration of sneaking some nutritious veggies into a treat that’s totally satisfying without feeling heavy. The zucchini adds moisture and a subtle flavor that compliments the cinnamon and vanilla. It’s perfect for breakfast, brunch, or a snack, and I honestly think it tastes even better warmed up with a pat of butter.
Why you’ll love this recipe?
What I love most about this zucchini swirl loaf is how versatile and forgiving it is. Whether you’re an experienced baker or just starting out, you’ll find it straightforward to make. The ingredients are staples in my pantry — no fancy stuff, just everyday items that come together to create magic. Plus, the zucchini keeps the bread incredibly moist, so you don’t need to worry about it turning dry or dense. This loaf is also budget-friendly. I often buy zucchinis in bulk or when they’re on sale, and they’re such a sneaky way to add some veggies into a sweet treat. And speaking of flavor, the cinnamon and vanilla give it a warm, cozy aroma that fills the house when it bakes. My family loves that first slice, still warm from the oven, topped with a drizzle of honey or a smear of cream cheese. It’s wonderful just as it is — simple, comforting, and downright delicious.
How do you make Zucchini Swirl Loaf?
Quick Overview
This zucchini swirl loaf starts with a simple batter made from flour, sugar, eggs, and a few flavorful spices. While the batter is coming together, you prepare the zucchini mixture — grate the zucchini, then mix it with cinnamon, sugar, and a touch of vanilla. Swirling it into the batter creates a marble effect that’s as pretty as it is tasty. A few gentle folds, a quick bake, and you’re rewarded with a fragrant loaf that’s perfect for slicing and snacking. The best part? It’s all fuss-free, and I’ve tested it countless times, tweaking the ingredients until it’s just right. The smell alone will draw everyone into the kitchen!
Ingredients
For the Main Batter:
- 1 ½ cups all-purpose flour (I like unbleached for a richer flavor)
- 1 teaspoon baking powder
- ½ teaspoon baking soda
- ¼ teaspoon salt
- 1 teaspoon ground cinnamon
- ½ cup granulated sugar
- ¼ cup brown sugar (adds a touch of molasses-y richness)
- ½ cup vegetable oil or melted coconut oil (I sometimes do half and half for extra flavor)
- 2 large eggs, at room temperature
- 1 teaspoon vanilla extract
- ¾ cup buttermilk or regular milk + a splash of vinegar (to mimic buttermilk; I tested with almond milk and loved it)
For the Filling:
- 1 small zucchini, grated (about ¾ cup)
- 2 tablespoons brown sugar
- 1 teaspoon ground cinnamon
- ½ teaspoon vanilla extract
For the Glaze:
- ½ cup powdered sugar
- 1 tablespoon milk or cream
- Optional: a dash of vanilla or lemon zest for flavor variation
Step-by-Step Instructions
Step 1: Preheat & Prep Pan
Set your oven to 350°F (175°C) and grease a standard loaf pan with butter or non-stick spray. I like to line mine with parchment paper — makes removing the loaf a breeze and keeps it looking perfect. While the oven heats, grate your zucchini and set it aside. Squeeze out any excess moisture with a clean towel — this step is key to preventing a soggy bread. Trust me, I learned the hard way that too much moisture makes the batter tricky to work with and can result in a dense loaf.
Step 2: Mix Dry Ingredients
In a large bowl, whisk together the flour, baking powder, baking soda, salt, and cinnamon. This ensures an even distribution of leavening and spice, so your bread rises beautifully and smells amazing. I always do this before adding the wet ingredients — it’s my little secret to perfect texture every time.
Step 3: Mix Wet Ingredients
In another bowl, beat the eggs with the sugars until light and fluffy. I usually do about 2 minutes with a whisk or a hand mixer. Add the oil, vanilla, and buttermilk. Mix until smooth — the batter will look a little thin, but that’s totally fine. I tested with almond milk and it’s just as good, if not creamier, so feel free to get creative with plant-based options.
Step 4: Combine
Pour the wet mixture into the dry ingredients, then gently fold together with a spatula — no overmixing! Overworking the batter can make the loaf dense. Stop when just combined; a few lumps are perfectly okay. That’s when the magic happens — the batter will be luxuriously smooth and ready for the zucchini.
Step 5: Prepare Filling
In a small bowl, toss the grated zucchini with brown sugar, cinnamon, and vanilla. It should resemble a chunky, cinnamon-sugar spread. Taste it — it’s delicious just like this! If you want more flavor, sprinkle in a pinch more cinnamon or even a dash of nutmeg. My kids actually ask for extra zucchini filling — they think it’s dessert!
Step 6: Layer & Swirl
Pour about half of the batter into your prepared pan. Spread evenly, then dollop spoonfuls of the zucchini mixture over the batter. Add the rest of the batter, and finally spoon in the remaining zucchini. Using a skewer or a butter knife, swirl gently through the batter to create a marbled pattern. Don’t overdo it — just enough to see lovely streaks of zucchini and cinnamon peeking through. This step is so satisfying to watch as the batter turns into a beautiful swirl.
Step 7: Bake
Bake for 45-50 minutes, or until a toothpick inserted in the center comes out clean. I usually set a timer at 45, then do a quick check — sometimes, my oven runs hot or cold, so I adjust accordingly. Keep an eye out for a deep golden-brown crust and a fragrant aroma that fills the whole house. If the top gets too dark but it’s still not done in the middle, loosely cover with foil for the last 10 minutes.
Step 8: Cool & Glaze
Allow the loaf to cool in the pan for about 10 minutes, then transfer to a wire rack. This resting time helps the crumb set up. Meanwhile, mix your powdered sugar and milk for the glaze — if it’s too thick, add a little more milk; if it’s too runny, dust in a tad more powdered sugar. Once the loaf is mostly cooled, drizzle the glaze over hot or warm slices. The glaze adds a sweet, shiny finish that makes it extra special.
Step 9: Slice & Serve
Use a serrated bread knife and slice with a gentle sawing motion. It’s perfect served warm with butter or a smear of cream cheese. I love it slightly warm, paired with a cup of coffee or tea. It’s also fantastic at room temperature, and leftovers keep well in an airtight container for a couple of days. Trust me, this disappears in minutes at my house — everyone always asks for seconds!
What to Serve It With
This loaf is so adaptable, I’ve served it in countless ways. For breakfast, a slice or two with a hot mug of coffee feels just right — the warm cinnamon smell is irresistible in the morning. My family loves it for brunch too, especially topped with a dollop of yogurt or fresh berries for a zing of freshness. And, of course, it doubles as a cozy snack — I often slice it thick and pack it in lunchboxes for an extra special treat. When company comes over, I like to serve it on a pretty platter with chopped nuts, a drizzle of honey, or even a dusting of powdered sugar for a more elegant look. It’s a crowd-pleaser, no matter the occasion. Plus, it’s so easy to make extra, freeze some, and just pull out slices when that sweet craving hits. That’s my kind of baking — simple, satisfying, and a little bit special.
Top Tips for Perfecting Your Zucchini Swirl Loaf
I’ve made this recipe so many times that I’ve picked up a few tricks to make it even better:
- Zucchini Prep: Always squeeze out as much moisture as you can — it’s the key to preventing a soggy loaf. I do this by pressing grated zucchini in a clean tea towel or paper towels. Plus, using fresh zucchinis gives the best flavor; older ones tend to be watery.
- Mixing Advice: Overmixing is my biggest mistake in baking — it can make the batter tough. I gently fold until just combined, and that’s when the loaf stays light and fluffy.
- Swirl Patterns: Don’t over-swirl — just enough to get a pretty marbled effect. Think gentle ripples, not a full tornado. It’s all about that beautiful visual contrast and making every slice look like a work of art.
- Ingredient Substitutions: I’ve tried swapping applesauce for some of the oil or honey instead of sugar, and it works beautifully. The texture stays moist, and the flavor becomes even more nuanced. Just keep the total volume about the same so the batter isn’t too runny or too thick.
- Baking Tips: Ovens vary, so start checking around the 45-minute mark. My oven runs hot, so I always turn the temperature down slightly if it’s browning too fast. A toothpick test is your best friend — no soggy crumbs, and it’s done!
- Glaze Variations: Feel free to mix things up — add lemon zest for zing, or a splash of vanilla extract. You can also sprinkle chopped nuts or coconut flakes on top before baking for extra texture and flavor.
This is one of those recipes that gets better every time I make it. I’ve learned not to rush the cooling — patience makes all the difference for that perfect, tender crumb. And honestly, the more I experiment, the more I realize how forgiving and flexible this loaf is. It’s a real keeper — simple enough for weeknights, sophisticated enough to serve at brunch, and so darn tasty that I always wish I’d doubled the recipe.
Storing and Reheating Tips
To keep that fluffy, moist goodness intact, here’s what I do:
- Room Temperature: Keep slices in an airtight container or wrapped in foil for up to 2 days. Make sure it’s cooled completely before wrapping to prevent condensation.
- Refrigerator Storage: Wrap tightly or store in an airtight container for up to 5 days. I find that a quick microwave reheating (about 15-20 seconds) restores warmth and softness.
- Freezer: Wrap slices individually in plastic wrap, then place in a freezer-safe bag. It keeps well for up to 3 months. To reheat, thaw at room temp or warm in the microwave. The bread stays just as delicious.
- Glaze Timing: If you want the glaze to stay shiny and fresh, add it when the loaf has cooled completely. If freezing, skip the glaze until ready to serve, then drizzle fresh for that beautiful finish.
For me, the key is not to overthink storage — this loaf is resilient and forgiving, making it perfect for batch baking and enjoying over several days or even sharing with friends. Trust me, the taste and texture hold up beautifully.
Frequently Asked Questions
Final Thoughts
This zucchini swirl loaf is honestly one of those recipes I keep coming back to — it checks all the boxes: flavor, simplicity, and a touch of homemade charm. It’s the type of treat that feels like a warm hug, whether you’re enjoying it with coffee in the morning, sharing it at a brunch table, or simply sneaking a slice after a busy day. Because it’s so forgiving and adaptable, I encourage you to sprinkle in your own twists — maybe some chopped nuts, coconut flakes, or even a handful of blueberries. It’s all about adding that personal touch that makes the recipe yours. If you try it at home, I can’t wait to hear how it turns out — and don’t forget to leave a comment or share a photo! Happy baking, friend — may your kitchen be filled with the comforting aroma of this delicious bread every time you make it.
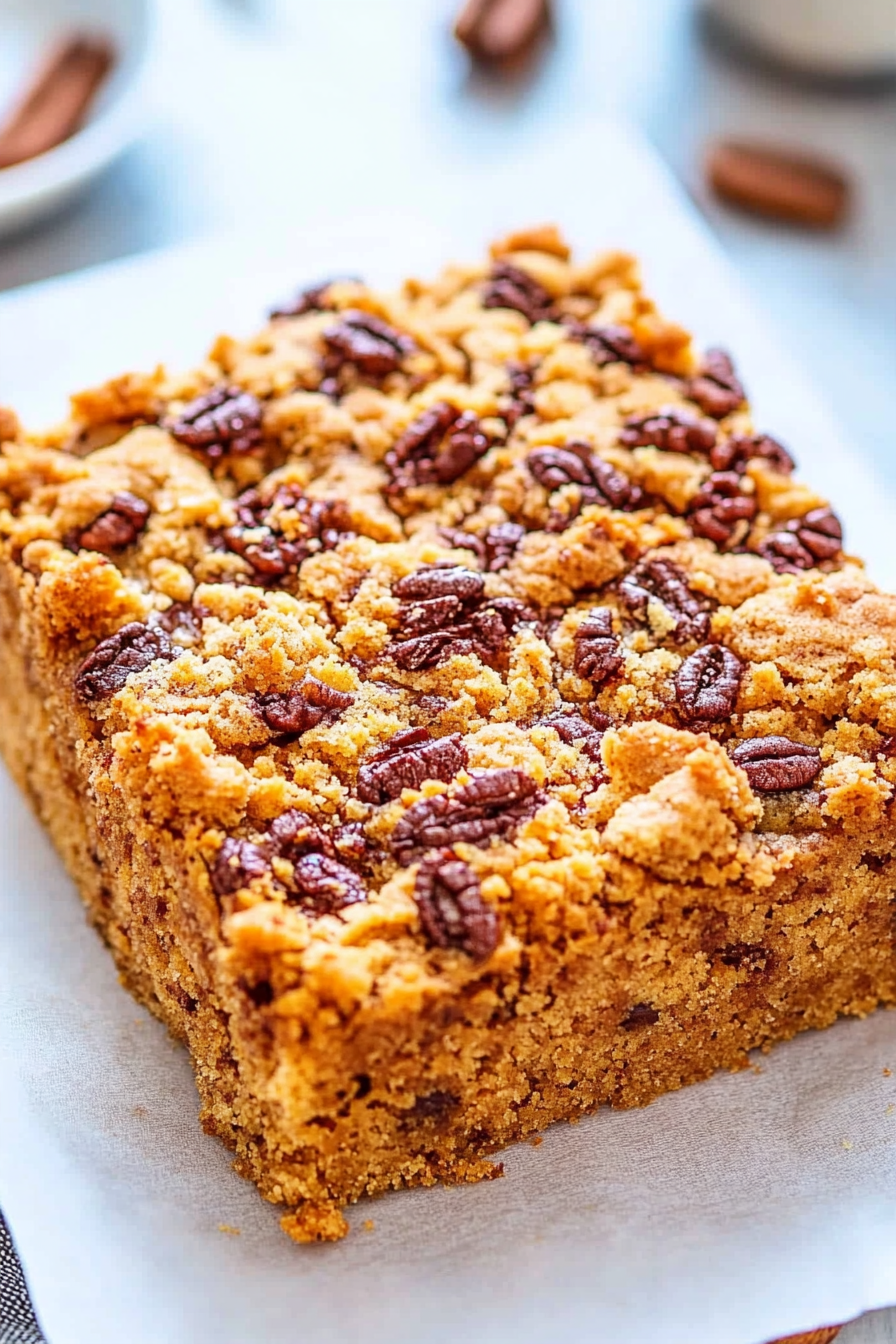
pumpkin coffee cake
Ingredients
Method
- Preheat oven to 350°F. Line an 8x8-inch pan with aluminum foil for easier cleanup and spray with cooking spray; set aside.
- In a large bowl, add eggs, sugar, pumpkin, oil, pumpkin pie spice, vanilla, and whisk until combined.
- Add flour, baking powder, baking soda, salt, and stir until just combined; do not overmix.
- Pour batter into the prepared pan, smoothing the surface with a spatula; set aside.
- To prepare the crumb topping, in a medium bowl, combine flour, sugars, salt, and stir with a fork.
- Drizzle melted butter over the dry ingredients and mix with a fork until small pebbles form.
- Stir in chopped pecans until evenly distributed.
- Sprinkle the crumb topping evenly over the batter.
- Bake for 50 minutes or until a toothpick inserted into the center comes out clean.
- Let cool on a wire rack before serving. Store in an airtight container for up to 5 days.


I totally agree—that first bite of warm spiced cake with a cup of coffee is pure autumn magic. So comforting!
This sounds absolutely comforting—I’m already craving a slice with my morning coffee! Thanks for sharing the cozy vibes.
I love how comforting the smell of baking bread is! This coffee cake recipe sounds perfect for fall mornings.
I love the cozy vibes of this recipe! That warm, spiced aroma is just the best—definitely making it this weekend. 🍂☕
I totally agree—there’s nothing like the cozy aroma of spiced coffee cake filling your kitchen! It really does make the whole house feel like home.