
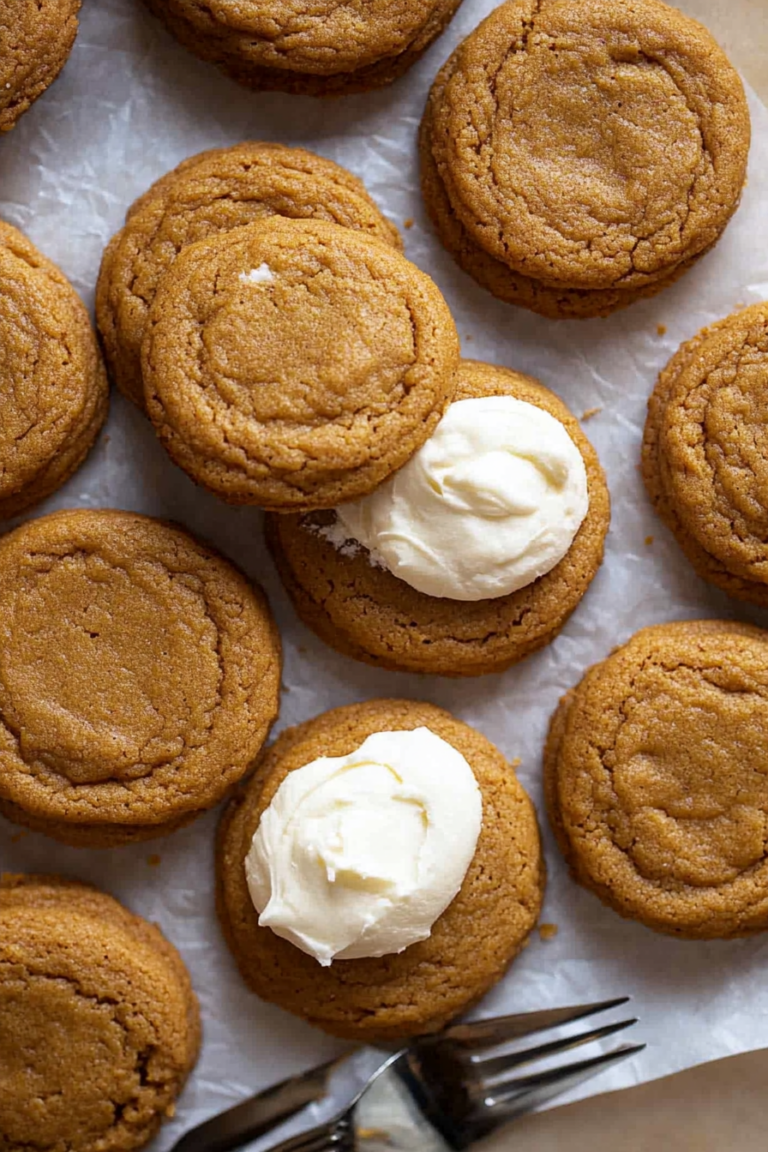
Easy Cookie Dough Cheesecake Delight
There’s something about baking that instantly transports me back to lazy summer afternoons on my grandma’s porch, the smell of fresh baked goods mingling with blooming flowers. This vanilla zucchini swirl cake is a recipe I’ve perfected over years — a sweet, moist treat that feels like a warm hug in every bite. It’s the kind of cake my family asks for when I want to surprise them, yet it’s so simple that I can toss it together on a busy weeknight. Honestly, I always do this when I need something comforting but don’t want to spend hours in the kitchen. Plus, it’s secretly healthy with shredded zucchini sneaked in — sneaky but brilliant, right? Whether you’re celebrating a birthday, craving a cozy afternoon tea, or just want a little slice of something special, this cake is a game-changer. And trust me, once you’ve tried it, it’ll become a staple in your dessert rotation, just like it has in mine.
What is a vanilla zucchini swirl cake?
This vanilla zucchini swirl cake is a soft, tender loaf with an irresistible marbled pattern of vanilla and zucchini that makes every slice visually stunning. Think of it as a cross between a quick bread and a delicate cake—think moist, slightly dense but airy, with a flavor that’s subtly sweet and beautifully vanilla-forward. The zucchini not only adds moisture but also a gentle hint of earthiness that balances the sweetness perfectly. The swirl happens when you layer the batter and gently create those beautiful marble effects—kind of like a little edible art. The name might sound fancy, but I promise it’s about as straightforward as baking gets. It’s essentially your everyday cake with a sneaky veggie punch, making it excellent for breakfast, brunch, or just because you deserve a treat that’s a little nourishing too.
Why you’ll love this recipe?
What I love most about this vanilla zucchini swirl cake is how it combines comfort with a hidden health boost. The flavor? Oh, it’s just perfect—subtle vanilla with that earthy undertone from the zucchini, all topped with a glossy glaze that’s downright addictive. This cake is incredibly forgiving; I’ve tested it with different kinds of milk—almond, coconut, and even oat—and it always comes out soft and flavorful. Plus, it’s budget-friendly: you probably already have most ingredients sitting in your pantry and fridge. The best part? It’s versatile. I’ve added a sprinkle of cinnamon, a splash of lemon zest, or even chocolate chips if I’m feeling decadent. My kids love it, my friends ask for the recipe, and honestly, I’ve made it a dozen times — and it never fails to impress. This one’s a lifesaver on busy nights when I want a homemade dessert that’s simple but nostalgic, and honestly, I feel good serving it because of the sneaky veggies. Plus, it disappears in minutes at my house!
How do I make a vanilla zucchini swirl cake?
Quick Overview
This cake comes together quickly — no fancy equipment needed. You start by shredding zucchini and mixing your dry ingredients. Then, whisk together wet ingredients until silky smooth. The fun part is layering the batter with the zucchini filling and swirling it into a beautiful marble pattern. Bake until golden, cool, and finish with a sweet, glossy glaze. It’s honestly a showstopper but so easy you’ll wonder why you didn’t do it sooner. Plus, I love that you can customize the swirl — add a hint of lemon or even cardamom for extra flavor. The smell alone during baking? Insanely good. Once cooled, it’s perfect for slicing and serving with a cup of coffee or tea. This cake’s got the right balance of homemade comfort and visual wow factor — I promise, you’ll make it again and again.
Ingredients
For the Main Batter:
– 2 cups grated zucchini (about 2 small zucchinis, shredded and excess water squeezed out)
– 1 ½ cups all-purpose flour (or gluten-free blend if you prefer)
– 1 teaspoon baking powder
– ½ teaspoon baking soda
– ¼ teaspoon salt
– 1 teaspoon vanilla extract
– ¾ cup granulated sugar
– ½ cup vegetable oil or melted unsalted butter
– 3 large eggs
For the Filling and Swirl:
– ¼ cup brown sugar (for added warmth and depth; optional)
– 1 teaspoon cinnamon or a pinch of nutmeg if you want warm spices
– 2 tablespoons of zucchini batter (or plain batter, if you want a more defined swirl)
For the Glaze:
– ½ cup powdered sugar
– 1-2 teaspoons milk or lemon juice (start with less, add as needed for drizzle consistency)
– Optional: vanilla extract or lemon zest for extra flavor
Step-by-Step Instructions
Step 1: Preheat & Prep Pan
Crank your oven to 350°F (175°C). Grab a loaf pan and line it with parchment paper or butter it up generously. I like to give it a light dusting of flour too—trust me, this helps avoid sticking, especially with that zucchini moisture!
Step 2: Mix Dry Ingredients
In a big bowl, whisk together the flour, baking powder, baking soda, salt, and spices if you’re using them. This ensures everything is evenly distributed, which is the secret to a uniform crumb.
Step 3: Mix Wet Ingredients
In another bowl, whisk the eggs, sugar, vanilla, and oil until the mixture looks smooth and a little fluffy. I always test by lifting my whisk—if the batter drips smoothly back into the bowl, you’re good to go.
Step 4: Combine
Gradually add the dry ingredients to the wet, folding gently. Do not overmix — a few lumps are okay, and avoiding overmixing keeps the cake light and tender. Now, fold in the grated zucchini until just combined.
Step 5: Prepare Filling
In a small bowl, mix your brown sugar and cinnamon. If you want a subtle swirl, scoop out about two tablespoons of the plain batter and mix it with the sugar-spice blend. This will be layered in later.
Step 6: Layer & Swirl
Pour half of the plain batter into your prepared loaf pan. Drop dollops of the cinnamon-sugar mixture and the remaining plain batter on top. Use a butter knife or skewer to gently swirl through the layers — don’t overmix! You want those beautiful marbled patterns to peek through later.
Step 7: Bake
Pop it in the oven and bake for about 45-50 minutes. The top should be golden, and a toothpick inserted in the center comes out clean. Ovens vary, so start checking around 45 minutes. If it’s browning too quickly, tent with foil.
Step 8: Cool & Glaze
Let the cake cool in the pan for 10 minutes, then transfer to a wire rack. Meanwhile, whisk together powdered sugar with milk or lemon juice until smooth. Drizzle over the cooled cake — I love doing this while it’s still a little warm; it’s so glossy and pretty.
Step 9: Slice & Serve
Wait at least 20 minutes until it’s fully cooled and the glaze sets. Slice with a serrated knife for clean cuts. I like serving this slightly warm or at room temperature. It looks charming on a plate with fresh fruit or a dollop of whipped cream. Honestly, it’s good enough to stand alone, but I often serve it alongside a steaming cup of coffee or tea — perfect for breakfast or brunch!
What to Serve It With
When it comes to serving this zucchini swirl cake, I find it’s versatile enough to suit any occasion. For breakfast, I love a slice with a hot cup of black coffee or a frothy cappuccino. The moistness and subtle sweetness make it a breakfast winner, especially when topped with a smear of butter or a dollop of Greek yogurt. On brunch days, I sometimes add a few fresh berries or a sprinkle of toasted almonds for crunch. If you’re looking for a cozy afternoon snack, it’s divine with a cup of herbal tea or a glass of cold milk. Still, I think the best way to enjoy it is as a dessert — warm, slightly fragrant, with that glaze adding just the right touch of sweetness. Trust me, my family has been known to devour an entire loaf in one sitting. Honestly, it’s the kind of cake that sparks happy conversations and comfort-filled moments.
Top Tips for Perfecting Your vanilla zucchini swirl cake
After making this a dozen times, I’ve picked up a few tricks I swear by. First, when shredding the zucchini, I always squeeze out excess water with a clean kitchen towel or cheesecloth—it keeps everything from getting soggy and helps your cake stay fluffy. If your batter looks a little thick, a splash of milk can loosen it up just enough. When swirling the batter, I try not to overmix — a gentle swirl creates pretty marbling and keeps the cake tender. For the filling, I experimented with adding a touch of orange zest — it brightens the flavors so beautifully, trust me! If you want more chocolate, toss in a handful of mini chips into the batter; I find it pairs like a dream with vanilla. Baking can be unpredictable, so I always check a few minutes before the timer and rotate the pan halfway through for an even bake. When it comes to glazing, I prefer adding a teaspoon of vanilla or lemon zest to the sugar for a flavor boost. Oh, and if your glaze is too thick, just stir in a tiny splash of milk — it should drizzle smoothly but not be runny. One thing I learned the hard way? Always let the cake cool completely before glazing — that way, the glaze sets just right and won’t slide off.
Storing and Reheating Tips
This cake keeps beautifully for a couple of days if stored properly. I like to wrap it tightly with plastic wrap or store it in an airtight container — it stays moist and fresh. At room temperature, it’s good for about 2 days, but if you want to prolong its life, the fridge is best. Just make sure it’s covered, as the zucchini can make it slightly humid if exposed to air for too long. When reheating, I prefer a quick warm-up in the microwave — just 20 seconds or so, enough to bring back that comforting softness. If you want to serve it warm with the glaze still a bit melty, microwave just enough to soften but not melt away the glaze. For freezing, wrap the cooled loaf tightly in plastic wrap, then foil. It’s good for up to 3 months. Thaw overnight in the fridge or at room temp. A little hint: I sometimes drizzle fresh glaze on frozen slices — it adds a fresh, glossy finish that looks like I spent hours decorating! This cake is forgiving and adaptable — just trust your senses and enjoy every bite.
Frequently Asked Questions
Final Thoughts
Honestly, this vanilla zucchini swirl cake has become one of my all-time favorites because it combines simplicity, a touch of elegance, and that nostalgic home feeling I crave. It’s perfect for everything from a quick breakfast to a fancy brunch or a cozy evening treat. The best part? It sneaks in zucchini—so it’s almost healthy, right? (Wink.) Every time I bake it, I remember why I fell in love with baking in the first place: the joy of creating something warm, beautiful, and delicious that makes loved ones smile. If you give this a try, I’d love to hear how it turns out — add your own twists, swap ingredients, or just tell me how much you liked it. Happy baking, my friend — I can’t wait to see your masterpiece!
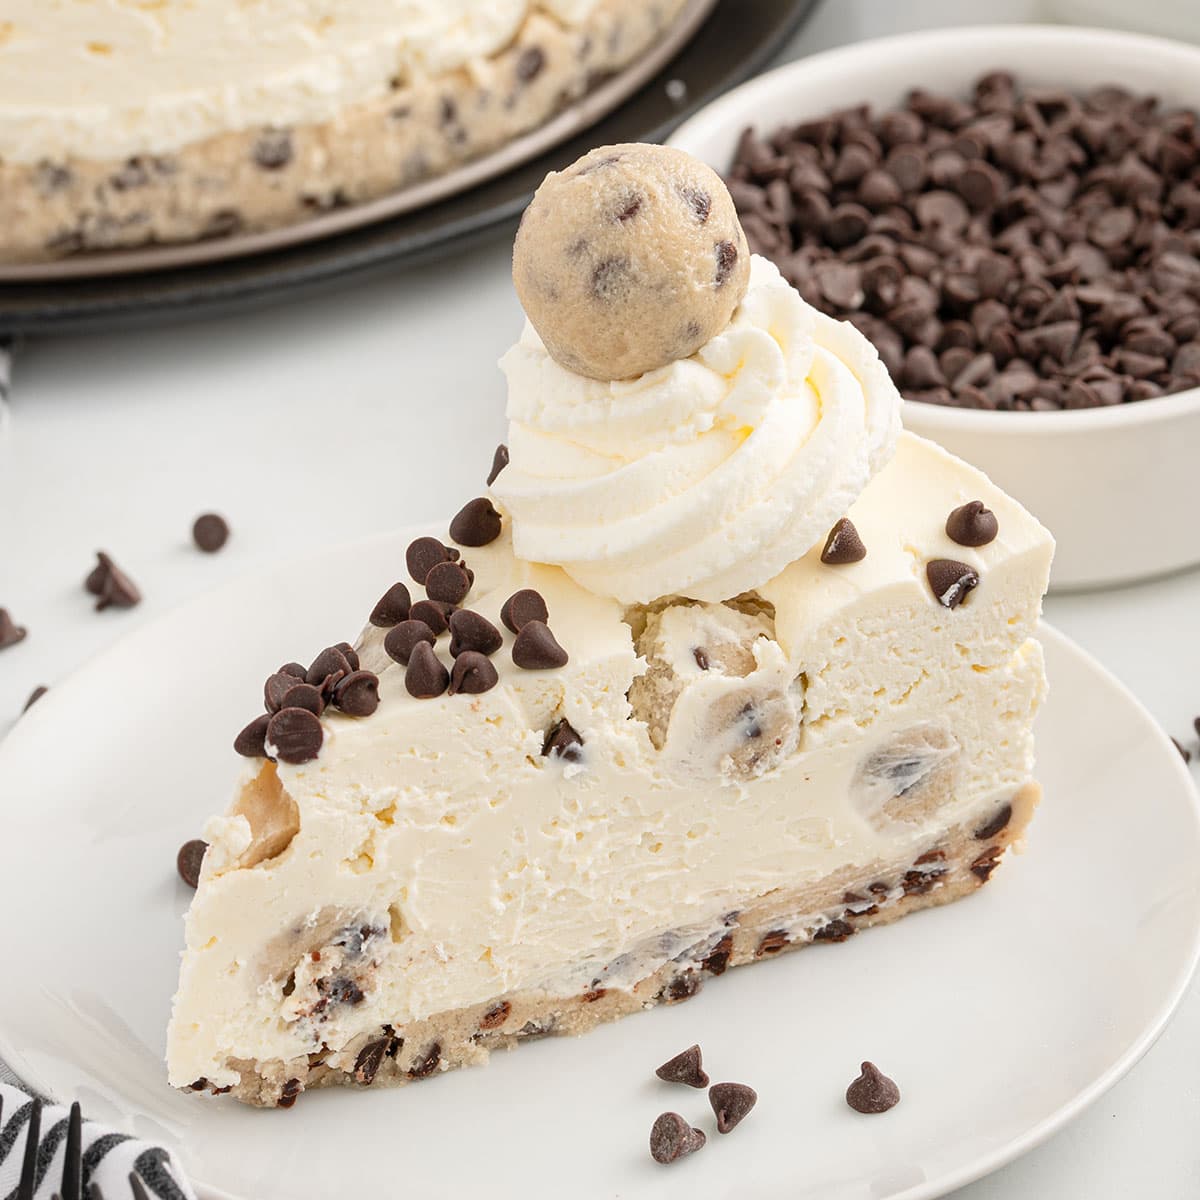
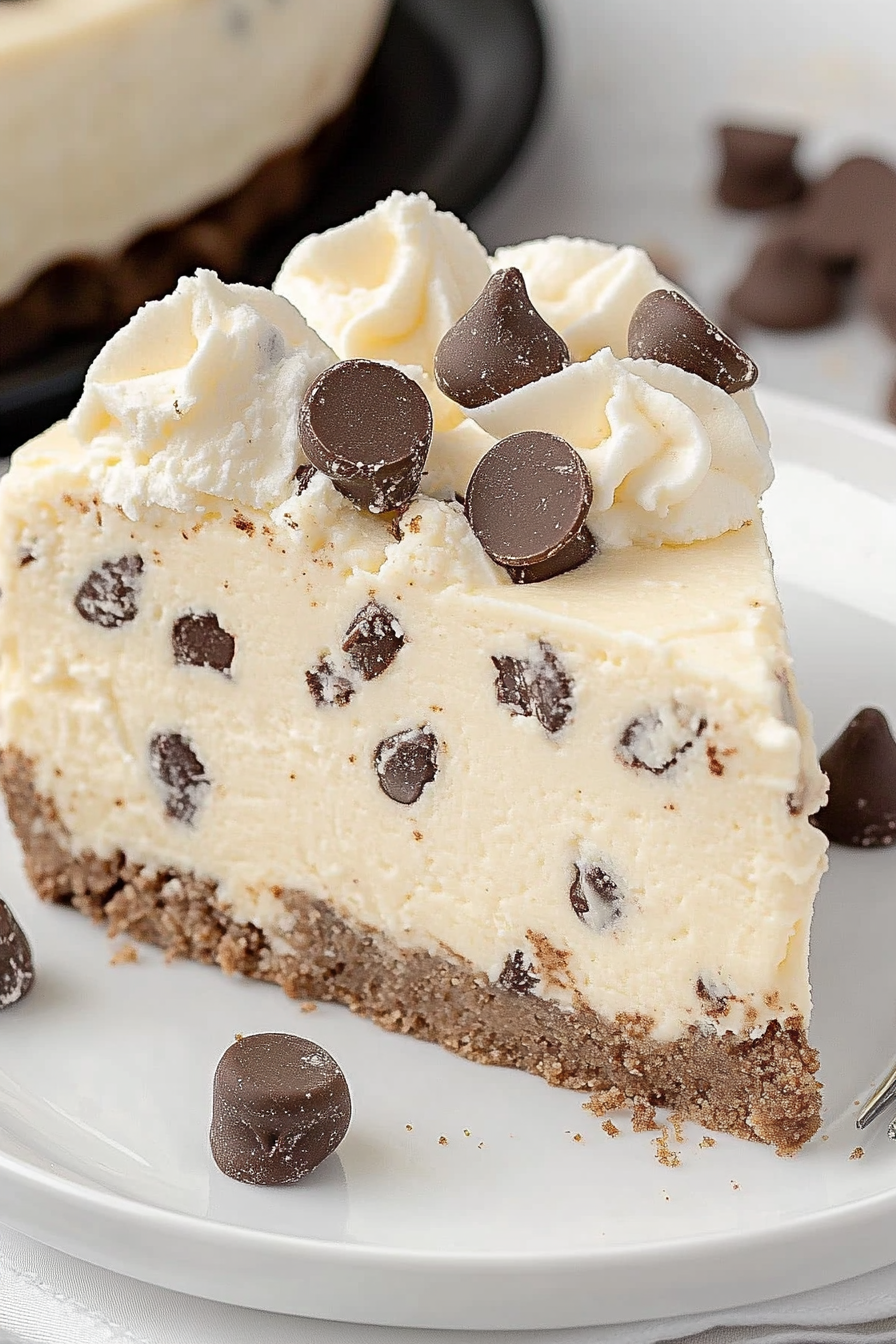
cookie dough cheesecake
Ingredients
Method
- Preheat the oven to 300°F. Line a baking sheet with parchment paper and heat the flour for 5-7 minutes to eliminate raw bacteria. Let it cool.
- In a large bowl, beat the butter, brown sugar, and granulated sugar for 1-2 minutes until fluffy.
- Add heavy cream, vanilla, and salt. Mix until combined.
- Incorporate the heat-treated flour just until blended; the batter should be thick.
- Stir in the mini chocolate chips evenly.
- Press 2 cups of cookie dough into the bottom of a springform pan and chill.
- With remaining dough, scoop 10 balls and refrigerate for garnish.
- For the filling, beat cream cheese and half the powdered sugar until smooth.
- Beat the cold heavy cream with remaining powdered sugar until stiff peaks form.
- Fold whipped cream into cream cheese mixture, then gently incorporate chopped cookie dough balls.
- Spread the filling over the crust and refrigerate for at least 6 hours.
- Top with whipped topping and chocolate chips, then garnish with cookie dough balls before serving.

This sounds amazing—cheesecake with cookie dough is pure comfort food! Reminds me of my grandma’s kitchen too.
This cheesecake sounds amazing! I can almost smell the cookies baking just from reading it—definitely making this weekend.
This sounds so comforting! I love how baking can bring back such warm memories. Can’t wait to try this recipe!
This sounds absolutely delicious! I love how baking brings back such warm, nostalgic memories—thanks for sharing this recipe.
This recipe sounds absolutely delicious! I can already imagine the cozy, nostalgic vibes it brings—perfect for a lazy afternoon with a glass of milk.