
Spice Up Your Tacos Simply
You know those mornings when you peek into the fridge and see a lonely zucchini hiding behind the milk? Or when your kids come home asking, “What’s for snack today?” and you’re suddenly desperate for something quick, healthy, and sweet? Well, this zucchini banana walnut bread is my go-to! I’ve made it dozens of times, tweaking the recipe every single time, and I swear it never fails to bring smiles around my table. It’s moist, sweet enough without overly sugar-y, and packed with bananas and zucchini — the dynamic duo of sneaky nutrition and flavor. Honestly, I always do this when I want something cozy but don’t feel like pulling out the big mixer or spending hours in the kitchen. My kids ask for this all the time, especially on busy mornings, and it disappears in minutes at my house. The smell alone brings everyone to the kitchen. Trust me, once you try this, it’ll become a staple in your baking rotation too!
What is Zucchini Banana Bread?
This is my favorite twist on classic banana bread — I call it zucchini banana walnut bread because it’s basically a mashup of two garden stars, with a generous handful of walnuts mixed in for crunch. Think of it as a sneaky way to get more veggies into the kids’ snack lineup, all wrapped in tender, fluffy bread with the warm aroma of bananas and toasted walnuts. It’s essentially a moist quick bread that’s perfect for breakfast, a coffee break, or even a sweet-ish treat after dinner. The name might be long, but the process is simple: mash bananas, grate zucchini, mix everything together, and bake it up. It’s kind of like a hug in loaf form, comforting and wholesome but still playful enough to feel like you’re indulging a little.
Why you’ll love this recipe?
What I love most about this zucchini banana walnut bread is how adaptable it is. It’s right there with my other comfort food favorites, like cinnamon swirl muffins or chocolate chip banana pancakes, but this one’s just a little more special because of that added veggie boost. The flavor? Oh, it’s rich and fruity with a nutty undertone that makes each bite worth savoring. Plus, it’s surprisingly easy — I’ve tested this with everything from almond milk to Greek yogurt, and it’s always super forgiving. This bread is budget-friendly, using simple ingredients I always have on hand. And the best part? It’s versatile. You can swap out the walnuts for pecans, add a handful of blueberries, or even sprinkle a little cinnamon on top before baking. What I love most is how it’s a one-bowl wonder — no fancy equipment required, and it comes together in less than 10 minutes. It’s what I’d call “little effort, big reward.”
How do you make Zucchini Banana Walnut Bread?
Quick Overview
Honestly, this recipe is everything I look for in a quick bread: simple, straightforward, and packed with flavor. You just mash the bananas, grate the zucchini, whisk everything together, pour it into a loaf pan, and bake. The zucchini keeps the bread moist, while the bananas add sweetness — no need for a ton of sugar. Just a few tweaks, and you get a tender, flavorful loaf that’s perfect for when you’re craving something sweet but don’t want the guilt. It’s forgiving if you’re rushing or if you forget to measure precisely — I’ve done this with icy bananas, overripe ones, and even with a splash of almond milk instead of regular, and it’s always a win. Honestly, I love how I can whip this up in a pinch and know it’s going to turn out just right, every single time.
Ingredients
For the Main Batter:
- 3 ripe bananas (the more spotted, the sweeter)
- 1 cup grated zucchini (squeeze out excess moisture)
- 2 eggs (or flax eggs for vegan version)
- 1/3 cup honey or maple syrup (adjust to taste)
- 1/4 cup melted butter or coconut oil
- 1 teaspoon vanilla extract
- 1 1/2 cups all-purpose flour (whole wheat works great too)
- 1 teaspoon baking soda
- 1 teaspoon baking powder
- 1/2 teaspoon cinnamon (optional but recommended)
- Pinch of salt
For the Filling:
- 1/2 cup chopped walnuts (or pecans)
- Extra walnuts to sprinkle on top (optional)
For the Glaze (optional):
- 1/2 cup powdered sugar
- 1-2 teaspoons milk or lemon juice
- Extra chopped walnuts for garnish
Step-by-Step Instructions
Step 1: Preheat & Prep Pan
Set your oven to 350°F (175°C). Grease a standard loaf pan with a bit of butter or line it with parchment paper — trust me, this makes it easier to get your beautiful bread out later. While the oven heats, grate the zucchini and make sure to squeeze out as much excess water as possible — this keeps your bread from turning into zucchini soup!
Step 2: Mix Dry Ingredients
In a small bowl, whisk together the flour, baking soda, baking powder, cinnamon, and salt. This step creates an even distribution of leavening agents. I’ve learned to do this before mixing wet ingredients — it helps prevent clumps and ensures a nice rise.
Step 3: Mix Wet Ingredients
In a large bowl, mash the bananas really well — I always do this with a fork or a potato masher. Add the eggs, honey, melted butter, and vanilla, whisking until smooth. It should smell sweet and warm, with that lovely banana aroma filling your kitchen. If your bananas are fridge-cold, just let the mixture sit for a minute or so to reach room temperature.
Step 4: Combine
Dump the dry mixture into the wet ingredients and fold gently until just combined. Avoid overmixing — I’ve been guilty of this, and the bread can end up dense rather than fluffy. Next, fold in the grated zucchini, then add most of the chopped walnuts, saving a few for sprinkling on top.
Step 5: Prepare Filling
In a small bowl, toss the remaining walnuts with a little cinnamon or sugar if you like — I sometimes do this for extra crunch and flavor. Spread the batter into your prepared loaf pan, then sprinkle the topping evenly over the surface.
Step 6: Layer & Swirl
If you want to get fancy, you can swirl in some blueberry jam or a drizzle of honey for pockets of sweetness. But honestly, I love it straightforward. Gently tap the pan on the counter to settle the batter, then use a toothpick to swirl slightly if you’re feeling artsy.
Step 7: Bake
Bake for 50-60 minutes, or until a toothpick inserted into the center comes out clean. The top should be golden brown, and the scent? Pure heaven. Check around 50 minutes; my oven sometimes runs hot, and I find that covering the top with foil for the last 10 minutes prevents burning.
Step 8: Cool & Glaze
Transfer the bread to a wire rack and let it cool for at least 15 minutes. If you’re glazing, whisk together powdered sugar and milk quickly, then drizzle it over the slightly warm loaf. Sprinkle some extra walnuts on top and watch it set, adding a pretty crunch and flavor boost.
Step 9: Slice & Serve
Use a serrated knife for clean slices — my favorite is when it’s just slightly warm, but it’s equally delicious when served at room temperature. Serve slices with a pat of butter, a dollop of yogurt, or just as is — guaranteed to satisfy any sweet tooth or veggie skeptic in your house.
What to Serve It With
This bread is wonderfully versatile. For breakfast, I love it toasted with a smear of butter and a side of fresh fruit — maybe some sliced strawberries or blueberries. It pairs beautifully with a hot cup of coffee or tea, especially on a slow weekend morning when the house is still cozy. My family also enjoys it as a hearty snack in the afternoon; I sometimes cut thicker slices and serve with a little cream cheese spread.
For a brunch spread, plate it alongside scrambled eggs, smoked salmon, or even a fruit salad — it adds that homemade, nourishing touch. When I’ve had dinner guests, I’ll warm a few slices and serve with a drizzle of honey or a dusting of powdered sugar for a more dessert-like vibe. It’s also fantastic spread with Nutella or peanut butter if you’re craving something richer. Honestly, it’s become our little pantry hero for any occasion where you want something warm, sweet, and a little rustic.
Top Tips for Perfecting Your Zucchini Banana Walnut Bread
If you want your loaf to turn out just right every time, a few tricks from my kitchen might help:
- Zucchini Prep: Always squeeze out as much moisture as you can; wet zucchini can make your bread heavy or soggy. I do this by wrapping the grated zucchini in a clean dish towel and twisting gently — it’s surprisingly effective.
- Mixing Advice: Overmixing is the enemy of fluffy bread. Fold gently, and you’ll reward yourself with light, tender slices. When the batter is just combined, stop mixing!
- Swirl Customization: For a pretty marbled effect, I sometimes swirl in a little equal parts jam or nut butter. Use a skewer or a chopstick for a gentle swirl through the batter—it’s all about that rustic, homemade look.
- Ingredient Swaps: I’ve tried using almond flour and coconut sugar, and honestly, it’s still delicious — just a little denser. If I’m out of walnuts, pecans are lovely, or chopped trail mix adds extra flair.
- Baking Tips: Every oven cooks differently. Begin checking at around 50 minutes, and use toothpick tests. If the top is browning too quickly, tent with foil to prevent burning.
- Glaze Variations: Want something richer? Mix cream cheese with a touch of honey or lemon juice rather than powdered sugar. Or skip the glaze altogether for a more rustic look.
After years of trial and error, I’ve learned to keep the batter moist but not wet, and to trust my nose — the smell of baking bread at 45 minutes is what tells me I’m almost there. Patience is key, but honestly, it’s so worth it for that first warm slice.
Storing and Reheating Tips
This bread is best enjoyed within a few days, but with proper storage, it stays fresh longer. Keep it at room temperature in an airtight container for up to 2 days — just make sure it’s well covered to prevent it from drying out. For longer storage, wrap slices individually in plastic wrap and freeze for up to 3 months; I love slicing and taking a piece straight from the freezer — it defrosts quickly, and the flavor stays fresh.
If you’re reheating, pop a slice in the microwave for about 15 seconds or warm it in a low oven (around 300°F) wrapped in foil for about 10 minutes. Trust me, it retains that just-baked moistness and aroma. If you added glaze or toppings, wait until it’s slightly cooled before applying it — you don’t want the glaze to melt away or turn runny.
Frequently Asked Questions
Final Thoughts
If you’re like me, you’ve probably tried a million banana bread recipes, but this zucchini banana walnut bread has a special place in my heart. It’s an everyday treat, a pick-me-up after a long day, and a fun way to sneak some greens into the kids’ diet — all without sacrificing flavor. The cozy aroma, the moist crumb, and the satisfying crunch of walnuts make it irresistible. Once you get the hang of it, I promise you’ll come back to this recipe time and time again, tweaking it to your taste, adding your favorite mix-ins, or just enjoying it plain with a steaming cup of coffee. Happy baking! And I’d love to hear how yours turns out — leave a comment below or share your own twists. Cheers to good, honest, homemade baking!
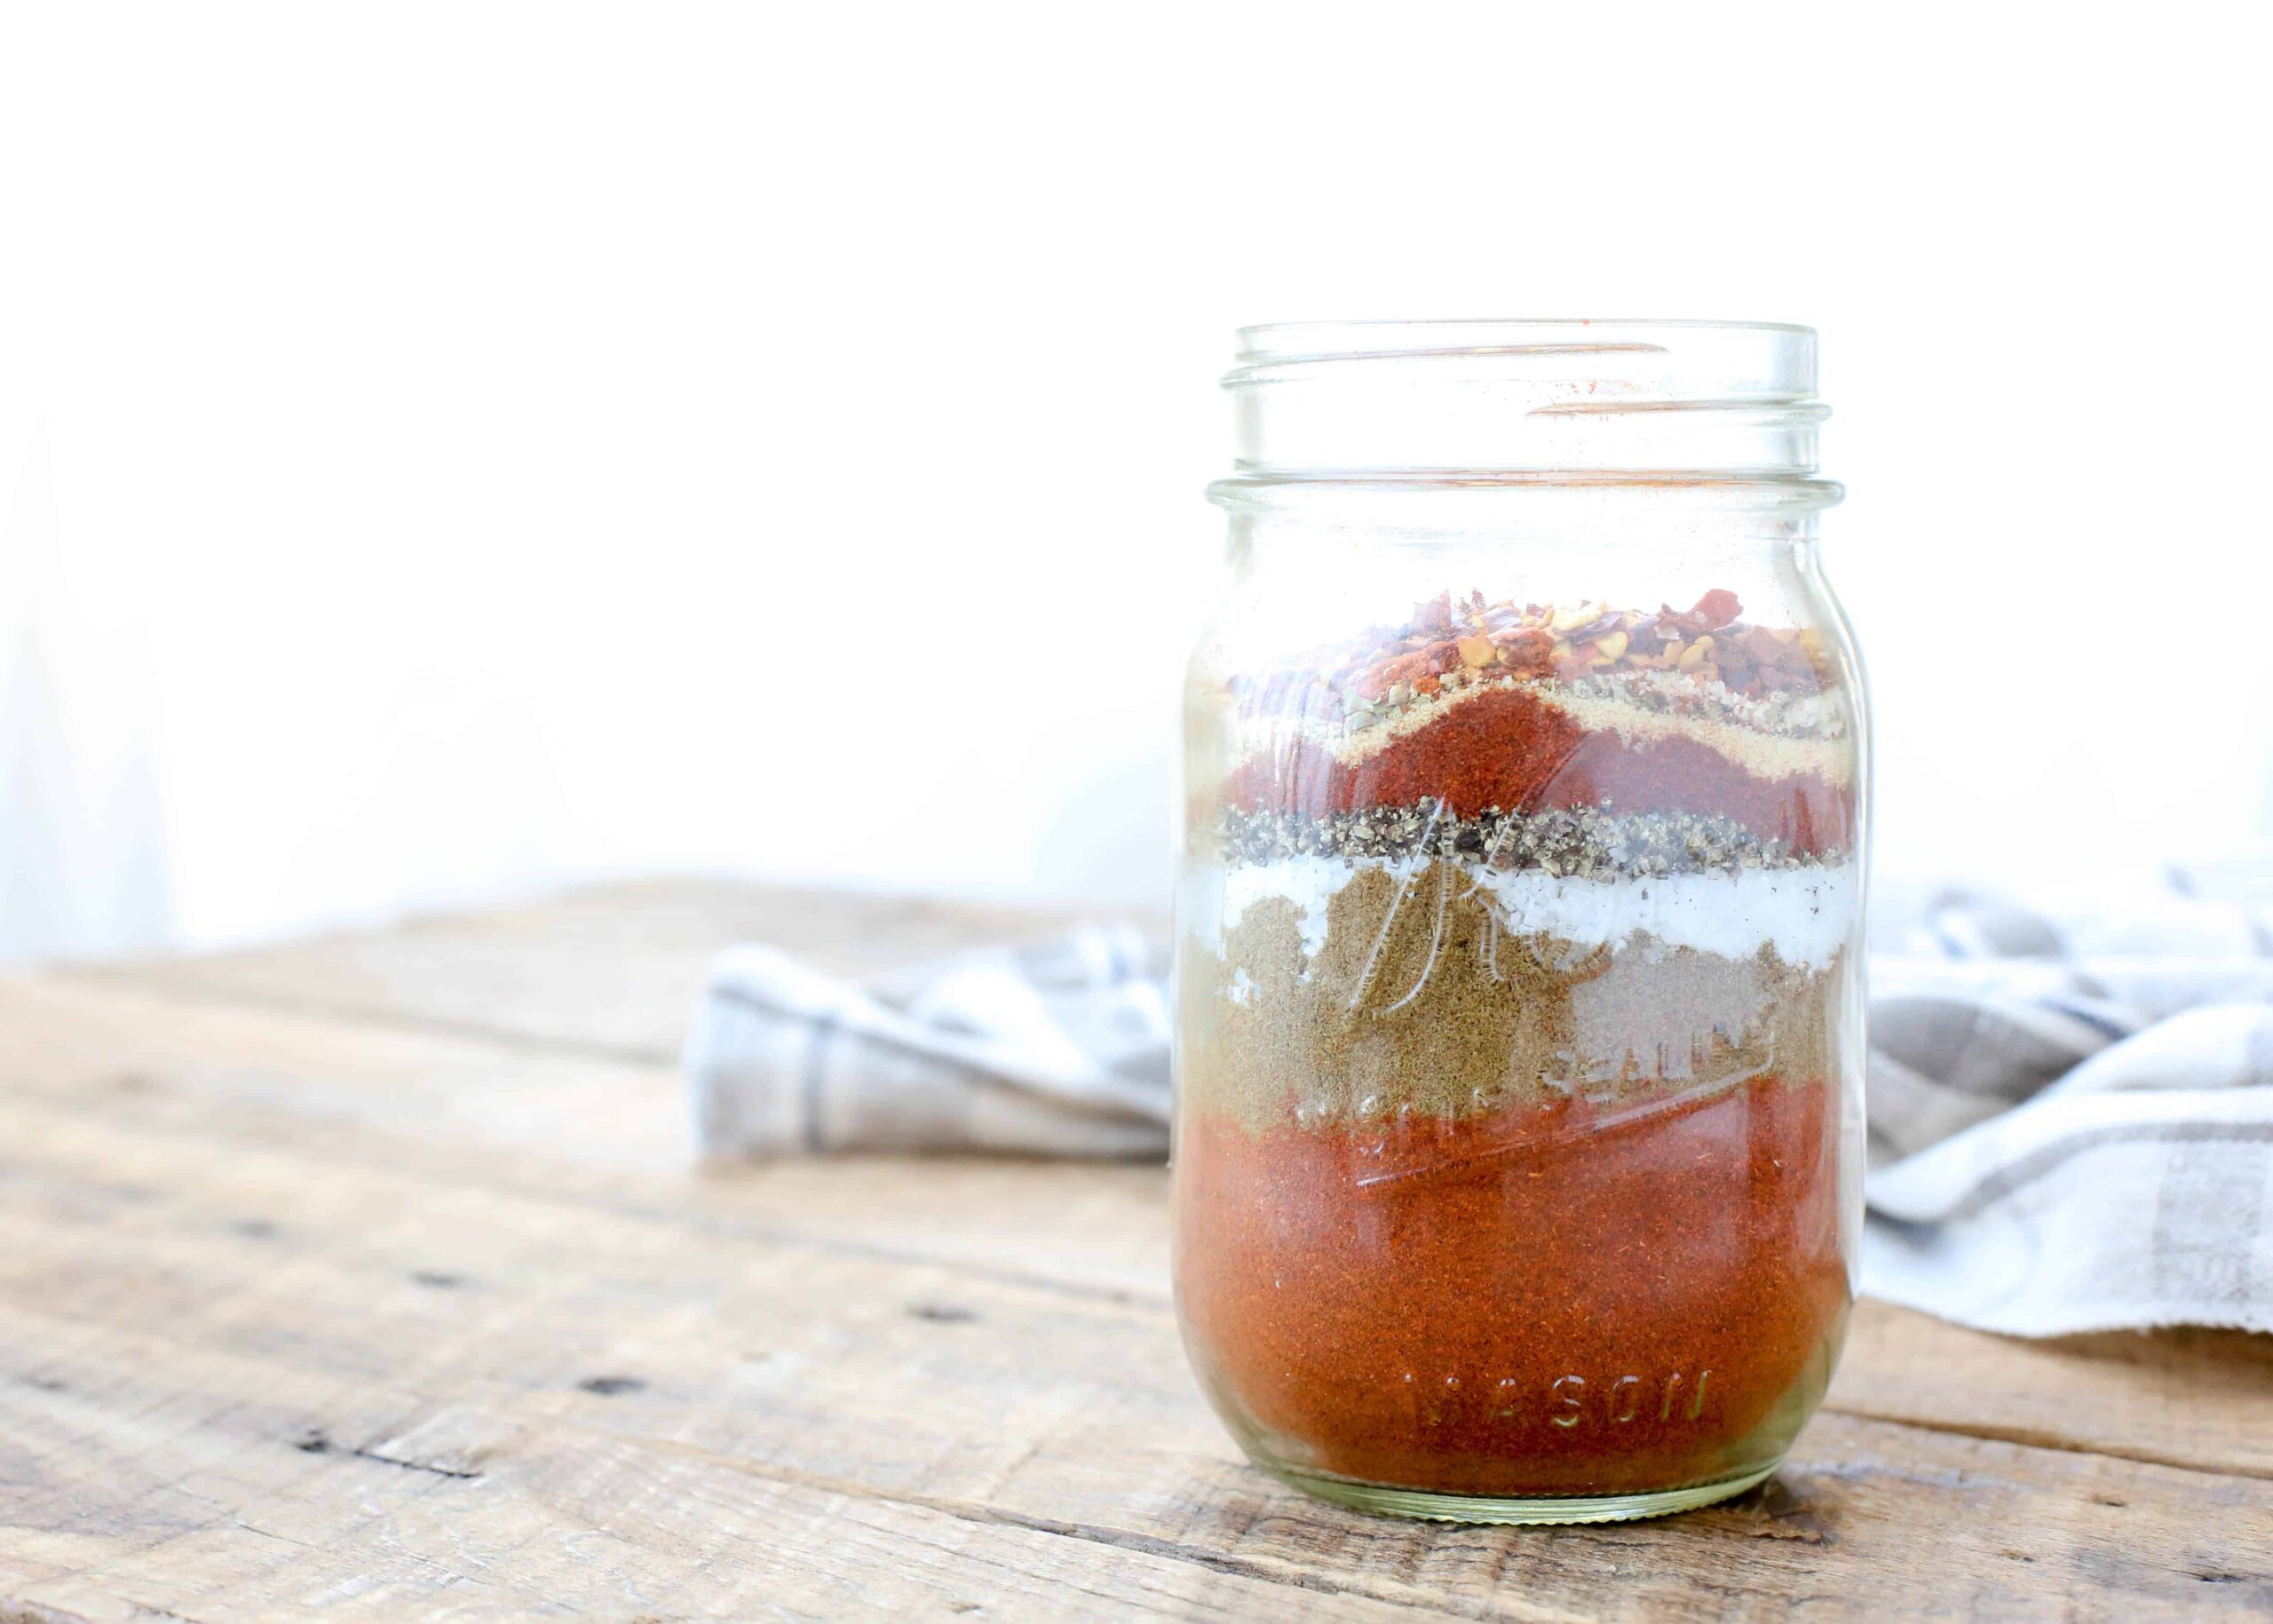
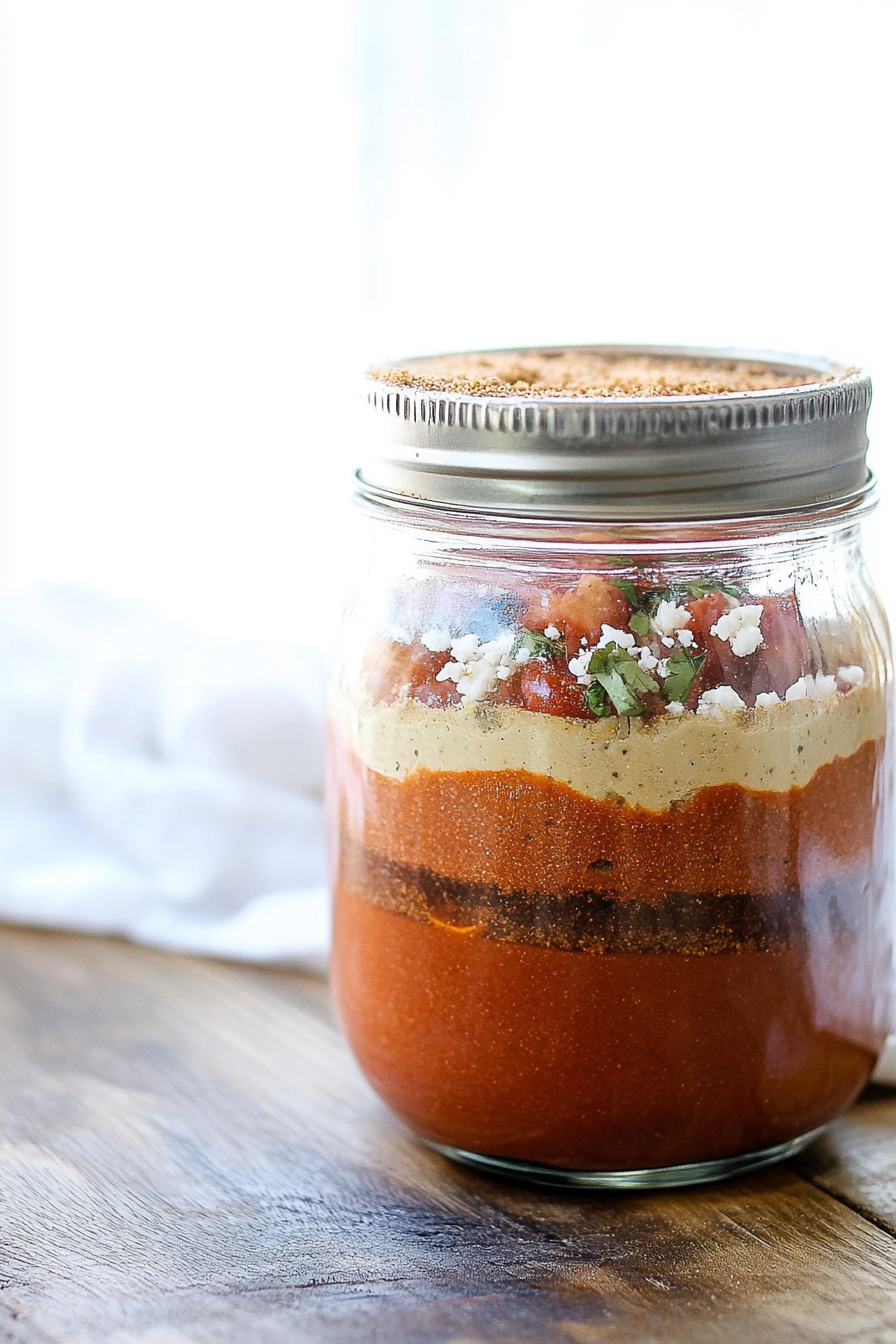
taco seasoning
Ingredients
Method
- In a small bowl, stir together all of the spices. Store the seasoning mix in an airtight container. I keep mine in a glass mason jar in my spice cabinet.


Love this—so relatable! That lonely zucchini always seems to find its way into my tacos. Great reminder to get creative with leftovers.
Love this—zucchini tacos sound like a fun twist! Any tips for keeping them from getting too soggy?
Oh this is so relatable! I totally get that “what’s for snack” moment—your post just saved me from opening another boring lunchbox.
Oh, I totally get that! That zucchini always finds a way to sneak into my tacos—simple and delicious. Thanks for the idea!
I love this! My kids actually asked me the same thing yesterday, and I ended up using leftover grilled zucchini in a taco—it was a hit!