

Autumnal Pumpkin Muffins How to Bake Them
I remember the first time I bit into this zucchini walnut spice loaf—my grandmother’s recipe, actually. The aroma, that warm, cozy scent of cinnamon and nutmeg filling the kitchen as the loaf baked, instantly transported me to my childhood. It’s one of those recipes that’s both nostalgic and incredibly versatile—a treat that feels fancy but is so easy to whip up on a busy weeknight. Honestly, I love how it plays with textures and flavors; the moist zucchini keeps it tender, while the walnuts add a nice crunch. Plus, the cream cheese glaze? It’s the perfect sweet-tangy finish that makes this loaf disappear in minutes at my house. My kids ask for this all the time, especially when they’re craving something sweet but I don’t wanna turn on the oven for a big cake. Trust me, this one’s a lifesaver on busy nights or lazy weekends when you want comfort in every bite. So, grab your ingredients—let’s do this! You’ll see, it’s simpler than you think, and the results? Absolutely addictive.
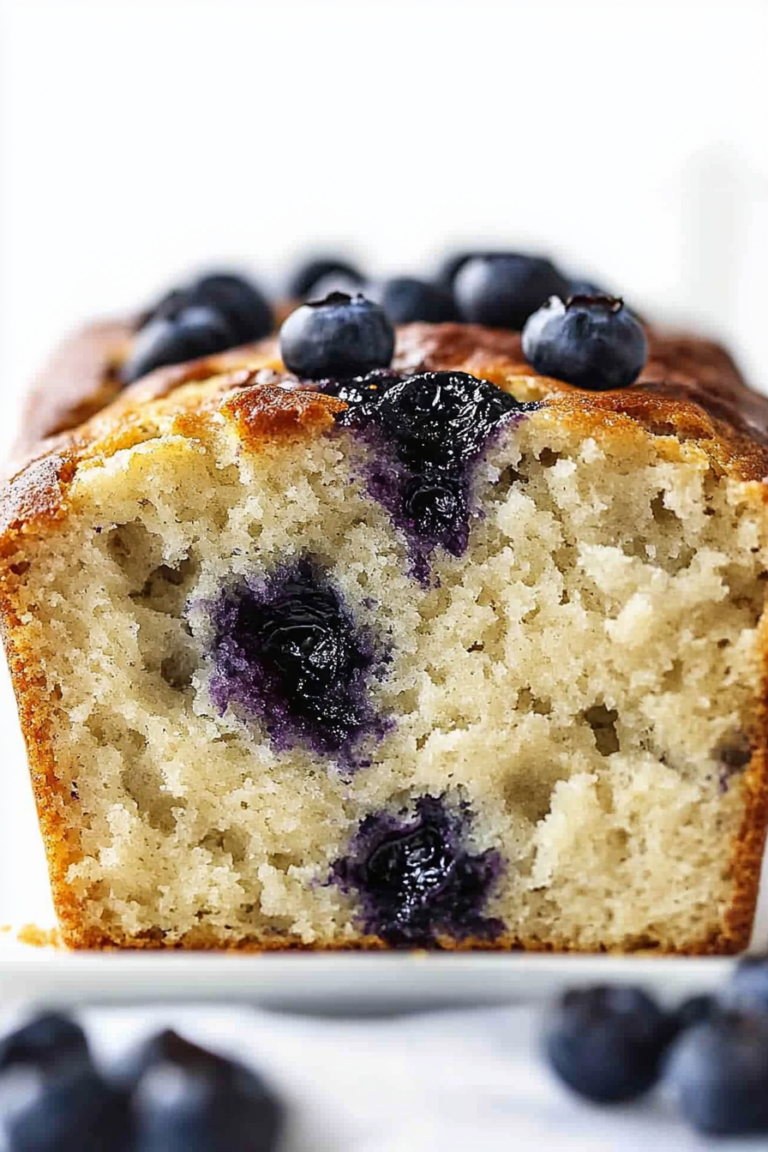
What is Zucchini Walnut spice?
This zucchini walnut spice loaf is a cozy, bread-like treat that combines the moist, tender goodness of grated zucchini with a warm blend of cinnamon, nutmeg, and a hint of cloves. Think of it as a cross between a quick bread and a comforting cake—perfect for breakfast, brunch, or an afternoon snack. The “spice” part is what makes it feel fall-like and inviting, but I make this year-round because it’s just that good. The addition of walnuts gives it crunch and richness, while the zucchini keeps everything super moist without the need for oil or butter in excess. The name might sound fancy, but honestly, it’s just a humble loaf that’s elevated by its flavor and texture. The best part? It’s all made in one bowl (well, almost), and it comes together quickly—no complicated techniques here. It’s basically a glorified, healthful snack that everyone in the family will ask for again and again.
Why you’ll love this recipe?
What I love most about this zucchini walnut spice loaf is how incredibly versatile it is. It’s the kind of recipe that feels special enough for brunch guests but straightforward enough for teenagers to make after school. The flavor profile is warm, comforting, with a hint of sweetness and earthy spice that’s just right. The smell alone—the wafting aroma of cinnamon and toasted walnuts—can turn a boring afternoon into something special. Plus, it’s budget-friendly; you probably already have most of these ingredients in your pantry or fridge. I’ve tested this with different nuts, like pecans or even almonds, and it still comes out fantastic. Don’t skip the cream cheese glaze either—without it, it’s like a little cake, but with it, it’s an indulgent treat that’s perfect for any occasion. What I really love is how forgiving it is. Overmixing? Not a problem. Extra zucchini? Even better. It’s a recipe that’s been tried and tested in my kitchen, and I guarantee it’ll become one of yours too.
How do you make Zucchini Walnut Loaf?
Quick Overview
This zucchini walnut spice loaf is as easy as mixing everything in one bowl, pouring it into a loaf pan, and baking. I always do this when I need a comforting treat pronto—no fancy equipment involved. First, you grate the zucchini (squeeze out a little moisture—it helps keep the loaf tender). Then, you toss together the dry ingredients—flour, spices, baking soda, and salt. Next, you mix the wet ingredients: eggs, sugar, vanilla, and a splash of oil or yogurt. Combine everything gently, fold in the zucchini and walnuts, pour it into your prepared pan, and bake until a toothpick comes out clean. Once cooled, slather with the cream cheese glaze, and you’re in business. Simple, fast, and wildly satisfying—that’s how I’d describe it.
Ingredients
For the Main Batter:
– 2 cups grated zucchini (about 2 medium zucchinis)
– 1 1/2 cups all-purpose flour (or gluten-free blend, see tips)
– 1/2 teaspoon baking soda
– 1 teaspoon ground cinnamon
– 1/2 teaspoon ground nutmeg
– 1/4 teaspoon ground cloves (optional but recommended)
– 1/2 teaspoon salt
– 1 cup sugar (white, brown, or a combo—my favorite is half and half)
– 3 large eggs
– 1/3 cup oil or melted butter
– 1 teaspoon vanilla extract
For the Filling:
– 1 cup chopped walnuts (toasted if you like a richer flavor)
– Optional: 1/2 cup dried cranberries or raisins for extra chewiness
For the Glaze:
– 4 oz cream cheese, softened
– 1 cup powdered sugar
– 1 tablespoon lemon juice or vanilla extract
– A splash of milk (to thin if needed)
Step-by-Step Instructions
Step 1: Preheat & Prep Pan
Set your oven to 350°F (175°C). Grease a standard loaf pan or line it with parchment paper—easy cleanup, trust me. If you want a crusty top, sprinkle a little flour or sugar on the bottom of the pan before pouring in the batter.
Step 2: Mix Dry Ingredients
In a large bowl, whisk together the flour, baking soda, cinnamon, nutmeg, cloves, and salt. This ensures everything is evenly distributed, so you won’t get pockets of too much spice or baking soda. I’ve learned that sifting isn’t necessary unless you’re OCD about lumps—just whisking works fine.
Step 3: Mix Wet Ingredients
In a separate bowl, beat the eggs, then stir in the sugar, vanilla, and oil. I find it’s easiest to whisk vigorously until everything’s combined and a little fluffy—this helps everything emulsify nicely. If you’re feeling fancy, you can substitute the oil with applesauce or Greek yogurt for extra moistness, and honestly, it works beautifully.
Step 4: Combine
Add the wet mixture into the dry ingredients gently, folding with a spatula just until everything looks combined. Don’t overmix—think of it as folding in a delicate fabric, so the batter stays light and airy. Overmixing might make your loaf dense and tough, which nobody wants.
Step 5: Prepare Filling
Stir the chopped walnuts into the batter or sprinkle them on top before baking if you prefer a crunchy top. I like tossing in a handful of dried cranberries here—they add a lovely tartness that balances the sweetness.
Step 6: Layer & Swirl
If you’re feeling fancy, you can swirl a bit of cinnamon sugar or extra glaze into the batter for a marbled effect. Pour half the batter into your loaf pan, add some filling, then top with remaining batter. Use a skewer or butter knife to swirl gently—this creates a beautiful marbled look and ensures bites of filling everywhere.
Step 7: Bake
Pop it into your preheated oven and bake for about 50-60 minutes. Test with a toothpick—if it comes out clean, you’re golden. Sometimes, my oven runs a little hot, so I start checking around 45 minutes. Cover loosely with foil if the top gets too dark before it’s baked through.
Step 8: Cool & Glaze
Once out of the oven, let it cool in the pan for about 15 minutes before transferring to a wire rack. This prevents it from sinking and keeps the texture just right. Meanwhile, whip up your glaze—beat the softened cream cheese with powdered sugar, add vanilla or lemon juice, and thin with a splash of milk until smooth. Spread generously once the loaf is completely cooled.
Step 9: Slice & Serve
Use a serrated knife, and cut with patience. The loaf is moist, so gentle sawing is best. Serve it warm or room temp—paired with a cup of coffee or tea, it’s pure comfort. Honestly, I like it best the next day after the flavors meld—a little bit fresher, a little more flavorful.
What to Serve It With
This loaf is pretty versatile, so I’ve got a few ideas for making it shine in different settings:
For Breakfast: Pair slices with a dollop of Greek yogurt and fresh berries, or serve with a steaming mug of coffee. The warm spices and the nuttiness are just right to kick-start your morning.
For Brunch: Serve slices alongside scrambled eggs and a fruit salad, maybe with mimosa glasses nearby. This loaf can take center stage or sit happily as a laid-back sweet option.
As Dessert: Top with whipped cream or more glaze, maybe add a scoop of vanilla ice cream on the side. It’s a rustic but classy finish to any meal. I even like to warm slices up a bit for a cozy evening treat.
For Cozy Snacks: Wrap a slice in parchment for on-the-go, or serve with a glass of milk. It’s perfect with an afternoon cup of tea while reading or chatting with friends. We always have this at family brunches, and it’s always met with smiles and requests for seconds.
Top Tips for Perfecting Your Zucchini Walnut Spice Loaf
Over the years, I’ve definitely learned a few tricks to make this loaf perfect every time:
Zucchini Prep: Always squeeze out excess moisture, especially if your zucchinis are extra watery. I do this by placing the grated zucchini between layers of paper towels and pressing gently. It’s a game changer for keeping your loaf moist without making it soggy.
Mixing Advice: Be gentle when combining your wet and dry ingredients. Overmixing is the enemy here—it’ll toughen the crumb. Just fold until you see no more streaks of flour, and you’re good to go.
Swirl Customization: Want a prettier, more marbled look? Before baking, swirl in some cinnamon sugar or even a little melted butter. Use a toothpick to make swooping circles—your loaf will look as good as it tastes!
Ingredient Swaps: I love experimenting—try replacing all-purpose flour with almond or coconut flour, but remember, ratios matter. When using alternative flours, you might need a bit more liquid. Likewise, add chopped pecans instead of walnuts—they add a different flavor dimension.
Baking Tips: Always check your oven’s actual temperature with an oven thermometer—many run hot or cold. Adjust your baking time accordingly, and don’t open the door too often. When a toothpick inserted in the center comes out clean, it’s done.
Glaze Variations: For a different flavor, swap lemon juice for orange or add a teaspoon of vanilla bean paste. If you want it extra shiny, lightly brush the loaf with a little warm apricot jam or honey just before slicing.
And honestly, the biggest trick? Don’t stress too much about perfection. Some cracks or uneven swirls just add charm. This loaf is homey, imperfect, and utterly delicious—just like good company in the kitchen.
Storing and Reheating Tips
This loaf stays surprisingly fresh for several days, which is a relief because once you taste it, you’ll want to keep it around! Here’s what I recommend:
Room Temperature: Wrap slices tightly in plastic wrap or foil. It’s best enjoyed within 2-3 days—bites are still moist, and the flavors stay vibrant.
Refrigerator Storage: Store in an airtight container for up to a week. Bring slices back to room temperature or microwave for about 10 seconds to revive that just-baked texture.
Freezer Instructions: Wrap individual slices in plastic wrap, then in foil or a freezer bag. They’ll last 2-3 months. To enjoy, thaw at room temperature or warm in the microwave. The moistness remains intact—trust me, it’s almost as good as fresh.
Glaze Timing: For best presentation, add the glaze after the loaf has cooled completely. If freezing, wait until thawed to glaze—it’ll stay smooth and shiny that way.
Frequently Asked Questions
Final Thoughts
If you’re looking for a cozy, crowd-pleasing bread that’s easy to throw together and full of comforting flavors, this zucchini walnut spice loaf is a hit. It’s one of those recipes that makes your kitchen smell like a cinnamon-scented hug, and the taste is just as satisfying as the smell. I’ve made this countless times, tweaking little bits here and there—adding extras, swapping ingredients—but the core remains a family favorite. It’s perfect for cozy mornings, casual brunches, or just when you want something sweet but don’t want to fuss. The best part? It’s forgiving enough that even if you’re a beginner, you’ll have success—and get that warm, homemade glow. I really hope you try it and that it becomes part of your baking repertoire. And hey, do share your tweaks or photos—I love hearing how it turns out in your kitchen. Happy baking, and enjoy every slice!

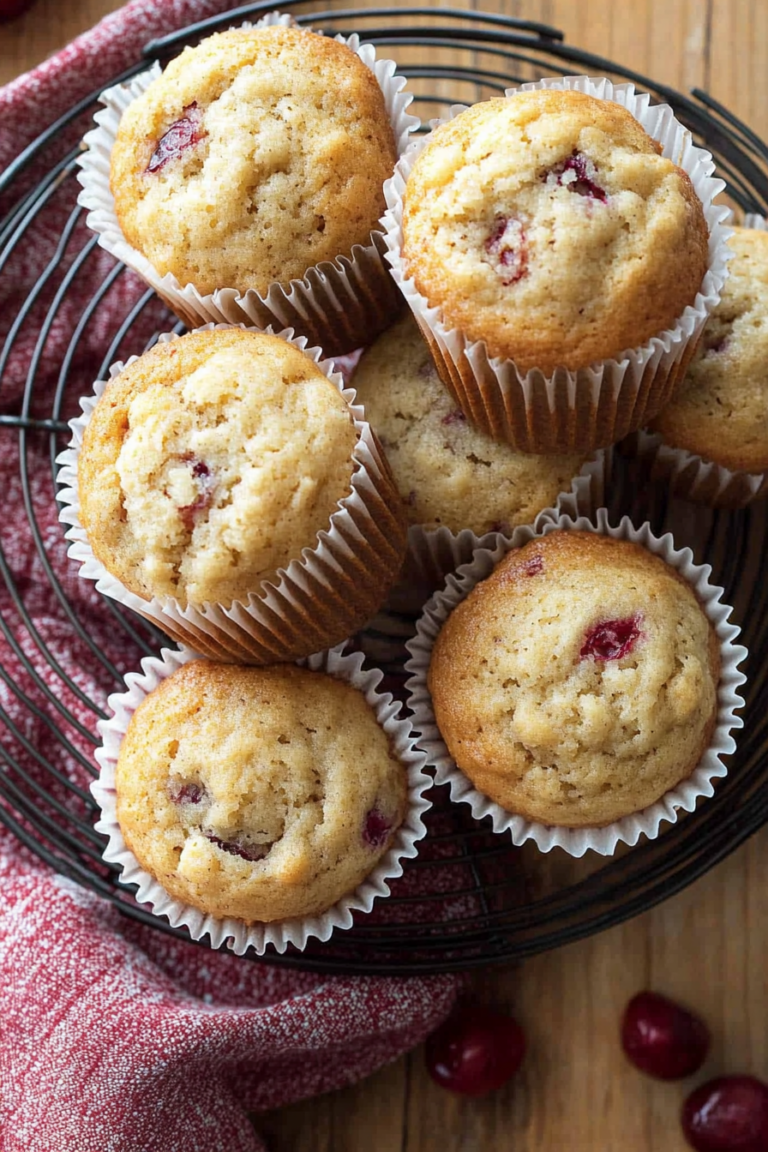
pumpkin muffins
Ingredients
Method
- Preheat the oven to 350 degrees F. and grease 2, 12-cup muffin tins well.
- In a medium bowl, mix pumpkin puree, sugar, eggs, and vanilla until well combined.
- Add the whole wheat flour, baking powder, salt, and cinnamon to the wet ingredients and stir until just combined.
- Fold in the chocolate chips.
- Divide the batter evenly into the prepared muffin tins, filling each about 3/4 full.
- Bake for 20 minutes or until the muffins spring back when lightly touched.
- Allow the muffins to cool in the tin for 5 minutes, then transfer to a wire rack to cool completely.
- Serve warm or at room temperature.


That sounds like such a comforting memory—I can almost smell the spices! Do you still make this recipe yourself?
That sounds absolutely delicious—I love how family recipes bring back such warm memories! The scent of cinnamon and nutmeg must be so comforting.
That sounds amazing! I’ve always loved baking with cinnamon and nutmeg—it really feels like autumn in a loaf.