
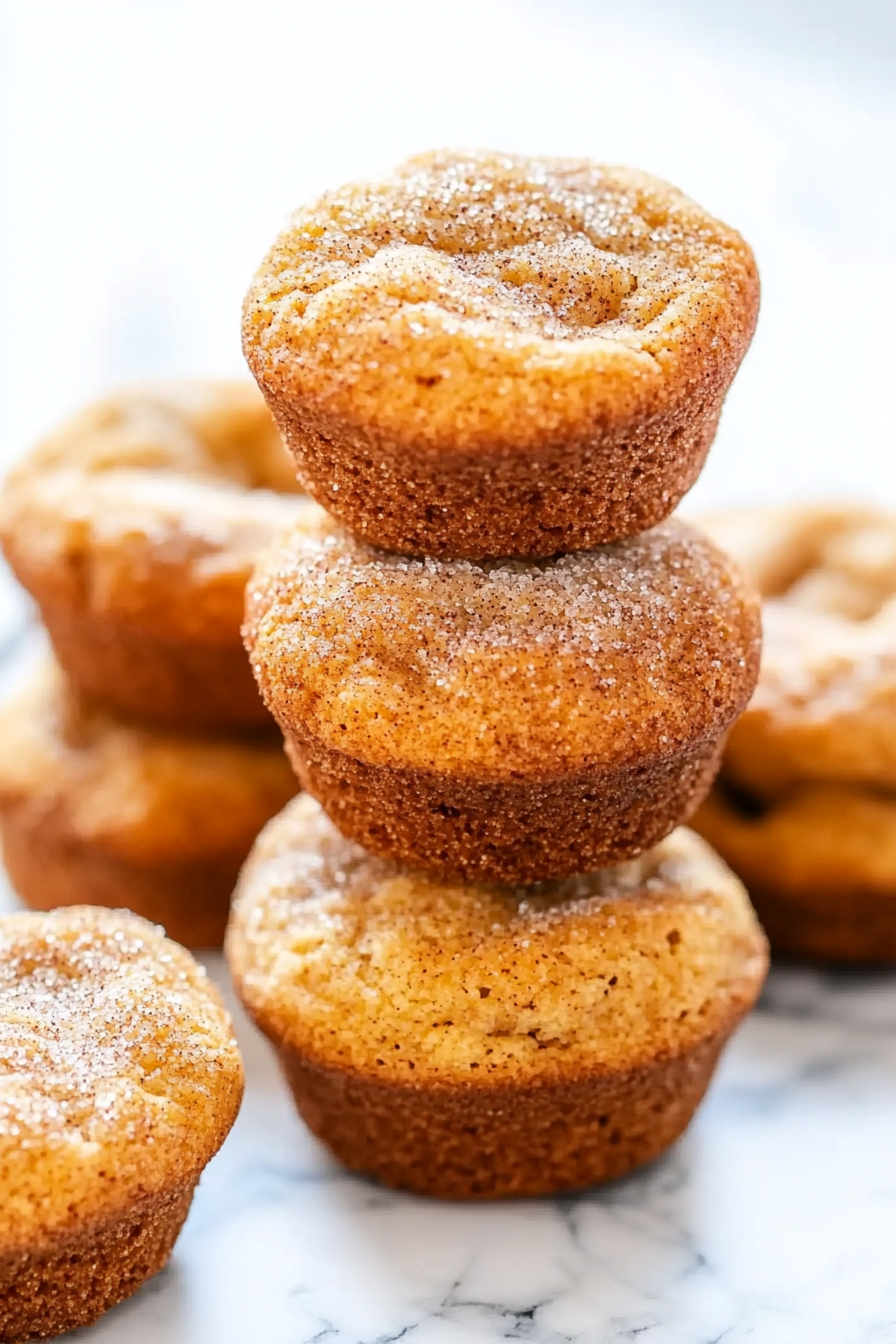
Cinnamon Sugar Mini Muffins How to Bake
There’s just something special about waking up on a lazy weekend morning, the smell of freshly baked cake wafting through the house, and my kids eagerly waiting at the table. I always do this zucchini swirl coffee cake when I want something comforting but with a little twist — it’s basically a hug in dessert form. And honestly, it’s become our family’s secret weapon for those mornings when you need a little sweetness, but also want to sneak in some veggies. I remember the first time I made this, my husband took one bite, looked at me, and said, “Whoa, where has this been all my life?” Trust me on this one — it’s insanely good, easy to pull together, and the swirl of tender zucchini just makes it feel like a breakfast treat with a sneaky veggie punch. This one’s a lifesaver on busy nights, and my kids ask for it all the time. The best part? It disappears in minutes at my house. If you’re craving something warm, moist, and loaded with flavor, you’ve gotta try this. You’ll see what I mean when the smell alone brings everyone to the kitchen!
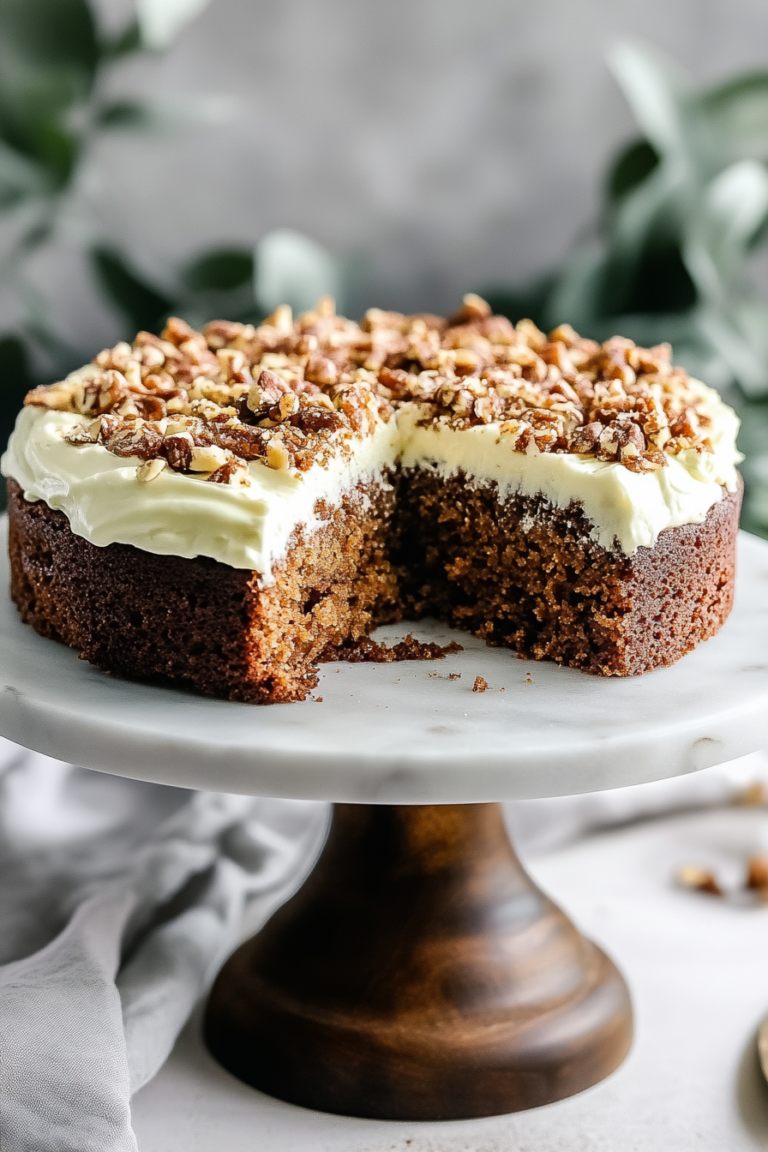
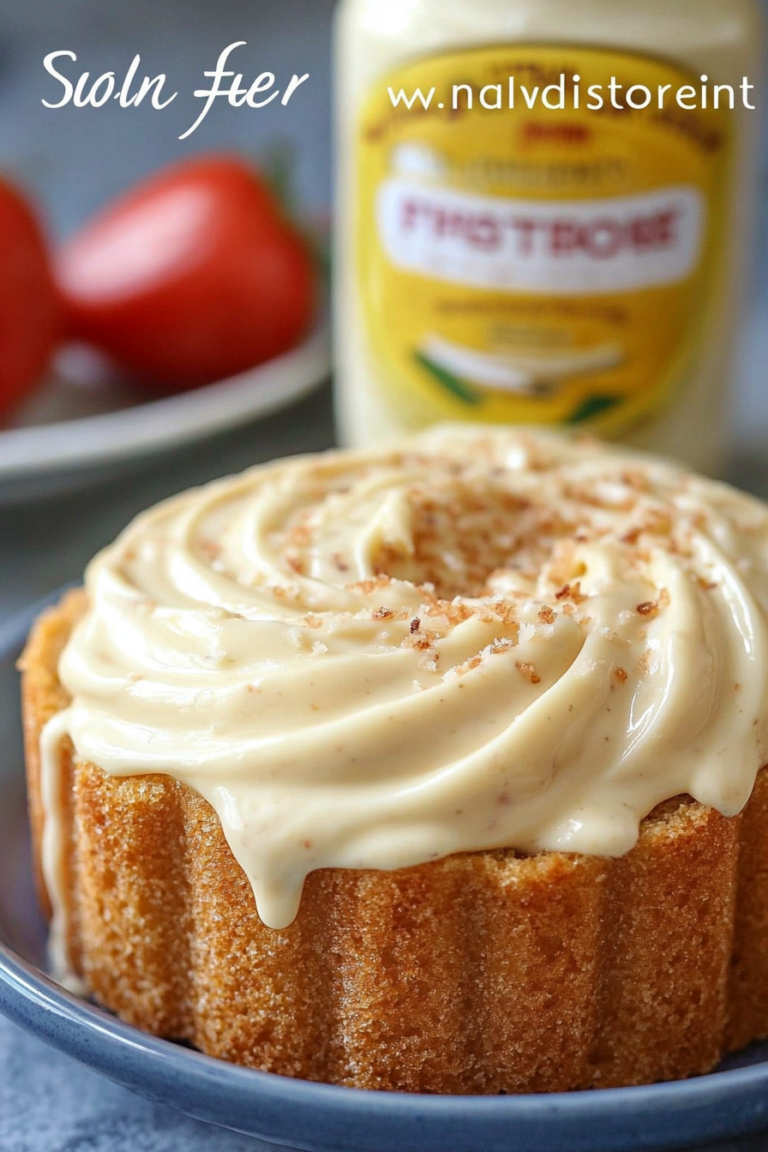
What is Zucchini Swirl Coffee Cake?
Think of it as a baked love letter to summer zucchini, layered with a sweet, cinnamon-y filling, all topped with a cozy crumb. It’s essentially a coffee cake — which means it’s meant to be enjoyed with a mug of steaming coffee or tea in hand — but with a twist. The “swirl” part comes from folding in grated zucchini into the batter, creating a moist, tender crumb that’s packed with hidden veggies. The name might sound fancy, but trust me, it’s incredibly straightforward. It’s like your favorite cinnamon roll but with a vegetable upgrade that doesn’t compromise on flavor. The key here is the way the zucchini melts into the batter, giving each bite a subtle sweetness and a slight veggie boost that even kids love. It’s kind of a breakfast, a snack, and a dessert all in one — I like to think of it as my secret weapon for sneaking health into treats. And if you’ve ever struggled with dry cake, this zucchini keeps it irresistibly moist every single time.
Why you’ll love this recipe?
What I love most about this zucchini swirl coffee cake is how effortlessly it hits all the right notes—flavor, texture, and comfort. The first thing people notice is how incredible it smells as it bakes — that warm cinnamon and vanilla fill the house like a hug. The flavor? Ahhh, it’s a delightful dance of sweet, slightly nutty zucchini, balanced by a tender crumb that melts in your mouth. And let’s be honest, it’s surprisingly easy to make. I’ve tested this countless times, and I swear I can whip it up even on my busiest mornings; it’s literally one bowl and a few simple steps. Plus, it’s such a budget-friendly dessert—no fancy ingredients required, just everyday staples. You can also get creative with add-ins: chopped nuts, a drizzle of cream cheese glaze, or even a handful of berries if you’re feeling adventurous. Best of all? It’s versatile. Serve it warm for breakfast, as a cozy snack, or dress it up with a dollop of whipped cream or a scoop of vanilla ice cream for dessert. It’s one of those recipes that turns a simple weekend into a little celebration every time. And honestly, I make this so often that I practically know the recipe by heart now—for good reason! It’s become my go-to when I want to bake something that makes the house smell amazing and keeps everyone happy.
How do I make Zucchini Swirl Coffee Cake?
Quick Overview
In just about 10 minutes, you’ll have your batter ready for the oven — it’s that simple. The trick is to grate the zucchini and squeeze out excess moisture, so the cake stays moist but not soggy. Then, you mix the dry ingredients, whisk together your wet stuff, combine gently, layer in your zucchini swirl filling, and bake until golden and springy. The swirl of cinnamon-sugar combined with the zucchini creates a beautiful ribbon through the middle of the cake. Once baked, I love to let it cool just enough to slice easily and then top with a light glaze or dusting of powdered sugar. It’s a straightforward process, but the result feels fancy enough to serve at brunch or share at the family gathering. Honestly, I’ve made this for years, and it’s still one of the most requested weekend treats — highly recommend giving it a try!
Ingredients
For the Main Batter:
– 2 cups all-purpose flour (I always use unbleached for that hearty flavor)
– 1 cup granulated sugar (can tweak here for less sweetness if desired)
– 1 teaspoon baking powder
– 1/2 teaspoon baking soda
– 1/2 teaspoon salt
– 2 teaspoons ground cinnamon
For the Zucchini:
– 2 small zucchinis (about 1 to 1.5 cups grated)
– A pinch of salt for squeezing out moisture
– A teaspoon of lemon juice (I tested this and it brightens the flavor)
For the Wet Ingredients:
– 1/2 cup vegetable oil or melted butter
– 2 large eggs
– 1 teaspoon vanilla extract
– 1/2 cup sour cream or Greek yogurt (makes it extra tender)
For the Filling & Swirl:
– 1/2 cup brown sugar
– 1 tablespoon cinnamon (more if you love that spicy punch)
– 2 tablespoons softened butter
For the Glaze (optional but lovely):
– 1 cup powdered sugar
– 2-3 teaspoons milk or cream
– A splash of vanilla
– A pinch of salt (trust me on this, it balances the sweetness)
Step-by-Step Instructions
Step 1: Preheat & Prep Pan
Set your oven to 350°F (175°C). Grab a 9-inch round or square baking pan, grease it well, and line it with parchment paper if you like to make removal easier. I always do this because it prevents sticking and keeps the edges neat. While the oven heats, grate your zucchinis and immediately sprinkle them with a tiny pinch of salt, then squeeze out as much moisture as you can — I use a clean kitchen towel and give it a good twist. Moisture is sneaky, and too much can make the cake dense rather than moist—lesson learned after a few tries!
Step 2: Mix Dry Ingredients
In a large bowl, whisk together your flour, sugar, baking powder, baking soda, salt, and cinnamon. This ensures even distribution so every bite gets a cinnamon kick. I like to sift the dry ingredients just to keep everything light and fluffy, but if you’re in a hurry, a good whisk works too.
Step 3: Mix Wet Ingredients
In a separate bowl, combine your eggs, oil, vanilla, and sour cream. Whisk until smooth. The sour cream adds such a nice tang and keeps the cake moist — I tested it with Greek yogurt, and it turned out just as fabulous. When your zucchini is squeezed dry, fold it into this wet mixture. It’ll seem a little thick, but don’t worry — that’s how it’s supposed to be.
Step 4: Combine
Pour your wet mixture into the dry ingredients and fold gently. No overmixing! You want just combined – a few streaks are fine. Overmixing can develop gluten and make the cake tough, so handle it with love. You’ll notice the batter is thick but silky, a good sign it’s ready for the pan.
Step 5: Prepare Filling
Mix the brown sugar, cinnamon, and softened butter until crumbly but cohesive. This will create that irresistible cinnamon swirl. I like to set aside a small spoonful to sprinkle on top later just for that extra crunch and flavor punch.
Step 6: Layer & Swirl
Pour about half of the batter into your prepared pan. Spread evenly. Dollop spoonfuls of the cinnamon-sugar filling, then cover with the rest of the batter. Use a butter knife or skewer to swirl through the layers, creating beautiful ribbon swirls of cinnamon and zucchini. Trust me, don’t overdo it — just a few gentle zigzags will do the trick.
Step 7: Bake
Bake for 35-40 minutes, or until the top is golden and a toothpick inserted comes out clean. My oven runs a little hot, so I start checking around 33 minutes. The smell should be heavenly, and the edges might be slightly crispy. If it browns too fast, loosely tent with foil. Every oven is different, so use visual cues and a toothpick test rather than timing alone.
Step 8: Cool & Glaze
Let the cake cool in the pan for about 15 minutes. Transferring it to a wire rack then makes the edges crisp up nicely, plus it’s just easier to cut later. Once cooled to just warm (not cold), drizzle with your powdered sugar glaze. I keep it simple — just powdered sugar and a splash of milk — but I’ve also added a touch of lemon or vanilla for a flavor upgrade.
Step 9: Slice & Serve
Use a sharp knife to cut neat slices — wait until it’s fully cooled to avoid crumbling. Serve it warm with a dollop of yogurt or a scoop of vanilla ice cream for a dessert feel. Honestly, my kids love it as is, sometimes with a little extra cinnamon sprinkled on top. It’s fantastic slightly warmed the next day too, so I always make a double batch. Trust me, once you make this, it’ll become a weekend staple that everyone asks for.
What to Serve It With
This coffee cake pairs beautifully with a steaming cup of coffee or tea — my personal favorite is a strong drip with a splash of milk. For brunch, serve it alongside scrambled eggs and fresh fruit for a balanced spread. It’s also perfect for afternoon coffees with friends; a few extra berries or a dusting of powdered sugar make it look Instagram-worthy. And as a dessert, I love slicing it warm and serving it with a scoop of vanilla ice cream or a drizzle of honey. This cake’s versatility always surprises me — it’s just that kind of recipe that adapts to every occasion. At my house, it’s tradition to enjoy it with a big mug of coffee on Saturday mornings — the smell just makes everyone slow down and savor the moment. And let’s not forget, it’s my secret to getting those veggies in without any fuss — sneaking zucchini in for a moist, flavorful treat that feels indulgent but secretly healthy.
Top Tips for Perfecting Your Zucchini Swirl Coffee Cake
Growing up, I always thought cake had to be complicated, but this recipe really shows that simple ingredients can turn into something magical. A few tricks I’ve learned over the years make all the difference. First, squeezing out excess moisture from the zucchini is a game changer — I use a fine grater and a sturdy kitchen towel to do this, and it prevents that soggy texture. I also recommend handling the batter gently; overmixing will give you a dense crumb, which is the opposite of what we want. When layering and swirling, don’t be afraid to go big on the cinnamon filling — it’s what makes this cake special. You can also swap out ingredients — I’ve experimented with coconut oil and almond flour (for a gluten-free version), and honestly, it still turns out fantastic, though the texture shifts slightly. Baking is all about balance, so keep an eye on your cake as it bakes — every oven is different. And finally, for the glaze, I like it thick but pourable. A little lemon zest in the glaze adds a bright note, which balances the sweetness beautifully. Trust me, these little tweaks turn this good recipe into a real showstopper — it’s all about the love and patience you put into it!
Storing and Reheating Tips
This cake keeps surprisingly well. Once cooled, I store it in an airtight container at room temperature for up to two days — just cover it loosely with foil or a clean towel, and it stays moist and flavorful. If you want to keep it longer, pop it in the fridge for up to 4 days. To reheat, just warm a slice in the microwave for about 20 seconds, and it’ll be just as soft and cozy as fresh out of the oven. For freezing, wrap individual slices tightly in plastic wrap, then tuck into a freezer bag. It’s great to have on hand for when that craving hits, especially during busy mornings. When ready to serve from frozen, microwave for 30-40 seconds — the aroma alone will make you feel at home. And about the glaze — I like to add that fresh after reheating, so it stays shiny and sweet. Honestly, this cake holds up beautifully, making it a go-to for those times I want a quick, satisfying treat without fresh baking every day. Once thawed, the texture remains moist and tender, just like it’s fresh out of the oven.
Frequently Asked Questions
Final Thoughts
This zucchini swirl coffee cake has become such a beloved part of my weekend routine. Its moist crumb, cinnamon-spiked swirl, and that hidden veggie punch make it wholesome yet indulgent. Every time I bake it, I’m reminded how simple ingredients transform into a comforting, nostalgic treat — perfect for breakfast, a snack, or a weekend dessert. I’ve tested and tweaked this recipe over the years, and I still get excited when I see that first slice come out golden and crackly on top. If you’re looking to add a little cozy magic to your kitchen, I wholeheartedly recommend giving this a try. Once you taste that first warm bite, I bet you’ll find yourself circling it back into your baking rotation — I sure do! And honestly, I can’t wait to hear how yours turns out. Share your pictures and variations in the comments below — happy baking, my friend!
Snickerdoodle Mini Muffins
Ingredients
Method
- Preheat oven to 350F. Spray two 12-count mini muffin pans with floured cooking spray; set aside.
- In the bowl of a stand mixer fitted with the paddle attachment (or large bowl and hand mixer), combine egg, butter, sugars, vanilla, and beat on medium-high speed to cream ingredients until light and fluffy, about 3 minutes.
- Stop, scrape down the sides of the bowl, and add the buttermilk. Beat momentarily to incorporate.
- Add the remaining dry ingredients and mix on low speed until just incorporated; don’t overmix. Batter will be fairly thick.
- Using a spoon sprayed with cooking spray so the batter slides off easily, drop rounded tablespoons into prepared pans. Fill each cavity about 2/3 to 3/4-full. I recommend dividing batter equally among the 24 wells.
- Bake for 10 to 15 minutes, or until muffins are domed with set centers, springy to the touch, and a toothpick inserted in the center comes out clean.
- Allow muffins to cool in the pans for about 10 minutes before removing. While the muffins cool, prepare the topping.
- In a small microwave-safe bowl, melt the butter, about 1 minute on high power; set aside.
- In a separate small bowl, stir together the sugar and cinnamon; set aside.
- After the muffins have cooled, dip the top of each muffin briefly in melted butter, then in cinnamon-sugar, and repeat until all muffins have been coated. Serve immediately.
This sounds so cozy and perfect for weekend mornings! I love how baking brings families together.
I love this idea—those weekend mornings with homemade treats are the best! The kids will absolutely adore these muffins.
I love this cozy weekend baking vibe! The cinnamon sugar scent really makes mornings feel extra special.