
Creamy Coconut Cake How to Bake It
There’s something about the smell of baking that instantly takes me back to childhood — those lazy Sunday mornings at grandma’s house, the scent of cinnamon and ripe bananas filling every corner of the kitchen. I love that feeling, and honestly, it’s what makes sharing recipes so special for me. Today, I want to tell you about my favorite zucchini banana bread with a sweet glaze — a recipe I’ve made countless times, and somehow, it’s gotten better every single round. It’s not just banana bread; it’s a cozy, slightly veggie-hidden, ultra-moist loaf that’s perfect for breakfast, teatime, or even a late-night treat. The best part? It’s ridiculously easy, and I’ve found just the right balance of sweetness and warmth to satisfy both kids and grown-ups alike. Trust me, this one’s a lifesaver on busy nights, and the smell alone will have everyone gathering in the kitchen ready to grab a slice. Let’s dive into it — I promise you’ll fall in love.
What is Zucchini Banana Bread?
Think of zucchini banana bread as a cheerful twist on the classic banana bread we all love — but with a secret vegetable sneaking in for extra moisture and nutrition. It’s essentially a moist, tender loaf made with ripe bananas, grated zucchini, and warm spices. The name might sound fancy, but it’s super simple. The zucchini blends into the batter, adding a subtle green hue and soft texture, while the bananas bring that comforting sweetness and richness. This bread is all about comfort without sacrificing health; I always do this when I want something sweet but don’t want to feel guilty afterward. It’s perfect for breakfast, a quick snack, or even packed in your kid’s lunch. I adore how adaptable it is — you can add nuts, chocolate chips, or even dried fruit if you’re feeling fancy. Honestly, once you taste it, I bet you’ll make it weekly.
Why you’ll love this recipe?
What I love most about this zucchini banana bread is how forgiving and versatile it is. It’s a family favorite, and my kids actually ask for seconds (yes, that’s rare with veggies involved!). The flavor is a beautiful blend of sweet bananas with just a hint of spice from cinnamon and nutmeg — I always say it smells like fall in the oven. Plus, it’s insanely easy to whip up, even on lazy weekends or busy mornings. The batter comes together in minutes, and once it’s in the oven, the house fills with that warm, inviting aroma that instantly lifts everyone’s spirits. Budget-wise, you’re just using pantry staples: bananas, zucchini, flour, eggs, and a few spices. I’ve tested this with different sweeteners and even almond milk — little tweaks that make it even more tailored to my mood. The best part? It keeps well for days and makes every snack feel a bit more special. My friends have even told me it’s better than any bakery store-bought version — high praise around here!
How do you make Zucchini Banana Bread?
Quick Overview
This zucchini banana bread is basically a no-fuss bake. You start by grating the zucchini and mashing the bananas; then, you mix the wet ingredients and dry ingredients separately. Combine them gently, layer in your favorite add-ins if you like, and bake. It’s foolproof, and I always do this when I want an effortless, warm loaf with an irresistible smell. The magic is in the moistness that zucchini brings — it keeps the bread soft for days — and the bananas, which add just the right amount of sweetness. Once it’s baked and cooled, I brush it with a simple glaze that’s sweet, yet not overpowering, giving it that Starbucks-worthy finish without any fuss.
Ingredients
For the Main Batter:
– 2 cups all-purpose flour (I like using unbleached for a bit more flavor)
– 1 teaspoon baking soda
– 1 teaspoon baking powder
– ½ teaspoon salt
– 1 teaspoon ground cinnamon (my secret ingredient for cozy flavor)
– ½ teaspoon nutmeg
– 1 cup granulated sugar (or brown sugar if you prefer richer flavor)
– ½ cup vegetable oil (or melted coconut oil for aroma)
– 3 ripe bananas, mashed
– 1 cup grated zucchini (squeeze out excess moisture — trust me on this!)
– 2 large eggs
– 1 teaspoon vanilla extract
For the Filling:
– Optional: ½ cup chopped walnuts or chocolate chips — I tested both, and they’re equally good!
– For a fun twist, I sometimes add a sprinkle of shredded coconut or dried cranberries.
For the Glaze:
– ½ cup powdered sugar
– 1-2 tablespoons milk (dairy or almond for vegan)
– ½ teaspoon vanilla
– Optional: a splash of lemon juice or a dash of cinnamon for flavor variation
Step-by-Step Instructions
Step 1: Preheat & Prep Pan
Set your oven to 350°F (175°C). Grease your loaf pan well — I like butter and a dusting of flour or parchment paper. The smell of batter sticking is heartbreaking, so don’t skip this part. Focus on the oven temperature—it’s the foundation for that perfectly risen loaf with just the right crust.
Step 2: Mix Dry Ingredients
In a large bowl, whisk together flour, baking soda, baking powder, salt, cinnamon, and nutmeg. This ensures everything is evenly distributed and your bread bakes uniformly. A quick step that saves you from clumps later!
Step 3: Mix Wet Ingredients
In another bowl, mash your bananas really well — I like using a fork or an immersion blender. Whisk in the sugar, eggs, oil, and vanilla until smooth. I always do this while the bananas are at room temp, so they mash easily and blend smoothly.
Step 4: Combine
Pour the wet mixture into the dry ingredients slowly, stirring gently. Don’t overmix — a few lumps are okay! Overmixing can make the bread dense. Fold in the grated zucchini last — this is where patience pays off. If you want mix-ins, fold those in now too.
Step 5: Prepare Filling
If you’re adding nuts or chocolate chips, fold them into the batter or sprinkle on top for a layered effect. I love swirling in some extra mashed banana or a swirl of jam for a surprise inside.
Step 6: Layer & Swirl
Pour about half the batter into the pan, then add your filling or swirl, and top with remaining batter. Use a skewer or knife to swirl gently, creating marbled patterns. Visuals matter — the prettier it looks, the tastier it seems.
Step 7: Bake
Pop it in the oven for about 50-60 minutes. Check doneness with a toothpick inserted in the center; it should come out clean. Every oven is different, so start checking at 50 minutes. The top should be golden, and the house smells like heaven.
Step 8: Cool & Glaze
Let the bread cool in the pan for about 10 minutes, then transfer to a wire rack. While it’s still warm, whisk together your glaze ingredients and drizzle over the loaf. The warmth helps the glaze seep in just enough for that glossy, inviting look.
Step 9: Slice & Serve
Once cooled completely, slice with a serrated knife. I like cutting thick slices—bonus: they’re perfect for butter or a smear of cream cheese. A little extra glaze on top, maybe a sprinkle of chopped nuts, makes it extra special.
What to Serve It With
This loaf is a chameleon. I usually have it with my morning coffee — it’s the kind of bread that makes waking up feel cozy. My kids love it toasted with a smear of peanut butter or a dollop of Greek yogurt on the side. For brunch, I serve slices with fresh berries and a side of honey-laced latte. It’s also wonderful as a dessert, topped with a dollop of whipped cream or a drizzle of caramel. I even pack leftovers in the lunchbox for a nutritious mid-afternoon snack. Once, I added a smear of mascarpone and berries on top — absolute winner! If you’re craving something quick and comforting, this loaf disappears in minutes at my house because everyone asks, “When’s the next batch?” Trust me, this recipe is a keeper that stretches across breakfast, snack, and dessert zones.
Top Tips for Perfecting Your Zucchini Banana Bread
After making this dozens of times, I’ve learned a few tricks to make it even better:
- Zucchini Prep: Always squeeze out excess moisture from the grated zucchini — I use a clean towel or paper towel. Too much water can make the bread soggy, and nobody wants that.
- Mixing Advice: Be gentle when combining wet and dry ingredients. Overmixing yields dense bread. When it’s just combined, stop!
- Swirl Customization: Play with patterns — a few gentle swirls with a butter knife make it look artistic and add visual interest. Think of it as a little “art project” while baking.
- Ingredient Swaps: You can swap out some sugar with honey or maple syrup — just reduce the liquid slightly to compensate. Also, using applesauce instead of oil makes it even healthier, but I find it a tad less moist.
- Baking Tips: Always check around the 50-minute mark to prevent overbaking. Every oven heats differently. A light golden crust and the clean toothpick test are your best guides.
- Glaze Variations: Swap vanilla for a splash of lemon juice in the glaze for a citrusy zing, or add a teaspoon of cinnamon for an extra kick. The glaze can be whatever you fancy — it’s your bread!
Honestly, I’ve learned from my mistakes (like forget to squeeze zucchini and ending up with a watery loaf) and those lessons helped me refine this recipe. It’s become one of those “every Sunday bake” kind of dishes — warm, inviting, and just a little bit special.
Storing and Reheating Tips
This bread stays moist and flavorful for days — I often leave it on the counter covered with a clean towel for 2-3 days. If I want it to last a bit longer, I wrap it tightly in foil and keep it in the refrigerator for up to 5 days. Honestly, it’s still delicious cold or slightly toasted. For longer storage, I pop slices in the freezer — wrapped in plastic wrap and then in a zip-top bag. When I’m ready to eat, I just microwave for 20-30 seconds or warm it in the toaster oven until it’s just warm enough to melt a bit of butter. The glaze can get a little sticky if stored too long, so I recommend adding it fresh after reheating instead of storing it together. If you plan on making the glaze ahead, keep it in the fridge and give it a quick stir before drizzling. That way, every slice feels fresh and special every time.
Frequently Asked Questions
Final Thoughts
Honestly, this zucchini banana bread is one of those recipes that feels like a warm hug on a plate. It’s forgiving, tasty, and the zucchini sneaks in a little health if you’re into that kinda thing — which I am! I love how the aroma fills my home and how everyone asks for seconds. It’s perfect for lazy weekends, busy mornings, or whenever you need a little comfort. Plus, it’s so adaptable — I’ve added chocolate, nuts, dried fruit, you name it. Once you make this once, I bet it becomes a staple in your kitchen too. I always say, baking from the heart just tastes better, and this bread is a testament to that. I hope you give it a try and love every bite as much as I do. Happy baking — can’t wait to hear how yours turns out! Don’t forget to leave a comment or share your own twist. Cheers to good food and even better memories!
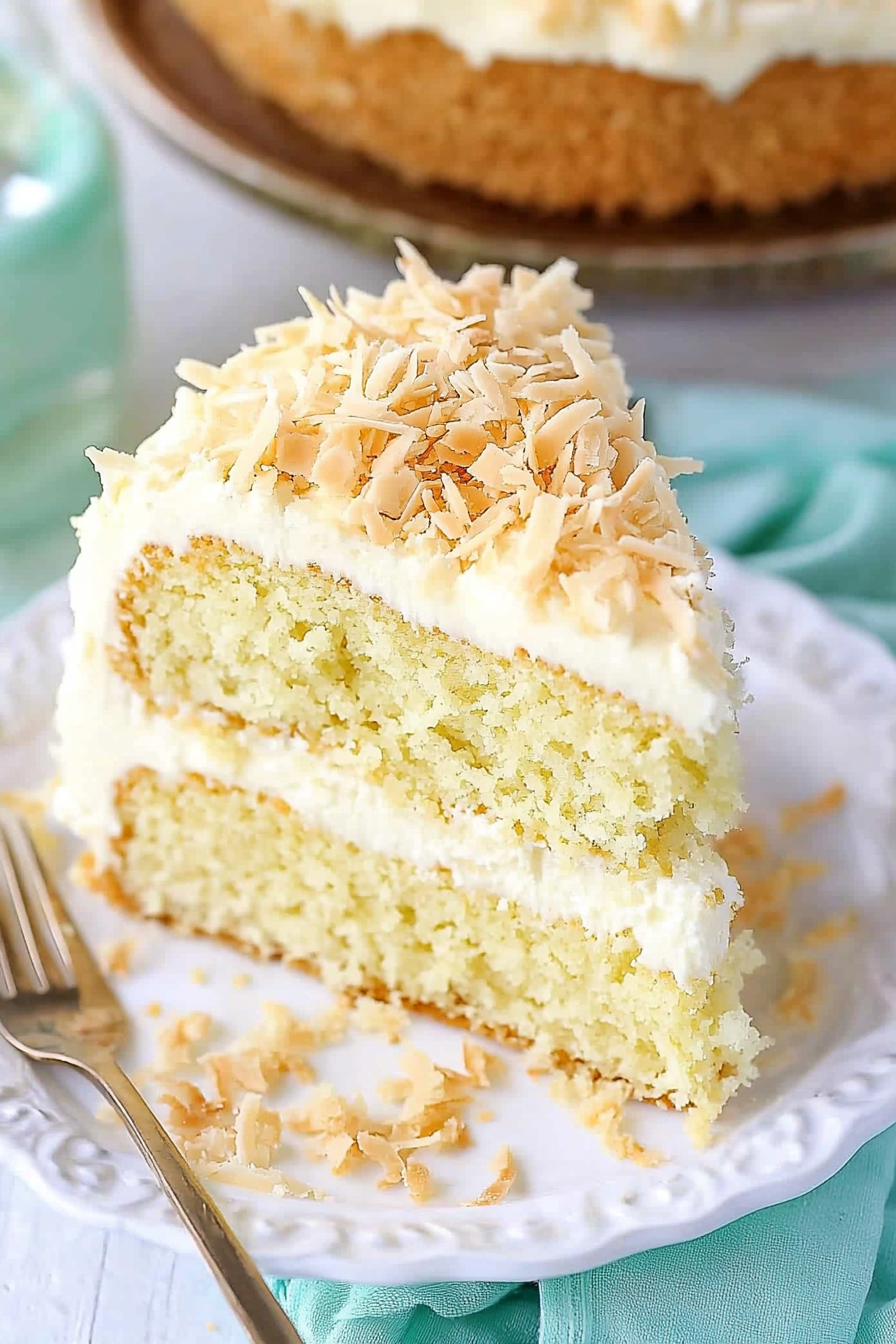
Coconut Cake
Ingredients
Method
- Preheat oven to 350°F. Prepare three 8-inch cake pans with parchment paper and grease the sides.
- In a medium bowl, whisk together flour, baking powder, and salt. Set aside.
- In a large mixing bowl, beat butter, sugar, coconut extract, vanilla, until light and fluffy. Add eggs one at a time, mixing well after each.
- Alternately add dry ingredients and coconut milk to the batter, beginning and ending with dry ingredients. Mix until just combined.
- Divide batter evenly into prepared pans. Bake for 20-25 minutes, until a toothpick inserted in the center comes out clean.
- Cool cakes in pans for 10 minutes, then turn out onto wire racks to cool completely.
- Meanwhile, prepare coconut custard: Whisk egg yolks with 6 tbsp sugar and cornstarch. Heat milk in a saucepan until boiling.
- Gradually pour hot milk into egg mixture, whisking constantly. Return to saucepan and cook over medium heat until thickened.
- Remove from heat, stir in shredded coconut, butter, coconut extract, vanilla. Cover and refrigerate until cooled.
- Make frosting: Beat cream cheese and butter until smooth. Gradually add powdered sugar, coconut extract, vanilla, until fluffy.
- Assembling: Level cakes if needed. Spread coconut custard between layers, frost outside, then press toasted coconut onto sides and top.
- Refrigerate before serving. Best enjoyed within 3 days.


That sounds absolutely divine! I can almost smell it now—what a comforting memory.
This reminds me of my abuela’s kitchen too—there’s nothing like the warmth of a homemade coconut cake to make you feel at home. Can’t wait to try this!
This cake sounds absolutely comforting! I love how baking can bring back such warm memories — the aroma really does feel like a hug from the past.
This cake brings back so many warm memories! The coconut and banana combo is pure nostalgia — I can almost smell it from here.