

Festive Pinwheel Cookies How to Bake Them
I get it—food’s not just about filling your belly. It’s about those moments in the kitchen that make you smile, the early mornings where the smell of baking wafts through the house, or that sweet, crumbly bite that takes you right back to childhood. This zucchini banana loom cake? It’s one of those kinds. I’ve lost track of how many times I’ve made this, often on a whim when I’ve got a lonely zucchini sitting in the veggie drawer or some ripe bananas that are just begging to be used. My kids ask for this all the time—especially when I sneak in a little extra zucchini for that sneaky humid moisture—and let me tell you, it disappears in minutes at my house. It’s surprisingly easy, ridiculously tasty, and the perfect cozy slice on a quiet weekend.
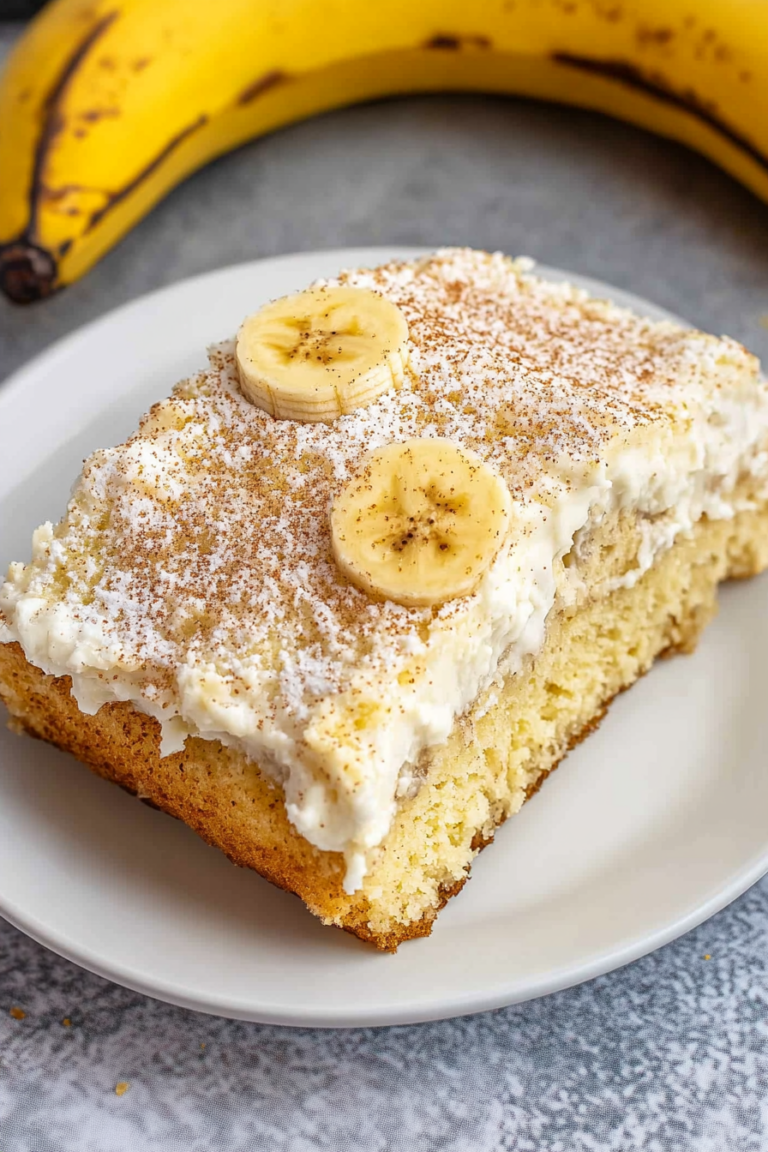
What is a Zucchini Banana Loom Cake?
This cake is pretty much what I’d call a sneaky, feel-good kind of dessert—think of it as a cross between a moist loaf and a light cake, with a great little hidden health boost from zucchini. The name might sound a little quirky, but honestly, it’s just about using what you have on hand—bananas for sweetness and zucchini for moisture. It’s essentially a mellow, bread-like cake that’s loaded with mashed bananas and grated zucchini, giving it that tender texture everyone loves. Plus, it’s topped with a light glaze that’s optional but totally worth it. Think of it as a “healthy-ish” treat that’s perfect for breakfast, snack, or dessert—because who says you can’t have cake all day?
Why you’ll love this recipe?
What I love most about this zucchini banana loom cake is how it balances flavor and ease. The sweet bananas give it that cozy, inviting aroma—you know, that smell that makes your house feel warm and welcoming—and the zucchini keeps it outrageously moist without being greasy. It’s a total crowd-pleaser, perfect for brunch or a quick snack, but I often turn to it when I need something sweet and wholesome after a long day. The best part? It’s ridiculously simple to make, even on those hectic nights when I don’t want to slave over a complicated dessert. Also, budget-wise, the ingredients are everyday staples—ripe bananas, zucchini, flour, sugar—and you probably already have most of what you need in your pantry. And because you can customize it so easily—adding nuts, chocolate chips, or even swapping in whole wheat flour—it’s just so versatile. Honestly, what I love most about this is how it feels like a little hug in every bite—comforting, homemade, with just a hint of goodness that makes you feel good about indulging.
How do you make a Zucchini Banana Loom Cake?
Quick Overview
This cake is a breeze—no fancy gadgets needed. You start by mixing your dry ingredients, then mash your bananas and grate zucchini, and stir everything together. Pour the batter into a loaf pan, add your toppings or swirl in some extras if you like, bake until golden, and finish with a quick glaze. It’s that simple! The key is to keep the batter moist but not overly runny, and to watch for that perfect golden crust before pulling it out. This method ensures a tender, flavorful loaf with just the right amount of sweetness and moisture, thanks to the zucchini. What makes it special is how forgiving it really is—so don’t worry if you’re new to baking or if your bananas are a little overripe. Trust me, you’ll be surprised at how easy and forgiving this recipe can be.
Ingredients
For the Main Batter:
- 2 ripe bananas, mashed – the riper, the better for natural sweetness
- 1 cup grated zucchini – don’t peel, just give it a quick rinse and grate
- 1¾ cups all-purpose flour – or whole wheat for a nuttier flavor
- ½ cup granulated sugar – or honey/maple syrup for a natural sweetener
- 1 teaspoon baking soda
- ½ teaspoon baking powder
- ½ teaspoon salt
- 1 teaspoon cinnamon (optional but adds cozy flavor)
- ½ cup vegetable oil or melted butter
- 3 eggs
For the Filling (Optional):
- Chopped walnuts or pecans for some crunch
- Chocolate chips for extra indulgence
- More cinnamon or a dash of nutmeg for spice variation
For the Glaze:
- 1 cup powdered sugar
- 2-3 tablespoons milk or cream
- A splash of vanilla extract
Step-by-Step Instructions
Step 1: Preheat & Prep Pan
I always start by preheating my oven to 350°F (175°C). While it heats, I butter or line a loaf pan with parchment paper—makes life so much easier when you’re ready to serve. Don’t skip this step; nothing worse than a cake that sticks. Also, I like to set up all my ingredients nearby so I can grab them quickly as I go along—less fuss, more fun.
Step 2: Mix Dry Ingredients
In a big bowl, I whisk together the flour, sugar, baking soda, baking powder, salt, and cinnamon. Breaking up any lumps helps ensure an even distribution of those leavening agents, which keeps the cake light. I’ve learned the hard way that overmixing the dry ingredients can make the batter dense, so I keep it just combined.
Step 3: Mix Wet Ingredients
In a separate bowl, I mash my bananas until smooth—trust me, very ripe bananas mash easily and add the sweetest flavor. I then add the grated zucchini, eggs, and oil, mixing until everything’s nicely combined. Sometimes, I throw in a splash of vanilla for extra depth. The smell alone at this stage? Heavenly.
Step 4: Combine
Pour the wet mixture into the dry ingredients, gently folding together with a spatula. I avoid overmixing here; just stir until the batter is mostly combined, a few lumps are fine. Overmixing can make the cake tough, and we definitely want it soft.
Step 5: Prepare Filling
If I’m adding nuts or chocolate chips, I toss them into the batter now, giving a gentle fold or sprinkle. For swirling in preserves, I usually dollop some batter, add a spoonful of jam or Nutella, then pour on more batter and swirl gently with a skewer or knife.
Step 6: Layer & Swirl
This is the fun part. I pour the batter into the loaf pan, then add some extra toppings on top—like chopped nuts or a sprinkle of cinnamon. If I want a marbled look, I swirl a little spoonful of jam or extra banana through the batter to create beautiful streaks.
Step 7: Bake
Pop it into the oven and bake for about 50-60 minutes, or until a toothpick inserted in the center comes out clean. Every oven is different—I’ve had mine take longer or shorter depending on the humidity or altitude. Keep an eye on it from the 50-minute mark; that golden crust is your cue!
Step 8: Cool & Glaze
Let the cake cool in the pan for about 10 minutes before transferring it to a wire rack. Once cooled, drizzle your prepared glaze over the top while it’s still slightly warm. I like the glaze to be thick but pourable—adjust with more powdered sugar or a splash of milk. It’s that sweet finishing touch that makes everything feel cozy.
Step 9: Slice & Serve
Slice with a serrated bread knife for clean cuts—that way, the slices hold their shape. It’s perfect warm right out of the oven—or even better the next day when the flavors have had a chance to meld. Serve it with a cup of tea, a scoop of yogurt, or just on its own. Honestly, it’s so versatile that it’s become my go-to for almost any occasion.
What to Serve It With
Honestly, I think this cake shines in so many ways. For breakfast, a warm slice with a dollop of yogurt and a drizzle of honey is heavenly. It pairs beautifully with a strong cup of coffee or a glass of milk in the mornings—my kids ask for this almost daily! When I want a more brunchy vibe, I like to serve it with fresh berries and a splash of cream or whipped ricotta. It’s elegant enough for dessert, especially if you add extra chocolate chips or a fruit compote on the side. And on cozy nights when we’re just lounging around, this cake is my secret weapon—great with a cup of herbal tea or a glass of dessert wine. The versatility makes it my family’s favorite pick, and I love knowing I can whip it up with pantry staples, no fuss.
Top Tips for Perfecting Your Zucchini Banana Loom Cake
The first thing I learned over time? Grate the zucchini thoroughly and squeeze out some excess moisture—otherwise, the batter can get a little too wet and mess with that perfect crumb. I used to skip this step, and the cake felt heavy; now, it’s light as air. Also, don’t overmix after adding the wet to dry—it’s a common rookie mistake but totally worth avoiding for that tender texture. When swirling in jam or extra ingredients, use a skewer or a butter knife to create pretty marbling—trust me on this, the visual makes all the difference. I’ve tested substitutions too—whole wheat flour makes it a bit denser but adds a nice nutty flavor, and almond milk works wonderfully instead of regular milk, adding a subtle nuttiness and making it even creamier. When baking, I always position the rack in the middle and keep an eye on the cake’s color—if it darkens too quickly, tent it with foil. For the glaze, I prefer starting with less liquid—a thick drizzle looks more appealing and sets nicely.
The key? Taste, adjust, and don’t be afraid to make it your own. I often add a dash of nutmeg or a handful of chocolate chips—whatever turns this cozy loaf into your personal comfort food. Cooking is about experimenting and enjoying the process, after all!
Storing and Reheating Tips
This cake keeps surprisingly well. I usually store slices in an airtight container at room temperature for up to 2 days—cover it loosely so it stays moist but not soggy. If I want to keep it longer, into the fridge it goes, wrapped tightly—3 to 4 days max. Reheating a slice in the microwave for about 10-15 seconds warms it right up, and the flavors stay fresh. For longer storage, I wrap the whole loaf tightly in plastic wrap and freeze it for up to 3 months. Thaw at room temperature or slightly warm before serving. A quick reheat at low power keeps it soft and cozy. Just don’t forget to add the glaze again if you want that shiny finish—it can sometimes melt or get dull during storage, so a fresh drizzle just before serving makes everything look appealing.
Frequently Asked Questions
Final Thoughts
This zucchini banana loom cake isn’t just another sweet treat—it’s a culinary hug. It’s that quick bake you turn to when you want something comforting but still wholesome. The moist, tender crumb, the gentle sweetness, and that little healthy hint of zucchini just make it irresistible. Plus, it’s incredibly forgiving—I’ve made it with overripe bananas, forgotten to squeeze out extra zucchini, or swapped ingredients on the fly, and it still works like a charm. Trust me, once you’ve tried this, it’ll be your new go-to for lazy Sundays or guilt-free mornings. I’d love to hear how you customize yours—maybe add a handful of chocolate chips or try a drizzle of lemon glaze. Baking, after all, is about making it your own. So, go ahead—grab those bananas and zucchini, and let’s whip up some cozy, homemade goodness. Happy baking!
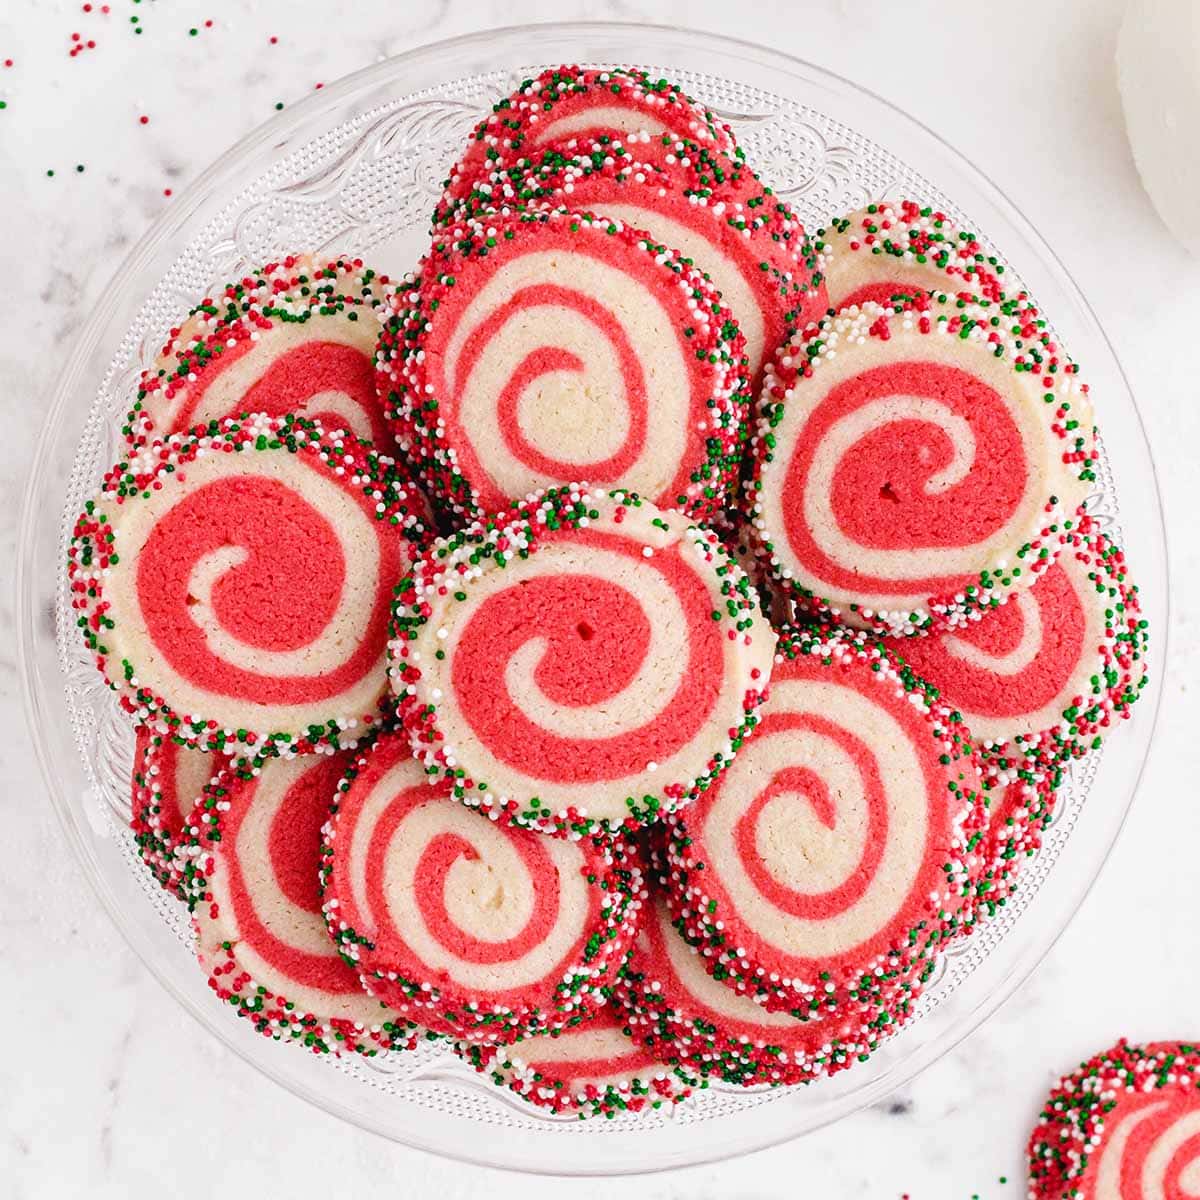
Christmas cookies
Ingredients
Method
- In the bowl of a stand mixer with the paddle attachment, add the sugar, butter, and vanilla extract. Beat on medium until creamy, about 2 minutes.
- Use a rubber spatula to scrape down the sides of the bowl. Add the egg and beat until well combined.
- Add the flour and baking powder, and mix on low speed until no streaks of flour remain.
- Divide dough in half. Color one half with red food coloring and leave the other plain. Wrap each in plastic wrap and refrigerate for 30 minutes.
- After chilling, roll each dough into an 11x7 inch rectangle. Trim edges to straighten.
- Place the colored dough on top of the plain dough, and roll each into a long log. Wrap and refrigerate for 1-2 hours or overnight.
- Preheat oven to 350°F. Slice the dough logs into ¼ to ½ inch thick cookies.
- Place slices on a baking sheet lined with parchment paper, about 1 inch apart. Bake for 9-11 minutes until edges are lightly golden.
- Cool cookies on a wire rack before serving.


I love this recipe! Baking these with my kids made such a special morning together.