

Festive Pinwheel Cookies How to Bake Them
There’s something about baking with zucchini that feels like a little secret—like sneaking vegetables into dessert without anyone catching on. I’ve got fond memories of my grandma’s kitchen, where she’d sneak grated zucchini into her muffins, and I’d always be suspicious but secretly delighted when the bread came out moist and chocolatey. This zucchini chocolate swirl cake is my current obsession—it’s incredibly moist, rich, and packed with flavor, but secretly sneaky with veggies. Honestly, it’s one of those recipes I keep coming back to, especially on busy nights when I want something sweet but don’t want a tub of frosting and a fuss. The best part? It’s super simple, uses pantry staples, and my kids actually ask for seconds! Trust me, once you make this once, you’ll be hooked. Plus, it’s perfect for transforming plain zucchini into a show-stopping dessert that feels fancy but is totally down-to-earth.
What is Zucchini Chocolate Swirl Cake?
This is basically a moist, tender cake infused with shredded zucchini, which adds a subtle earthiness and lots of moisture, making it feel like a treat and a vegetable craving all at once. Think of it as a cross between a fudgy chocolate cake and a vibrant vegetable side dish—kind of like a magic trick in the kitchen. The “swirl” part comes from a luscious swirl of rich cocoa and batter that runs through the cake, creating beautiful marbled patterns that make it look as fancy as it tastes. The name might sound a little funny, but it’s just a way to sneak in some greens without anyone noticing—it’s essentially a chocolate zucchini cake with a swirl of decadence. My friends always ask for the recipe, and I love that it feels like a little culinary secret you can share—something that looks fancy but was actually quick to whip up.
Why you’ll love this recipe?
What I love most about this zucchini chocolate swirl cake is how it hits all the right notes—moist, chocolaty, and beautifully swirled—yet it’s surprisingly simple to make. The flavor is rich and indulgent, thanks to good quality cocoa powder and a touch of vanilla, but the zucchini keeps everything super moist and tender, so no dry bites here. Plus, it’s a real budget-friendly win; I often have all these ingredients sitting in my pantry and fridge, making it a lifesaver on busy nights or last-minute get-togethers. The versatility is another big plus—think brunch, an after-dinner treat, or even a cozy snack with a cup of tea. I’ve tested this with different types of cocoa and even infused a little espresso powder once, and let me tell you, it’s amazing every time. What stands out most to me is how the zucchini adds this wonderful, almost secret moisture that keeps the cake fresh for days—if it lasts that long!
And I can’t forget—kids love it. My little ones ask for this all the time, especially when I tell them it’s “chocolate and veggie” cake, which is basically like a win-win in my book. It’s also a great way to get more greens into picky eaters without the fuss. Honestly, once you’ve made it, it’ll become a staple in your baking repertoire—trust me on this one.
How do I make Zucchini Chocolate Swirl Cake?
Quick Overview
This cake comes together in just a few bowls, with a simple batter made from basic ingredients, then layered with a velvety cocoa swirl for that beautiful marbled effect. The entire process is forgiving—you don’t need to be a baking expert. I always do this when I want a little indulgence with minimal fuss. You start by preparing your zucchini, mixing the wet and dry ingredients separately, then combining them gently. The swirl is my favorite part—the contrast of dark fudgey cocoa against the lighter zucchini batter makes each slice almost too pretty to cut. After baking, you let it cool before draping it with a shiny glaze or just a dusting of powdered sugar. It’s a perfect balance of easy, decadent, and a little bit sneaky—just how I like dessert.
Ingredients
For the Main Batter:
– 2 cups shredded zucchini (about 2 medium zucchinis, grated and drained)
– 1 1/2 cups all-purpose flour (or a mix of half whole wheat for extra fiber)
– 1 cup granulated sugar
– 1/2 cup packed light brown sugar
– 1/2 teaspoon baking powder
– 1 teaspoon baking soda
– 1/2 teaspoon salt
– 1/2 cup vegetable oil or melted coconut oil
– 3 large eggs
– 1 teaspoon vanilla extract
For the Filling (Cocoa Swirl):
– 1/4 cup unsweetened cocoa powder
– 2 tablespoons sugar (or maple syrup for a natural touch)
– 2 tablespoons hot water or milk (to loosen the cocoa paste)
For the Glaze (Optional):
– 1/2 cup powdered sugar
– 1-2 teaspoons milk or cream
– A splash of vanilla or just a sprinkle of cocoa powder for dusting
Step-by-Step Instructions
Step 1: Preheat & Prep Pan
Preheat your oven to 350°F (175°C). Grease a 9-inch loaf pan or round cake pan with butter or non-stick spray and line with parchment paper if you like. I always do this to make sure the cake comes out smooth and neat. Set aside and get ready to mix!
Step 2: Mix Dry Ingredients
In a large bowl, whisk together the flour, baking powder, baking soda, salt, and sugars. This helps distribute everything evenly and prevents clumping. I’ve learned the hard way that dry ingredients need a good whisk to get that tender, crumbly texture just right.
Step 3: Mix Wet Ingredients
In a separate bowl, beat the eggs, then stir in the oil, vanilla, and shredded zucchini. I always squeeze out excess moisture from the zucchini with a clean towel or paper towel before adding it—otherwise, the batter gets way too watery. Don’t worry if it looks a little chunky; that’s fine!
Step 4: Combine
Pour the wet mixture into the dry ingredients and fold gently just until combined—overmixing can make the cake denser. The batter will be thick but pourable. At this stage, it should smell fantastic—like vanilla and cocoa combined.
Step 5: Prepare Filling
Mix the cocoa powder, sugar, and water to make a smooth paste. It should be thick yet spreadable. I tested this with a little bit of milk instead of water, and it made the swirl richer and creamier. Feel free to tweak based on your taste!
Step 6: Layer & Swirl
Pour half of the batter into your pan, then dollop spoonfuls of the cocoa mixture on top. Use a skewer or toothpick to gently swirl the cocoa through the batter—think of it as creating marble art, but in cake form. Don’t over-swirl; a few gentle figure-eights are enough to get that beautiful pattern.
Step 7: Bake
Bake for about 45-50 minutes or until a toothpick inserted in the center comes out clean. My oven runs hot, so I start checking around 43 minutes. It’s done when the top is domed and a little cracked, and the edges are slightly pull away from the pan. If the top starts to brown too quickly, tent it loosely with foil.
Step 8: Cool & Glaze
Let the cake cool in the pan for about 15 minutes, then transfer to a wire rack to cool completely. Once cooled, drizzle with your glaze or dust with powdered sugar. I love a simple glaze because it adds just a touch of sweetness and makes the top look so pretty—and it hides any imperfections, trust me!
Step 9: Slice & Serve
Use a serrated knife to cut neat slices—wait until it’s fully cooled for cleaner cuts. Serve it on a pretty plate with a cup of tea or coffee for the full cozy experience. I swear, this tastes even better the next day, once the flavors have melded.
What to Serve It With
This cake is so versatile. For breakfast or brunch, I love pairing it with a bright, citrusy fruit salad or a dollop of Greek yogurt on the side. When serving as a dessert, I’ll add a scoop of vanilla ice cream or a swirl of whipped cream—my kids go crazy for that combo. On cozy nights, a hot cup of cream or a glass of cold milk complements the rich cocoa flavor beautifully. And honestly, I’ve served it plain with just a dusting of powdered sugar, and it’s still a hit. We also love to enjoy slices with a drizzle of honey or a smear of almond butter for extra flavor and texture. It’s one of those all-purpose desserts that feels elegant but is super comforting—like a warm hug in cake form.
Top Tips for Perfecting Your Zucchini Chocolate Swirl Cake
Over the years, I’ve learned a few tricks that make this recipe even better. First, always squeeze out excess moisture from the zucchini—if it’s too wet, your cake can turn dense or soggy. I’ve tested with both grated fresh zucchini and the frozen kind (just defrosted and drained), and honestly, fresh works better for me. For the swirl, I recommend working quickly—if the cocoa mixture sits too long, it thickens and becomes tricky to swirl smoothly. Trust me on this—practice makes perfect! When it comes to mixing, fold gently but thoroughly to ensure the zucchini is evenly distributed without overworking the batter, which can turn rubbery. For ingredient swaps, I’ve used coconut sugar and it worked beautifully, giving the cake a slightly caramelized note. Gluten-free friends, I’ve had success replacing all-purpose flour with a blend of almond flour and gluten-free oats—just keep in mind it’ll be a bit denser, but still delicious.
In terms of baking, oven turndown—if your cake browns too quickly, tent it with foil and continue baking. My biggest lesson? Always do the toothpick test—better safe than sorry! For the glaze, I find that adding a splash of vanilla or a pinch of cinnamon can elevate this dessert even more. And don’t skip cooling completely before glazing—otherwise, the glaze can melt away. Honestly, I’ve made this countless times, and every time I feel a little proud of myself for sneaking those veggies into something so indulgent. It’s a family favorite that never fails to surprise and delight.
Storing and Reheating Tips
This cake stays moist and delicious for days if stored properly. I usually cover it with a clean towel or place it in an airtight container at room temperature—up to two days, especially in cooler weather. If you’re making it ahead for a gathering, I suggest wrapping it tightly with plastic wrap or foil and refrigeration extends the freshness to about 4 days. To reheat slices, I prefer a quick zap in the microwave—about 10-15 seconds—just until warm. If you add the glaze after reheating, it’s best to do so on the day it’s served, as the syrup can become a little sticky over time. If freezing, wrap slices tightly in plastic wrap, then foil, and store for up to a month. Thaw at room temperature, then add glaze or dust again if needed. I always taste it again after a little reheating—sometimes baking makes the flavors deepen, and it tastes even better!
Frequently Asked Questions
Final Thoughts
There’s something so satisfying about transforming humble ingredients into a dessert that feels indulgent and special. This zucchini chocolate swirl cake is that rare combo—easy enough to whip up on a weeknight, but impressive enough to serve at a weekend gathering. Every time I make it, I find myself sneaking another slice just to savor the moist crumb and rich cocoa. It’s a cake that feels like a warm hug, especially after a long day. Plus, knowing I’ve sneaked in some veggies makes me feel a little better about indulging. Whether you’re baking for family, friends, or just yourself, I promise this will become a go-to. Dive in, enjoy the process, and don’t be surprised if your house fills with the smell of chocolate and zucchini—that’s the sweet sound of comfort baking. Happy baking, and I can’t wait to hear how yours turns out! Don’t forget to leave a comment with your tweaks or pics—sharing is half the fun!
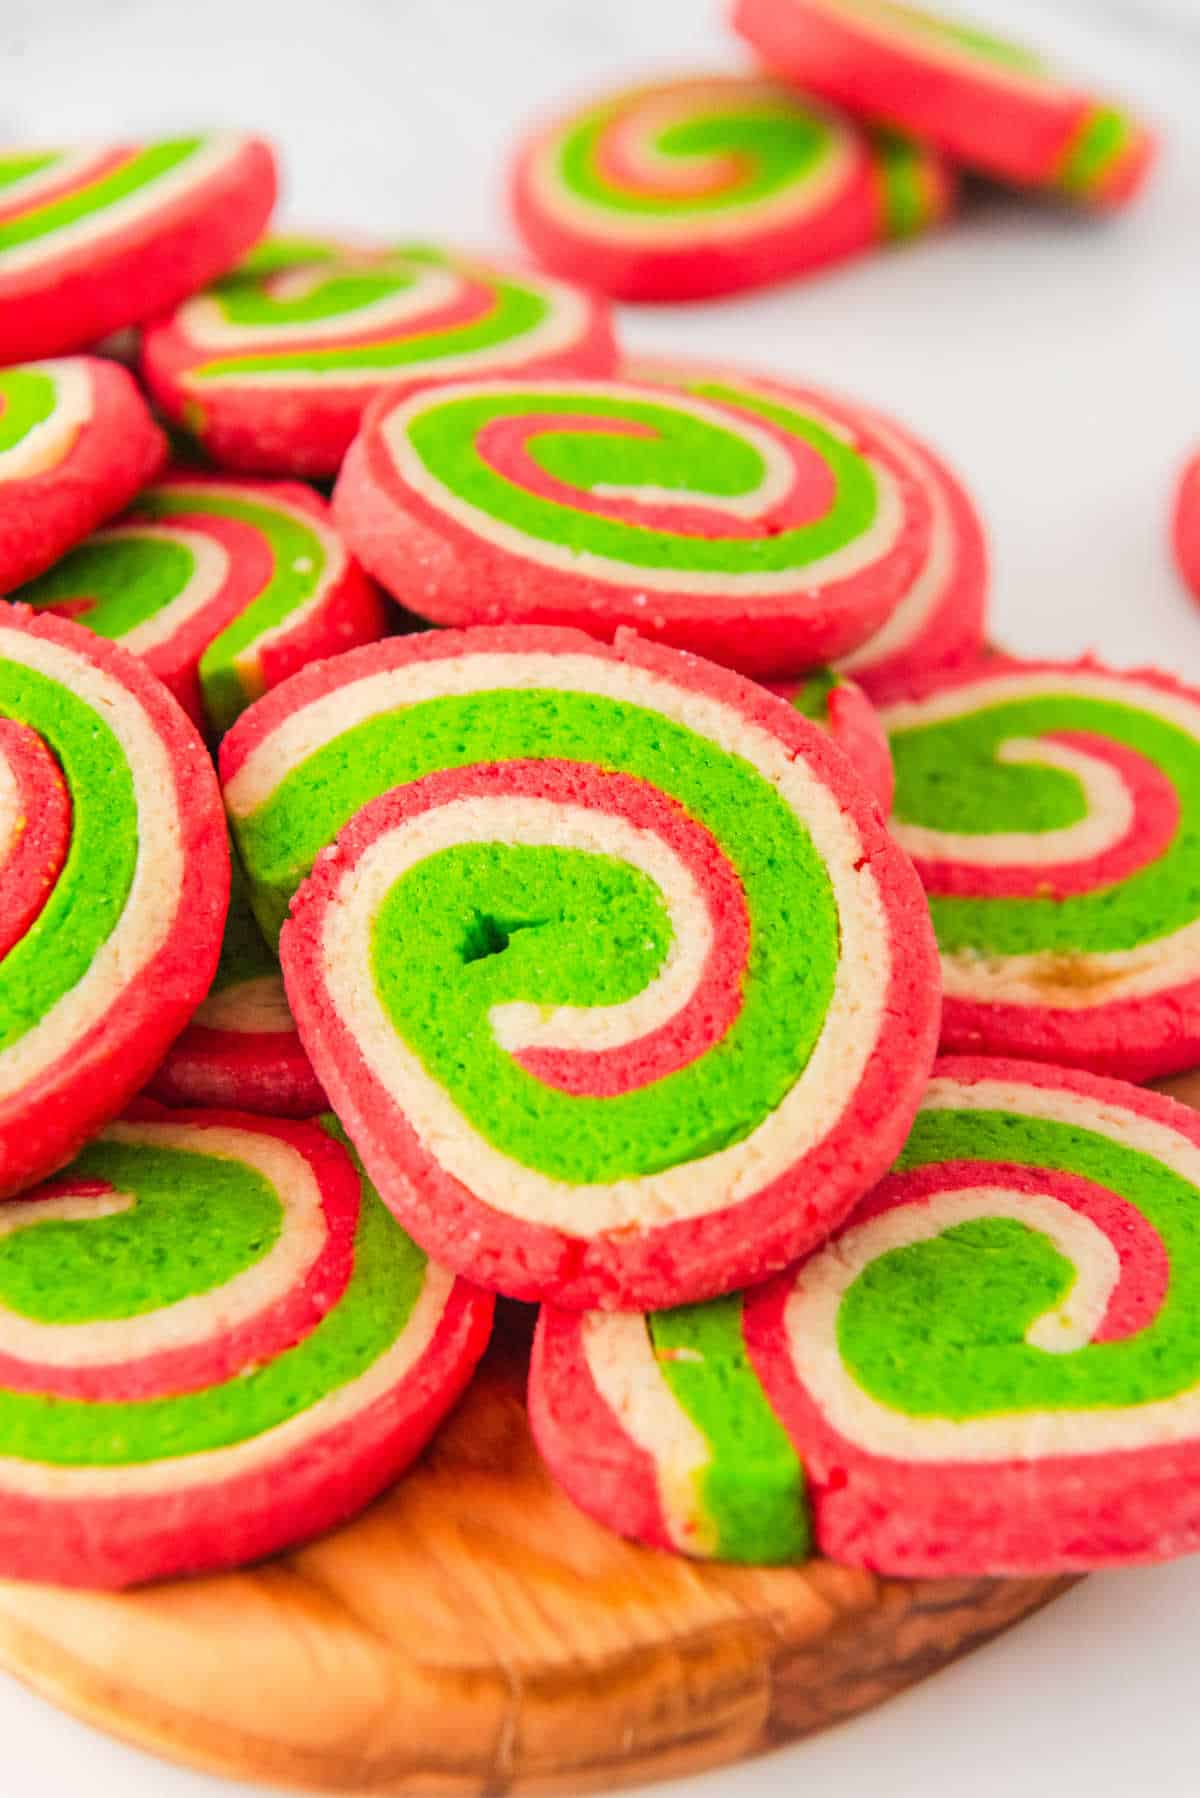
Christmas Cookies
Ingredients
Method
- Add the flour, baking powder, and salt to a large mixing bowl. Stir with a fork to combine and set aside.
- In a separate large mixing bowl, cream together the butter and sugars using a mixer. Beat until smooth.
- Add the egg and vanilla and mix again until smooth.
- Fold in the dry ingredients, half at a time, and mix until a thick and smooth dough forms.
- Divide the dough into three equal parts. Color one part green, another red, and leave the third white. Roll each out flat about ¼ inch thick.
- Layer the colored doughs on top of each other (red - white - green). Use a pizza cutter to cut out a rectangular shape, about 9x13 inches.
- Carefully roll the layered dough into a log, pinching the end to seal. Wrap in plastic wrap and chill for 2 hours.
- Preheat the oven to 350°F near the end of the chilling period.
- Unwrap the dough and slice into ½ inch thick cookies. Place on a parchment-lined baking sheet.
- Bake for 13 to 15 minutes or until just set. Cool on the baking sheet for 1 minute, then transfer to a wire rack to cool completely.
Love these cookies! The zucchini trick is genius—so moist and delicious, no one would guess. Reminds me of baking with my grandma too!
I love the idea of zucchini in cookies—what a clever way to sneak in extra veggies while keeping things delicious!
I love this idea—zucchini in cookies is such a clever way to sneak in veggies! Reminds me of my grandma’s kitchen too.
I love this idea! Zucchini in cookies is such a clever way to add moisture and keep them tender.