
Webby Rice Krispie Treats Recipe
Whenever I think about comfort food that’s just a little bit special, this zucchini swirl loaf pops into my mind. It’s one of those recipes I’ve been making forever—seriously, for over a decade—and it’s still a hit with my family. The smell alone gets everyone lingering in the kitchen, coffee in hand, waiting for a slice. I love that it’s surprisingly simple to whip up on a busy weeknight, but it feels totally indulgent. Plus, it’s a sneaky way to get vegetables into the kids without them even noticing—I swear, they ask for seconds! I’ve tested this with everything from almond milk to coconut oil, and honestly, it just keeps getting better. There’s a cozy, nostalgic feel to this one, kind of like those warm mornings baking with Grandma, but it’s modern enough for a quick snack or a last-minute dessert. Trust me, once you’ve made this zucchini swirl loaf, it’ll be on your regular baking rotation—good luck not eating the whole thing yourself!
What is Zucchini Swirl Loaf?
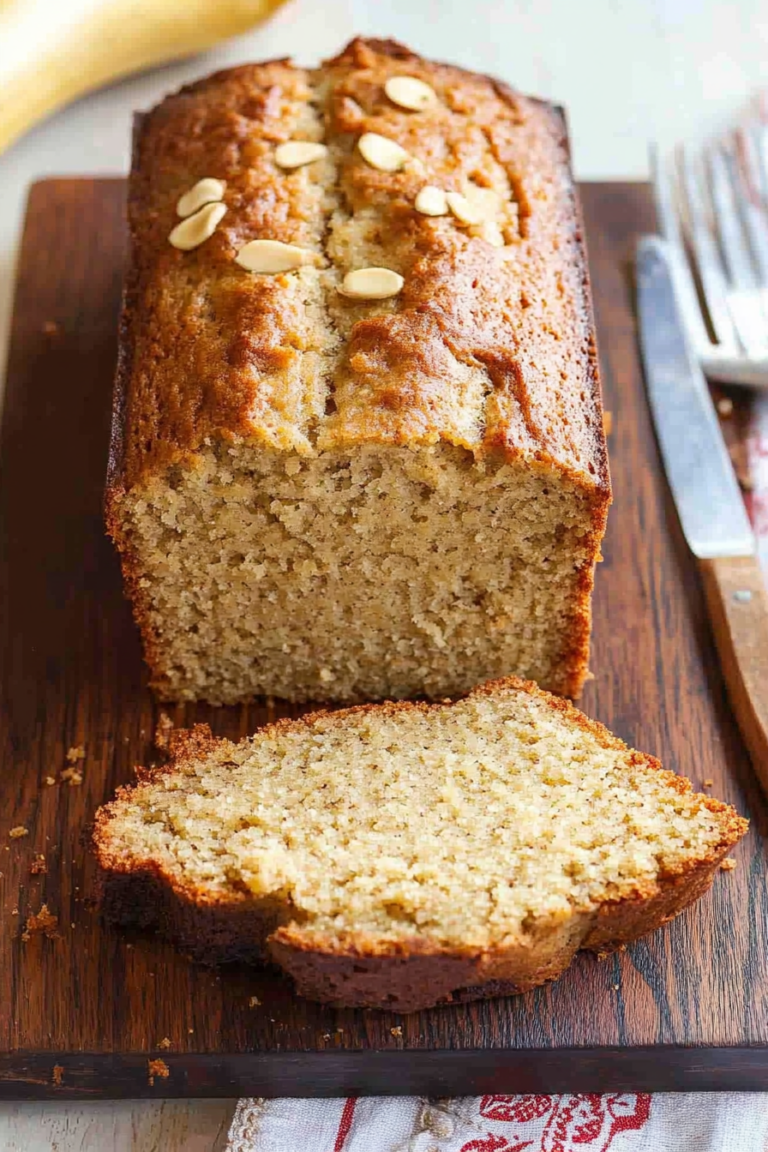
This zucchini swirl loaf is a moist, tender bread layered with a luscious zucchini filling that adds a dash of freshness and a pop of vibrant green. It’s essentially a mash-up between a sweet quick bread and a veggie-packed cake, which sounds kinda crazy but works beautifully. Think of it as a cross between your favorite zucchini bread and a cinnamon roll—only less messy and more perfect for slicing later. The “swirl” comes from a creamy, spiced zucchini mixture that winds through the batter, giving it that beautiful marbled look when sliced. The name is pretty straightforward: zucchini, the star ingredient, takes center stage, and a swirl of flavorful filling makes the whole loaf feel fancy but totally doable at home. And don’t worry—the zucchini doesn’t make it dense or watery; it adds moisture and a subtle sweetness with just the right amount of earthiness. It’s the kind of recipe that makes you feel like a culinary wizard despite being super simple!
Why you’ll love this recipe?
What I love most about this zucchini swirl loaf is how it combines all those cozy, familiar flavors with a bit of a fun twist. The first thing you notice when you cut into it is that gorgeous marbled pattern, and I promise, it’s way cooler to look at than most quick breads. The taste? Think warm cinnamon, a hint of vanilla, and the veggie, which keeps the loaf moist and light but still wholesome. Plus, it’s incredibly simple to make, really—no fancy equipment required. I’ve made this a hundred times, and it’s always a hit. It’s a great way to use up zucchini from the garden (or the grocery store—no shame if it’s frozen in your freezer!) and feels just a little more special than your average muffin or banana bread. And honestly, what’s better than slicing into a loaf that’s as pretty as it is delicious? This one’s a lifesaver on busy nights or when I want to wow friends with a homemade treat that doesn’t have a million steps. It’s also versatile—swap out the spices, add nuts, or drizzle with frosting if you’re feeling fancy. The combinations are endless, and I guarantee, once you taste that first slice, you’ll be hooked.
How do you make Zucchini Swirl Loaf?
Quick Overview
This zucchini swirl loaf is a little bit like a magic trick—mix simple ingredients, layer your zucchini filling, swirl it all together, and pop it in the oven. The process is straightforward but yields a stunning, bakery-quality bread. You start with a basic batter—flour, sugar, eggs, and a splash of oil—then prepare that luscious zucchini filling seasoned with cinnamon and vanilla. The trick is layering it just right so you get those gorgeous, swirled patterns when you slice. Baking time is about 45-50 minutes, and the smell alone will draw everyone to the kitchen. My favorite part? Cooling it just enough so that the glaze I make slowly drips down the sides, and then slicing into that fluffy, flavorful goodness. It’s honestly so simple, but it feels like baking a little piece of art every time.
Ingredients
For the Main Batter:
– 2 cups all-purpose flour (trust me, don’t skip on quality here, but plain supermarket flour works fine)
– 1 cup granulated sugar (feel free to reduce if you prefer less sweetness)
– 1 teaspoon baking soda
– 1 teaspoon cinnamon (the magic spice that really makes the flavor pop)
– ½ teaspoon salt
– 3 large eggs
– ¾ cup vegetable oil or melted coconut oil for extra flavor
– 1 teaspoon vanilla extract
– 1 cup grated zucchini (squeeze out excess moisture—this is key to avoiding sogginess)
For the Filling:
– 1 cup grated zucchini (again, squeeze out moisture)
– ¼ cup brown sugar or honey for sweetness
– 1 teaspoon cinnamon
– ½ teaspoon vanilla
– Optional: a handful of chopped nuts or raisins for added texture
For the Glaze:
– 1 cup powdered sugar
– 2-3 tablespoons milk (almond, dairy, or whatever you prefer)
– A splash of vanilla or lemon juice for zing
– Optional: a pinch of cinnamon or cardamom for extra flavor
Step-by-Step Instructions
Step 1: Preheat & Prep Pan
Start by heating your oven to 350°F (175°C). Grease a standard loaf pan generously with butter or non-stick spray, then dust it with a little flour—trust me, this makes your loaf slide right out at the end. Set it aside while you prepare your batter. I always do this first so I’m not rushing later, especially if I get distracted chatting with my kids in the kitchen.
Step 2: Mix Dry Ingredients
In a big bowl, whisk together the flour, sugar, baking soda, cinnamon, and salt. I like to do this first so everything gets evenly distributed. The dry ingredients should look uniform, almost like a soft, cinnamon-scented cloud—this helps prevent clumps when you add the wet ingredients later.
Step 3: Mix Wet Ingredients
In a separate bowl, beat the eggs, then stir in the oil, vanilla, and grated zucchini. I prefer to use a whisk here because it breaks down the zucchini a little and ensures everything’s combined. The mixture should look glossy and moist, with bits of zucchini poking out—makes for a textured surprise in every bite!
Step 4: Combine
Slowly fold the wet ingredients into the dry, stirring gently. I try not to overmix—just enough until everything’s combined. A few lumps are okay; overmixing can make the bread dense instead of light and fluffy. If the batter feels too thick, a splash of milk will loosen it up just right.
Step 5: Prepare Filling
In a small bowl, combine the grated zucchini, brown sugar, cinnamon, and vanilla. The mixture should be moist but not runny—if it feels too wet, just sprinkle in a little more sugar or add a tiny bit of flour. This keeps the swirl defined when baked.
Step 6: Layer & Swirl
Pour half the batter into your prepared loaf pan. Spread the zucchini filling evenly over this layer, then add the rest of the batter on top. Use a knife or skewer to gently swirl through the batter, creating those beautiful marbled patterns. Don’t overdo it—you want a gentle swirl, not a messy jumble—trust me, patience pays off here.
Step 7: Bake
Pop it in the oven for about 45-50 minutes. Check for doneness by inserting a toothpick into the center—it should come out clean. The loaf will smell like cinnamon heaven, and the top will turn golden. If it starts to brown too quickly, tent it with foil for the remaining time.
Step 8: Cool & Glaze
When it’s out of the oven, let the loaf cool in the pan for about 10 minutes, then transfer it to a wire rack. While it’s still warm, mix your glaze—powdered sugar, milk, vanilla—until smooth. Drizzle that glossy icing all over, letting it drip down the sides. It’s the little touch that makes it feel extra special.
Step 9: Slice & Serve
Once cooled completely (or just warm if you prefer!), slice it with a serrated bread knife to see those beautiful swirls. The slices are best enjoyed fresh but keep well covered for a day or two. The glaze adds just enough sweetness, but if you’re feeling decadent, add a dollop of whipped cream or extra nuts on top. My kids love this with a glass of cold milk or a hot cuppa—it’s like a hug in loaf form.
What to Serve It With
This loaf is versatile enough to be served anytime. For breakfast, pair it with a strong coffee or a chai latte—something warm to compliment the cozy spices. I often serve slices with a smear of butter and a sprinkle of extra cinnamon; it feels like a treat but isn’t overly indulgent. On weekends or brunch, I like to set out a platter with fresh berries and a dollop of whipped cream to elevate it. It’s also an amazing dessert—warm slices with a scoop of vanilla ice cream or a drizzle of caramel sauce make everyone at my table happily forget about trying to watch carbs. As a snack, I keep slices in the fridge, and my kids ask for this all the time, especially after school. It’s perfect for picnics, packed lunches, or even a casual tea with friends. I love how adaptable it is—sometimes I add walnuts or swap the cinnamon for cardamom or nutmeg. The best part? It always feels just a little bit homemade, a little bit special, and totally comforting.
Top Tips for Perfecting Your Zucchini Swirl Loaf
After tons of experimenting, I’ve picked up a few tricks that make all the difference. First, always squeeze out as much moisture as possible from the zucchini—you don’t want a soggy loaf. Grate it finely, then pop it in a clean dish towel and give it a good squeeze. Trust me, moisture is the enemy here. When mixing the batter, be gentle—overmixing can make the loaf dense, so fold it just until the ingredients come together. For the swirl, I recommend adding the filling in a thick layer on top of the batter, then swirling gently with a skewer or a knife. The pattern should be loose, not overly marbled—just enough to peek through when sliced. Also, don’t forget to check your oven’s temperature; I’ve found that ovens can vary by a few degrees, and a slightly lower temperature can prevent over-browning. As for ingredient swaps, I’ve tested coconut sugar instead of regular sugar—delicious! Or, you could substitute half the flour with almond meal for extra nutty flavor. When baking, keep an eye on it after 40 minutes—every oven is different. And finally, try different glazes—lemon glaze, cream cheese frosting, or even a dusting of powdered sugar all work beautifully.
From my kitchen to yours, I hope this zucchini swirl loaf brings as much comfort and joy as it’s brought to my family. Remember, every time you bake it, it’s a little piece of home. And the best part? You can absolutely customize it to match your mood or pantry. Happy baking!
Storing and Reheating Tips
If you’re anything like me, you’ll want to savor every last crumb of this zucchini swirl loaf. Luckily, it stores pretty well. Keep leftovers in an airtight container at room temperature for up to two days—just make sure it’s covered or wrapped tightly so it doesn’t dry out. I find that a little foil or a cake dome helps hold in the moisture. If you want to keep it longer, pop slices in the refrigerator; it stays fresh for about four days. To reheat, just microwave a slice for about 15-20 seconds—perfectly warm and soft again. You can also re-toast slices if you prefer a little crunch. For freezing, wrap the entire loaf tightly in plastic wrap, then foil, and store for up to three months. When you’re ready to enjoy it, thaw overnight at room temperature, then warm gently in the microwave or oven. Just don’t forget to add a fresh drizzle of glaze if you want the full effect! I’ve tested this a hundred times, and it still tastes just as good reheated as fresh out of the oven. Honestly, I think the flavor deepens over time, so it’s worth making ahead.
Frequently Asked Questions
Final Thoughts
This zucchini swirl loaf isn’t just a recipe—it’s a little piece of comfort woven into bread. It’s forgiving, flexible, and downright delicious, whether you’re baking for a quick breakfast, a weekend brunch, or a cozy afternoon snack. I love how simple it is to throw together, yet it feels a bit fancy when you serve slices, drizzled with glaze or topped with whipped cream. Every time I make it, I’m transported back to lazy mornings and garden afternoons, and I love watching my family gather around it. If you try it, I’d love to hear how it turns out—maybe you’ll add your own twist or swap the spices. Either way, I hope this recipe brings a little extra joy to your kitchen. Happy baking, friends!
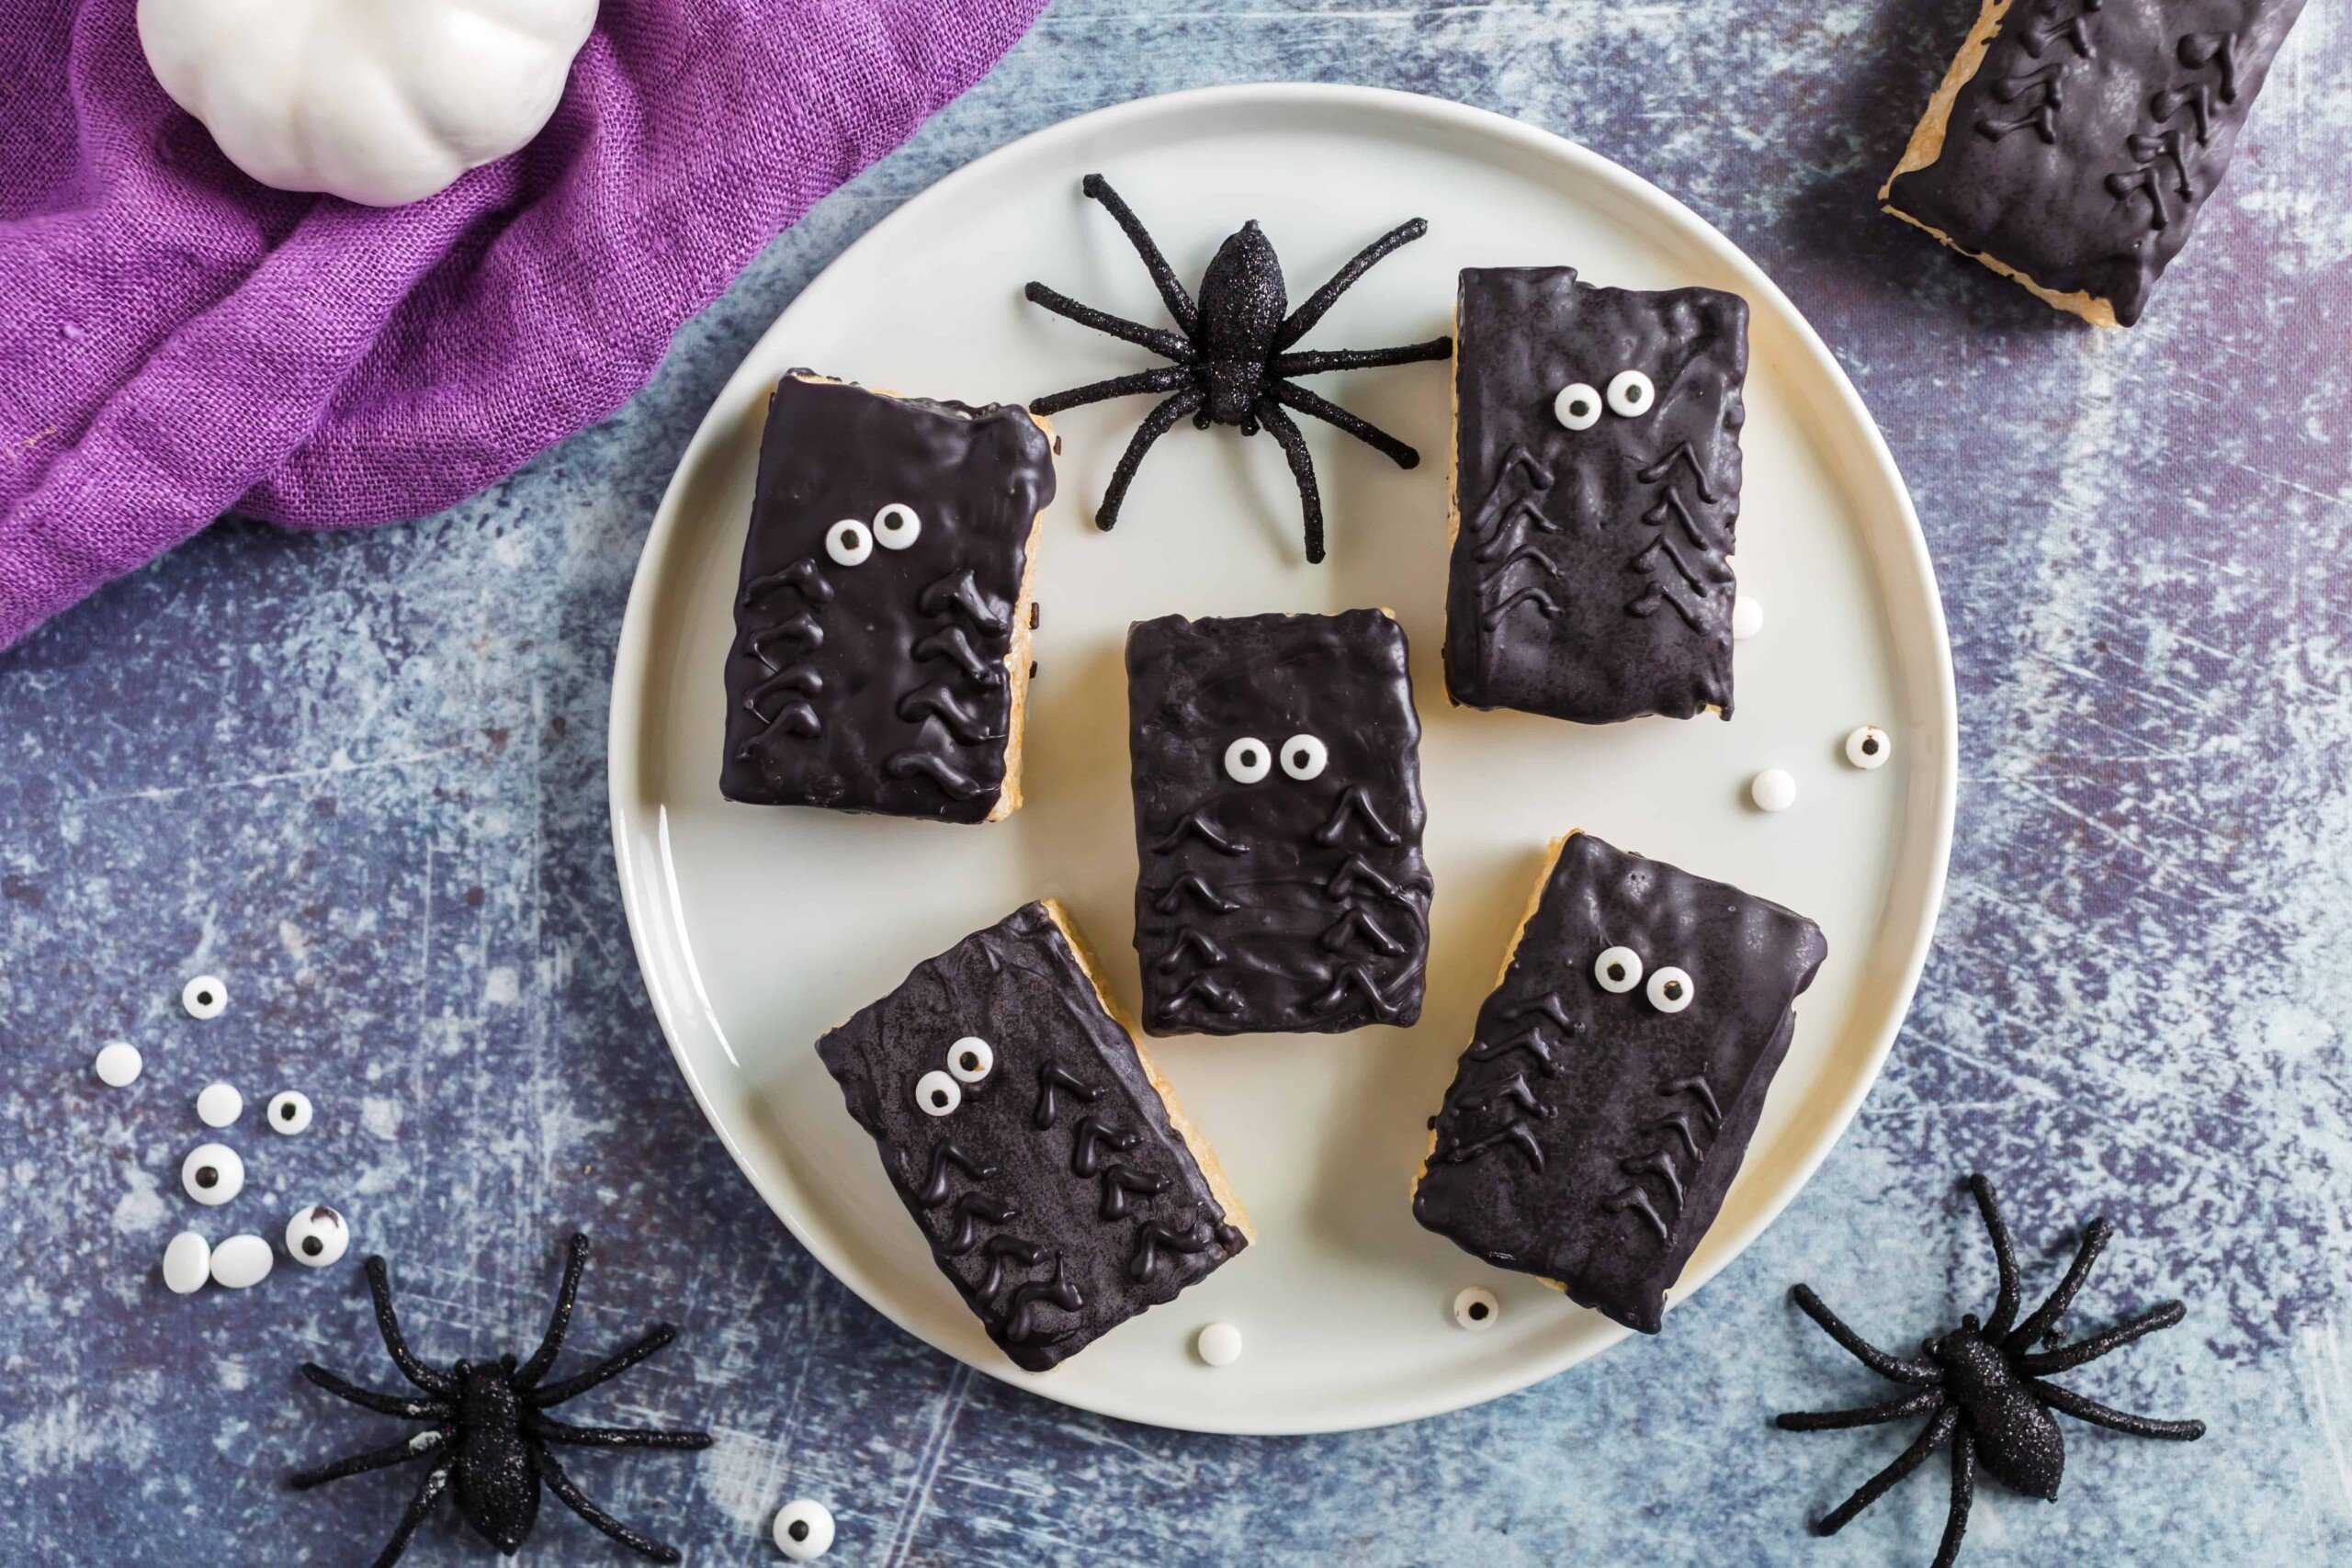
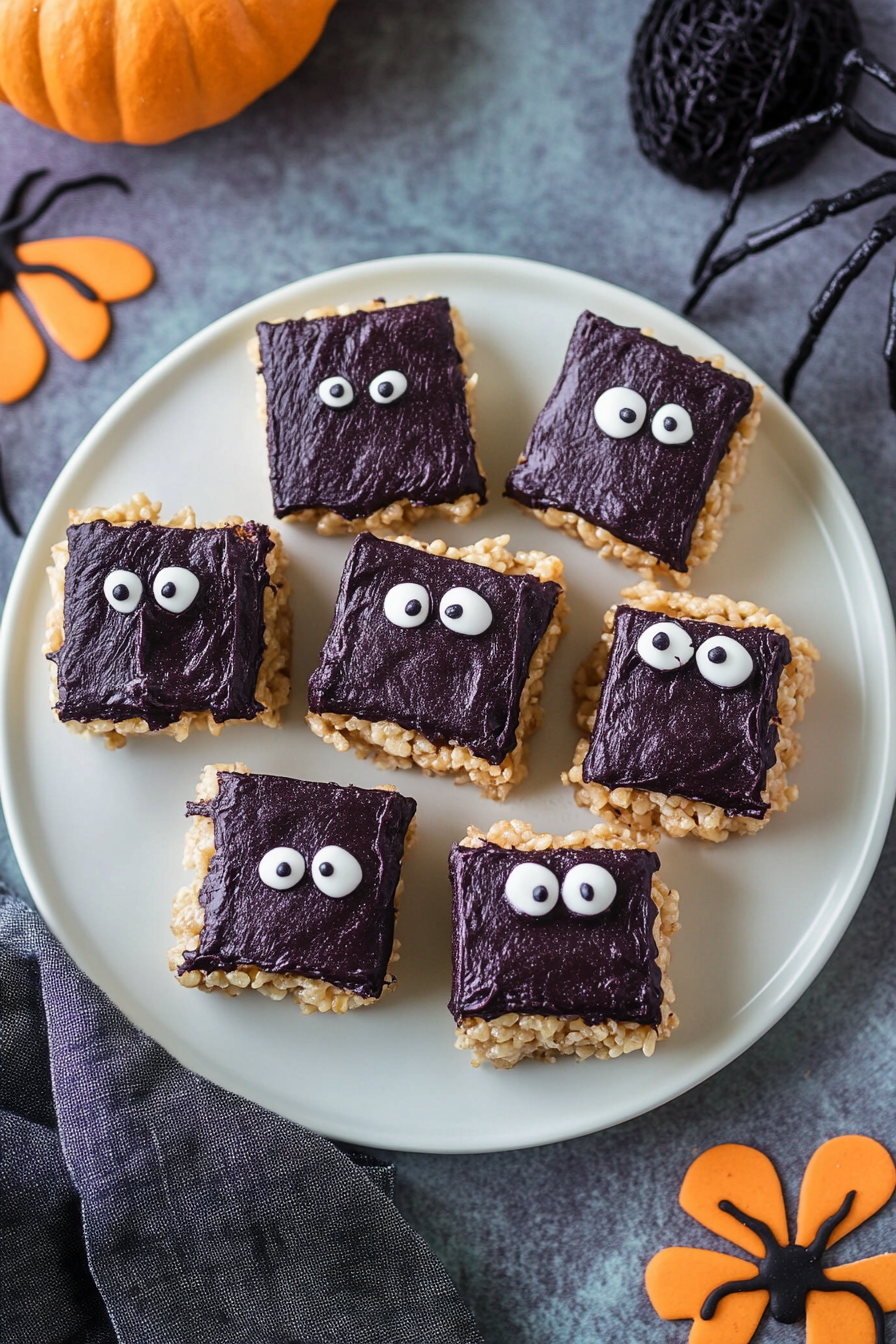
Spider Rice Krispie Treats
Ingredients
Method
- Prepare a batch of Rice Krispie Treats, or unwrap individual store-bought treats. Make treats in a 9-inch square baking dish and cut into 8 large rectangles.
- Melt the dark chocolate wafers in a glass bowl in the microwave for 1 minute. Stir until smooth. Add an additional 15-30 seconds if needed.
- Dunk the top of each rice krispie treat square into the melted chocolate, spreading smoothly with an offset spatula as needed.
- Immediately place a pair of candy eyes onto each treat while the chocolate is still soft. Allow to set for 10-15 minutes.
- Once the chocolate has set, spoon remaining chocolate into a small Ziploc bag. Snip the corner and pipe 8 legs onto each treat. Allow to set. Enjoy!


This recipe sounds amazing! I love how it combines comfort and creativity—definitely adding this to my weekend baking list.
This recipe sounds so comforting! I love how zucchini can add moisture without being heavy.
I love this recipe—it’s such a cozy, nostalgic treat! The zucchini swirl adds a perfect little twist.
I’ve been making this zucchini swirl loaf for years—it’s such a cozy, comforting treat! Perfect for when you want something sweet but feel like baking.
I love this recipe! The zucchini swirl adds such a nice touch—so moist and delicious.