
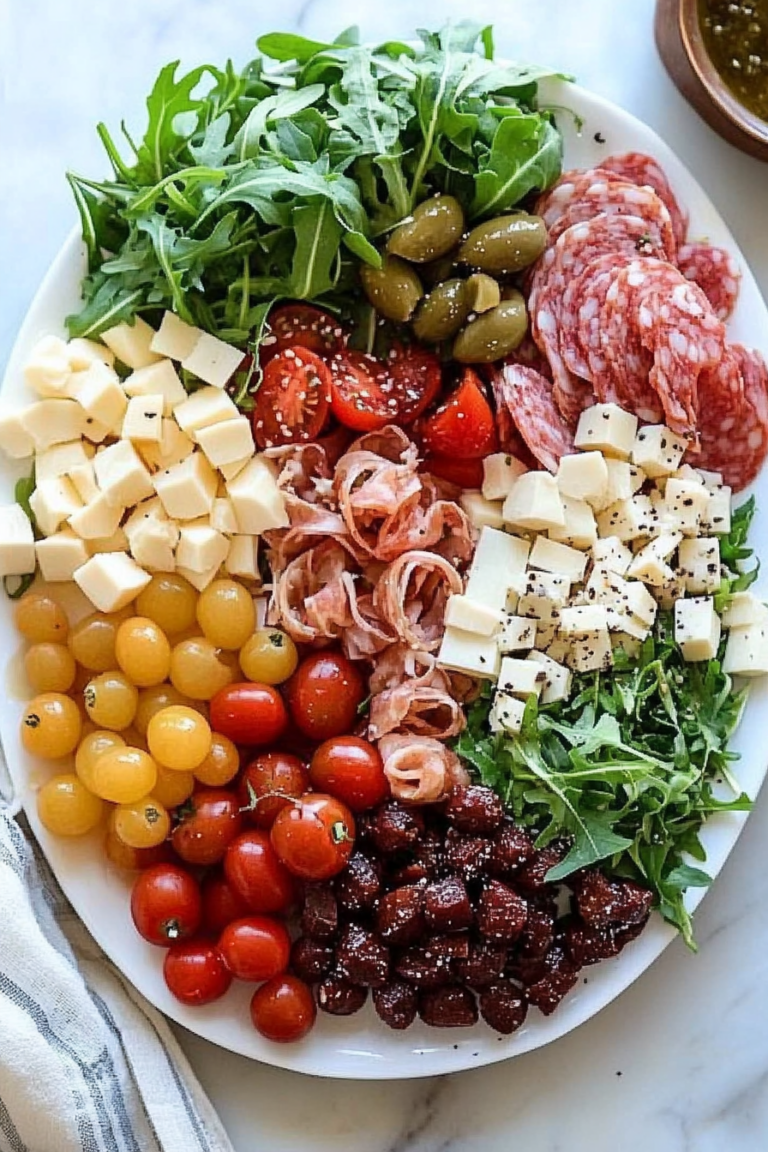
Easy Seven Layer Fiesta Dip Recipe
There’s something about baking with zucchini that always takes me back. Maybe it’s because my grandmother used to hide it in her bread, or maybe it’s just the way zucchini adds a whisper of moisture and richness without overpowering. I’ve always loved how versatile and forgiving it is—kind of like that quiet hero in my kitchen. One evening, recently, I was craving something sweet but didn’t want to fuss too much, so I threw together this zucchini swirl cake. Trust me, it’s a game-changer. The smell alone—warm, sweet, with a hint of zucchini freshness—had everyone at my house wandering into the kitchen like a herd of happy cows. My kids ask for this all the time now, especially when I want to impress but keep it cozy. It’s like a humble hug in cake form, easy enough for a weeknight dessert but fancy enough for guests. And what’s more? It’s surprisingly simple, loaded with flavor, and totally adaptable. That’s why I keep coming back to it—bold, comforting, and a little special. Let’s get into how I make this zucchini swirl cake, shall we?
What is Zucchini Swirl Cake?
Think of zucchini swirl cake as a lovely marriage of moist cake and beautiful marbled filling—like a chocolate ripple cake but with fresh zucchini and a touch of cinnamon. It’s essentially a quick, one-bowl batter layered with a sweet, spiced zucchini mixture that gets swirled into the batter before baking. The name? Well, the “swirl” refers to that gorgeous marbled effect when you gently fold in the zucchini filling and create those beautiful, finger-pleasing ribbons of flavor. This cake is somewhat like a simpler, less fancy cousin of layered coffee cakes or marble pound cakes, but with a delightful twist of vegetable goodness hidden inside. It’s cozy, nostalgic, and perfect when you want something that feels a little indulgent but still wholesome. Also, it’s a great way to use up those zucchinis lurking in the back of your fridge—trust me, they disappear in minutes at my house! It’s kind of a perfect comfort food, without the guilt of a full-blown dessert. Plus, kids love the surprise of the swirl, and it’s surprisingly photo-worthy with that beautiful marbling—hello, Instagram!
Why you’ll love this recipe?
What I love most about this zucchini swirl cake is how it hits all the right notes—flavor, texture, and that charming look that makes everyone say, “Wow!” First, the flavor profile is a lovely balance between sweet and earthy, thanks to freshly grated zucchini and warm spices like cinnamon and nutmeg. It’s not overly sweet, which makes it super versatile as a snack or dessert, and I’ve even snuck in a handful of chopped nuts or chocolate chips for an extra treat. The best part? It’s so easy to make, you’ll probably find yourself whipping it up on a whim, especially on busy weeknights when the craving hits. Honestly, I tested this with different sweeteners—honey, maple syrup, even coconut sugar—and it always turns out fantastic, so feel free to adapt based on what you have. The ingredients are budget-friendly and straightforward, making it an accessible option even on a tight grocery run. I also love how versatile it is—serve it with a dollop of whipped cream, a dusting of powdered sugar, or just plain. It’s perfect for brunch, a quick afternoon snack, or a cozy end-of-the-day treat. And practically, this cake stays moist and delicious for days, making leftovers an absolute delight. Basically, this recipe is my go-to for when I need a little something sweet, wholesome, and pretty—without any fuss.
How do I make Zucchini Swirl Cake?
Quick Overview
This cake is a one-bowl wonder—literally! You mix dry ingredients, stir in wet, prepare a creamy zucchini filling, and then layer and swirl. The trick is to not overmix the batter and to keep the zucchini filling thick enough to swirl into the batter without sinking. Baking takes about 35-40 minutes, and the look of that marbled swirl emerging through the cracks in the batter is pure magic. Once out of the oven, I let it cool just enough so the glaze (if you’re using one) can set beautifully. It’s a straight-forward process that feels almost therapeutic—mixing the batter, watching the swirl come together, smelling that cinnamon filling baking—bonus points for the comforting aroma that fills your whole house. Even if you’re new to baking, I promise this is manageable. The hardest part? Not sneaking bites of the zucchini mixture as you go!
Ingredients
For the Main Batter:
– 2 cups all-purpose flour (or gluten-free flour blend, see tips below)
– 1 cup granulated sugar or coconut sugar for a richer flavor
– 1 tsp baking powder
– 1/2 tsp baking soda
– 1/2 tsp salt
– 1 tbsp cinnamon (trust me, it makes all the difference!)
– 1/2 cup vegetable oil or melted unsalted butter
– 3 large eggs
– 1 tsp vanilla extract
– 1/2 cup buttermilk or milk of choice (almond, oat, or regular) – I’ve tested with almond milk, and honestly, it made it even creamier!
For the Filling:
– 1 medium zucchini, grated (about 1 cup tightly packed)
– 2 tbsp brown sugar or honey
– 1 tsp cinnamon
– 1/2 tsp nutmeg (optional but recommended)
– 1 tbsp lemon juice (to brighten the zucchini flavor)
– A pinch of salt
For the Glaze (optional but pretty):
– 1 cup powdered sugar
– 1-2 tbsp milk or cream
– A splash of vanilla extract
– A sprinkle of cinnamon or lemon zest to jazz it up
Step-by-Step Instructions
Step 1: Preheat & Prep Pan
I always start by preheating my oven to 350°F (175°C). Line a 9-inch round or square baking pan with parchment paper—trust me, this saves a headache when you’re trying to get that cake out nicely. Give the pan a tiny brush of butter or non-stick spray, especially if you’re not using parchment. This is an easy, foolproof way to prevent sticking and keep things tidy. Set it aside while you prepare your batter.
Step 2: Mix Dry Ingredients
In a large mixing bowl, whisk together the flour, sugar, baking powder, baking soda, salt, and cinnamon. I always do this first—it helps distribute everything evenly, so you don’t end up with bites that are too cinnamon-heavy or flour-y. This step is simple but key to a smooth batter.
Step 3: Mix Wet Ingredients
In a separate bowl, beat your eggs, then add the oil, vanilla, and buttermilk. Whisk until it’s smooth and slightly frothy—this helps everything blend better, especially when you add it to the dry ingredients.
Step 4: Combine
Pour the wet mix into the dry ingredients and fold gently with a spatula or wooden spoon—no overmixing! The batter should be just combined, thick but pourable. Too much mixing can make the cake dense, and nobody wants that.
Step 5: Prepare Filling
While the batter’s coming together, grab that grated zucchini, then toss it with the sugar, spices, lemon juice, and a pinch of salt. I like to squeeze out a little extra moisture from the grated zucchini—just a quick press with a paper towel—to avoid a runny swirl. The filling should be thick and sticky, not watery, so the swirl holds its shape.
Step 6: Layer & Swirl
Pour half the batter into your prepared pan, then dollop spoonfuls of the zucchini mixture on top. Use a knife or skewer to gently swirl the zucchini in, creating beautiful marbled patterns. Don’t overdo it—less is more, and the visual of a gentle swirl is what makes this cake stunning.
Step 7: Bake
Pop it into your preheated oven and bake for 35-40 minutes. Keep an eye on it around the 35-minute mark—look for a golden top and a toothpick inserted in the center coming out clean. If your oven runs hot or cool, adjust the timing slightly.
Step 8: Cool & Glaze
Once baked, let the cake cool in the pan for about 15 minutes, then transfer to a wire rack. When it’s mostly cooled (not cold!), stir together your glaze and drizzle generously over the top. The warmth helps the glaze seep into all the nooks and crannies, making every bite extra luscious.
Step 9: Slice & Serve
When it’s fully cooled—preferably after about 30 minutes—slice beautifully with a sharp knife. I like to use a gentle sawing motion and wipe the blade clean between cuts for that perfect marbled look. Serve plain or with a dollop of whipped cream, and watch how quickly it disappears from the plate!
What to Serve It With
This zucchini swirl cake is amazingly versatile. For a cozy breakfast, pair it with a strong black coffee or a frothy cappuccino—trust me, it’s the perfect start. At brunch, serve slices with a side of fresh berries and a dollop of yogurt. Honestly, it’s simply divine after dinner with a cup of tea or a glass of cold milk. My personal family tradition? We always have this with a splash of whipped cream and a dusting of extra cinnamon—makes everything feel a little more special. Sometimes, I keep it super simple; just a warm slice straight from the fridge. It’s also excellent as a snack, especially when you want a little sweet wake-up call during busy days. The moist crumb and subtle spice make it a crowd-pleaser and a favorite for packed lunches or tea time, too. The kids love the surprise of the swirl—nothing beats the look on their faces when they see that beautiful pattern emerge. It’s a little piece of homemade magic that everyone asks for again and again.
Top Tips for Perfecting Your Zucchini Swirl Cake
The more I bake this, the more I learn what makes it shine. Here are some little tricks I swear by:
- Zucchini Prep: Always squeeze out the excess moisture from the grated zucchini. It keeps the swirl from sinking and makes that gorgeous marbling stay defined. The zucchini should be moist but not watery—that’s the secret.
- Mixing Advice: When combining wet and dry, fold gently—think of it as mixing childhood dreams with reality. Overmixing leads to dense cake; I learned this after many experiments, and now I just fold until everything is just combined.
- Swirl Customization: Play with your swirl pattern—try a figure-eight or justrandomster marks; the more unpredictable, the better! Use a skewer to make those ripples—like a painter’s brush for your cake.
- Ingredient Swaps: Coconut oil, almond flour, or even adding chopped nuts or dark chocolate chips—I’ve tested all these. Coconut oil makes it more tender; nuts give a crunchy contrast. Just remember, if you swap flour, adjust the liquids accordingly.
- Baking Tips: Oven temps vary—if yours runs hot, cover the top loosely with foil after about 30 minutes to prevent over-browning. A toothpick in the center should come out moist but not gooey. Trust your nose and eye; cake should smell warm and inviting, with a slight sticky top.
- Glaze Variations: You can swap powdered sugar for Greek yogurt glaze or sprinkle with chopped nuts for crunch. I like to add a splash of lemon zest to the glaze—it adds brightness that balances the spice and zucchini.
Honestly, I’ve made this cake so many times, and I still find little tweaks that make it better. The joy is in the process, and every batch seems just a little different, but always delicious. My biggest lesson? Keep it relaxed—nothing’s perfect, and that’s the beauty of homemade baking. Just enjoy the mess, the smell, and that moment when your family gathers around the table with delighted eyes.
Storing and Reheating Tips
This cake keeps surprisingly well—probably because of those zucchini moistures, it stays soft for days. To store, I recommend wrapping it tightly in plastic wrap or placing it in an airtight container at room temperature if you plan to eat it within two days. If you want to keep it longer, a quick trip to the refrigerator works great—just bring it to room temp or warm it slightly before serving for that freshly-baked feeling. For freezer lovers, wrap individual slices or the whole cake tightly in foil and pop it in a freezer bag. It’ll stay good for up to three months! When you’re ready to enjoy, thaw it at room temperature or warm slices gently in the microwave—about 20 seconds for a cozy, just-baked feel. Remember, if you add a glaze, it’s best to do it fresh, or reapply lightly after reheating. I’ve learned the hard way that glazing before freezing can make everything soggy, so I now wait to glaze just before serving. The key is gentle reheating—nothing too hot or it can dry out or cause the glaze to soften too much. Basically, this cake is a hold-and-reheat champion, which suits my busy life perfectly.
Frequently Asked Questions
Final Thoughts
There’s a cozy magic in this zucchini swirl cake that’s hard to beat. It’s simple enough for a weeknight treat but special enough to serve at the table when friends drop by. The combination of moist crumb, warm spices, and beautiful marbling makes every bite a soothing, satisfying experience. Plus, its versatility means you can adapt it whether you’re craving a little chocolate, nuts, or even swapping out ingredients for dietary needs. Honestly, I’ve tested this so many times that I know it’s a fail-proof crowd-pleaser. Every time I bake one, I get a little giddy watching that swirl come to life, knowing it’s going to disappear fast. So go ahead—grab that zucchini from your fridge, and let’s make baking magic together. I’d love to hear how yours turns out! Share your tips or variations in the comments, and happy baking, my friend! This recipe is a small but mighty joy in our busy lives, and I’m so excited for you to try it.
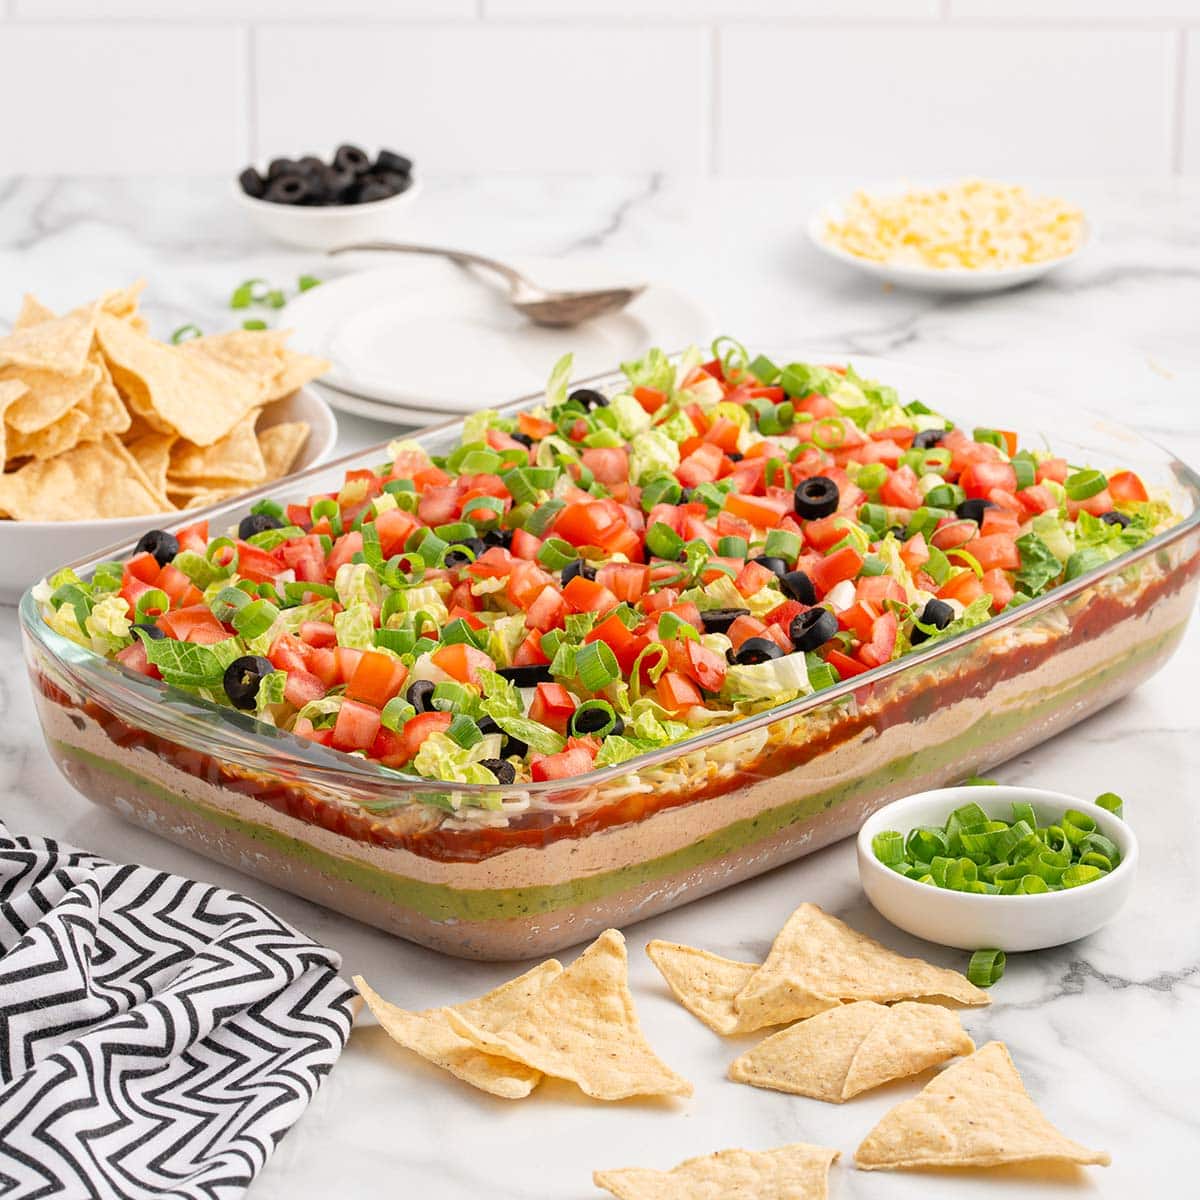
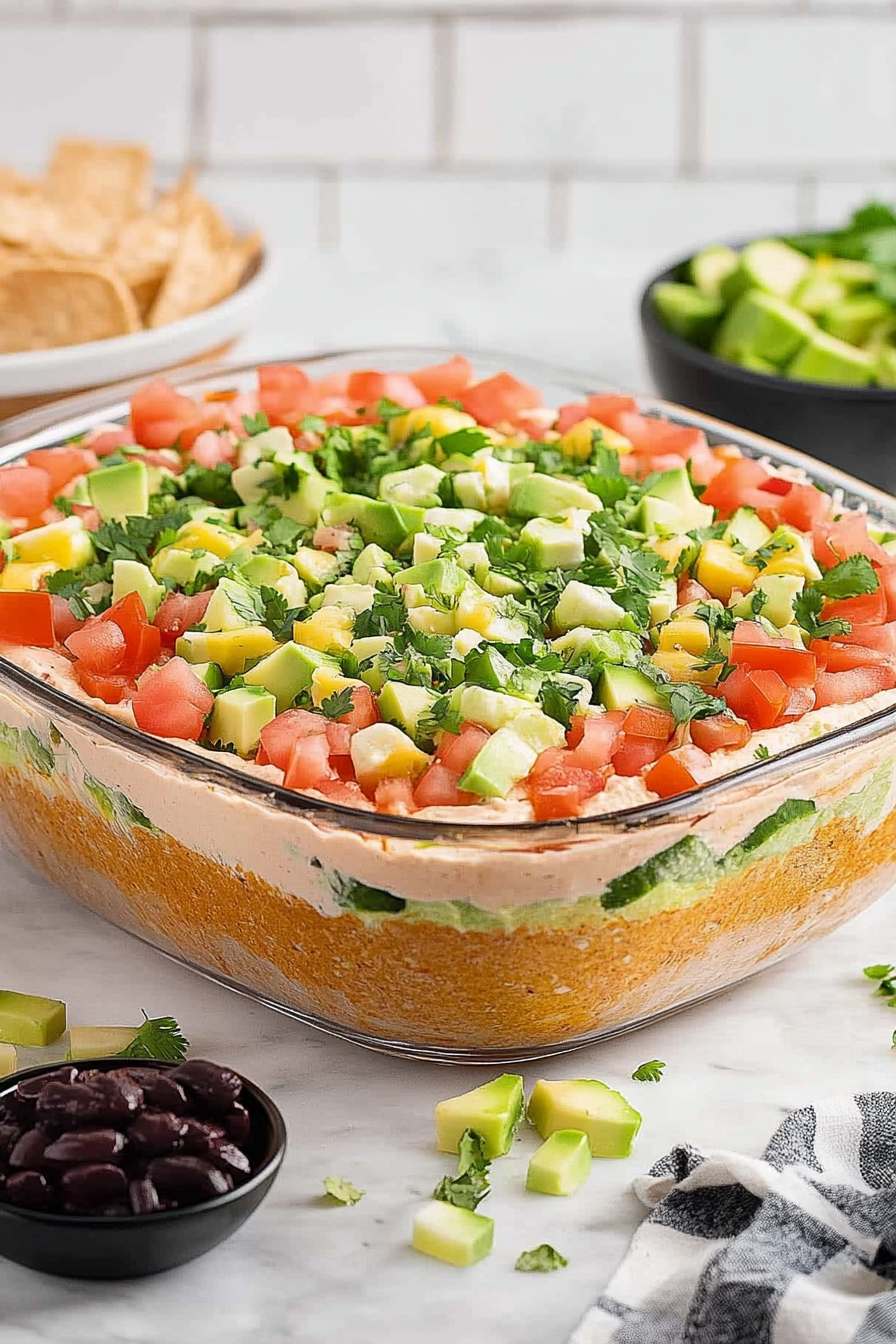
seven layer dip
Ingredients
Method
- Add the canned refried beans to a small mixing bowl. Add 3 tablespoons of water, and stir until completely combined and smooth.
- Spread the refried beans evenly into the bottom of a 9x13 baking dish using a spatula.
- Spread the premade guacamole over the refried beans layer.
- In a small bowl, whisk together sour cream and taco seasoning packet. Then spread over the guacamole layer.
- Drain excess liquid from chunky salsa and spread over the sour cream layer.
- Sprinkle shredded cheese evenly over the salsa layer.
- Top with shredded lettuce.
- Sprinkle drained black olives over the lettuce.
- Add chopped roma tomatoes over the olives. Pat dry with paper towels to reduce excess juice.
- Finish with sliced green onions on top. Cover and chill for at least 1 hour before serving with tortilla chips.


I love how zucchini adds a secret veggie boost—my kids never suspect it’s in the dip! Great twist on a classic.
I love how you bring up zucchini memories—my grandma did the same thing! This dip looks perfect for game day.
This sounds delicious! I love how zucchini can be both healthy and hidden in tasty recipes—just like with my grandma’s meatloaf.
I love zucchini in dips—so much flavor without being heavy. Great recipe!
I love this recipe! Zucchini always reminds me of home-cooked meals with my grandma too.