
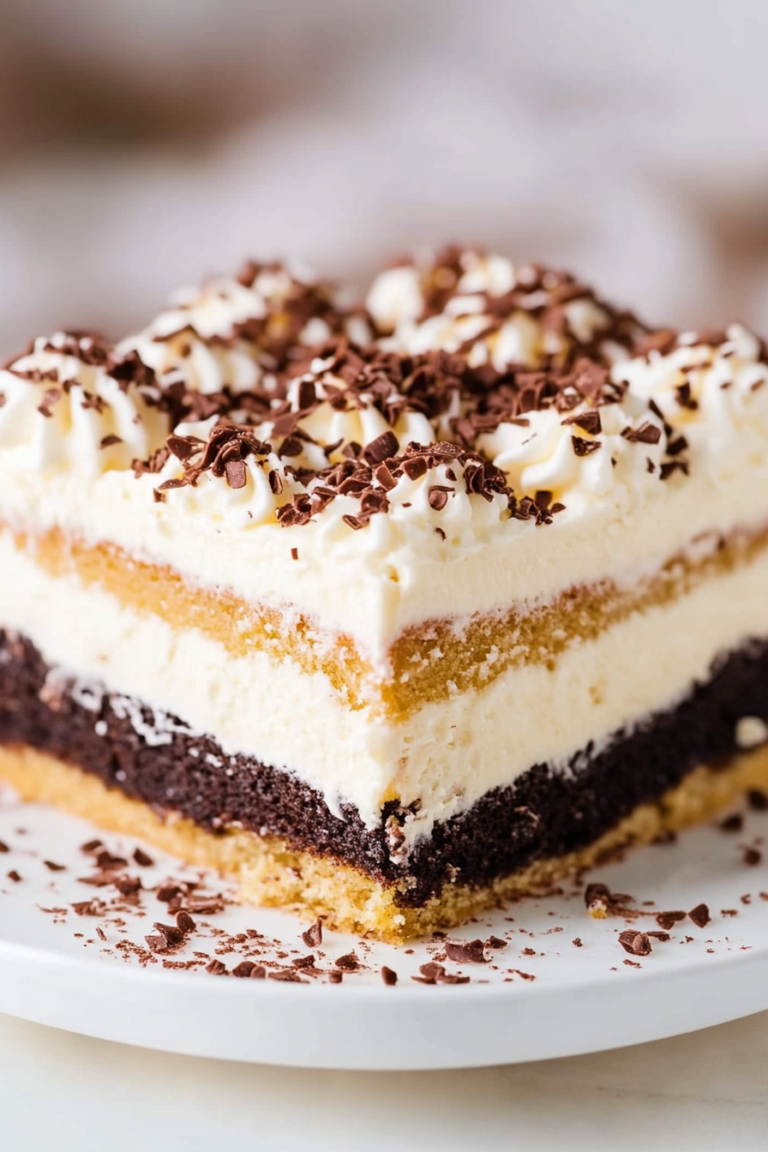
Easy Chocolate Eclair Cake Recipe
There’s just something about waking up to the smell of a warm, comforting coffee cake tucked into a cozy corner of the kitchen. My grandma used to make this legendary lemon zucchini coffee cake, and I swear, it’s the smell that brings everyone rushing into the breakfast nook. I’ll admit, when I first tried making my own, I was a little nervous—would it turn out dry? Too sweet? But after a few tweaks, I discovered this version hits the sweet spot every time. It’s moist, bursting with fresh lemon flavor, and the zucchini keeps it surprisingly light. Honestly, I always do this when I need a little boost in the mornings, especially since this one’s a lifesaver on busy nights when I want something homemade but don’t want to slave away in the kitchen. Plus, my kids ask for this all the time—sometimes I hide a second piece just for myself. It’s become more than a recipe; it’s a little piece of family magic I love sharing.
What is a Zucchini coffee cake?
This lemon zucchini coffee cake is a charming twist on the classic—a tender, flavorful cake swirled with fresh zucchini and bright lemon zest, then topped with a crumbly streusel and a drizzle of glaze. Think of it as a breakfast cake that feels special enough to serve when friends drop by, but simple enough to whip up at a moment’s notice. The name might sound fancy, but it’s basically a cake that’s perfect for brunches, lazy Sunday mornings, or even a quick afternoon treat with tea. The zucchini is the secret—that little vegetable that makes it insanely moist and keeps it from feeling too dense or heavy. And trust me, it’s a sneaky way to get the kids to eat their greens without hearing any complaints! It’s essentially a riff on coffee cakes you see in bakeries, but homemade and with a personal touch—lemon zest adds that fresh, zippy tang that wakes up your senses.
Why you’ll love this recipe?
What I love most about this lemon zucchini coffee cake is how it all comes together without a fuss. The flavor? Out of this world—light lemon paired with the faint sweetness of zucchini and a hint of vanilla. The moistness is thanks to the zucchini—trust me, I’ve tested this with various types of zucchini, and the small, fresh ones work best. The crumb topping is a total game-changer—crunchy, buttery, slightly sweet—and it adds an irresistible texture contrast to the soft cake. Plus, it’s seriously budget-friendly since the ingredients are staples I always have around—flour, sugar, eggs, and, of course, zucchini from my garden. This is perfect when you want something sweet but don’t want to go overboard with sugar or butter. And the best part? You can customize it! Want more lemon? Double it. Prefer a crunchier topping? Add chopped nuts. What I particularly adore is how forgiving this recipe is—you really can’t mess it up, and it always makes my kitchen smell divine.
How do I make a lemon Zucchini coffee cake?
Quick Overview
This cake is a breeze to throw together—mix the batter, prepare the zucchini and lemon zest, make the streusel, layer everything, and bake. What makes it stand out is how flexible the process is: you can prep the ingredients ahead, and it comes together in under an hour. I love to keep this simple because the resulting flavor is so fresh and lively—you’ll get that perfect balance of sweetness and citrus with just a hint of zucchini moisture. It’s a hit with both kids and grownups, and you’ll find it’s one of those recipes that disappears in minutes at my house. Trust me on this one: once you smell it baking, you won’t want to wait to slice into it.
Ingredients
For the Main Batter:
– 2 cups all-purpose flour (or almond flour for a gluten-free twist)
– 1 cup granulated sugar
– 1/2 teaspoon salt
– 1 teaspoon baking powder
– 1/2 teaspoon baking soda
– 1 cup buttermilk (or plain yogurt, or even almond milk—tested and works great!)
– 1/2 cup vegetable oil or melted butter
– 2 large eggs
– Zest of 2 lemons (it’s all about that fresh zing!)
– 1 teaspoon vanilla extract
For the Filling:
– 1 cup grated zucchini (small to medium is perfect; no need to peel)
– 2 tablespoons lemon juice
– 1 tablespoon cornstarch (to help bind the zucchini)
– Optional: a handful of chopped nuts for texture
For the Glaze:
– 1 cup powdered sugar
– 2-3 tablespoons lemon juice
– A tiny splash of milk or water to thin it out (adjust until drizzle-ready)
Step-by-Step Instructions
Step 1: Preheat & Prep Pan
I always start by preheating my oven to 350°F (175°C). Grease a 9-inch round or square baking pan with butter or non-stick spray, then lightly dust with flour—nothing fancy, just enough to prevent sticking. Lining it with parchment paper is optional but helps with clean slices later.
Step 2: Mix Dry Ingredients
In a large bowl, whisk together the flour, sugar, salt, baking powder, and baking soda. This ensures everything’s evenly distributed and helps prevent lumps in the batter. I’ve learned the hard way that overmixing can make the cake dense, so I just do a few gentle folds.
Step 3: Mix Wet Ingredients
In a separate bowl, whisk the eggs, then add the buttermilk, oil, lemon zest, vanilla, and lemon juice. I always test the temperature—make sure the eggs are at room temp and that the buttermilk isn’t cold, so everything mixes smoothly and kisses the flour lightly.
Step 4: Combine
Pour the wet into the dry and gently fold it together. No overmixing! A few lumps are okay—this keeps the cake tender. Now, fold in the grated zucchini. It might seem like a lot, but the zucchini melts into the batter, making it moist and bursting with tiny flavor bursts.
Step 5: Prepare Filling
In a small bowl, toss the grated zucchini with lemon juice and cornstarch. This keeps it from sinking or making the batter soggy. If you want an extra crunch, add chopped nuts here—walnuts or pecans work beautifully.
Step 6: Layer & Swirl
Pour half the batter into your prepared pan. Spread evenly, then dollop the zucchini mixture over, followed by the remaining batter. Using a knife or skewer, swirl gently to create pretty ribbons—this gives each slice a lovely marbled look and bursts of zucchini and lemon in every bite.
Step 7: Bake
Pop it in the oven and bake for about 35-40 minutes, or until a toothpick inserted in the center comes out clean. I always set a timer, but I also peek at around 35 minutes—every oven is a little different. The top should be golden and slightly cracked—just perfect!
Step 8: Cool & Glaze
Allow the cake to cool for about 15 minutes in the pan, then transfer to a wire rack. Drizzle the glaze over while it’s still warm so it sinks in beautifully. If you want even more lemon punch, you can add a little lemon zest to the glaze before drizzling.
Step 9: Slice & Serve
Cut neat slices with a serrated knife to keep the crumb intact. Serve slightly warm or at room temperature. I like with a cup of black coffee or tea—makes for a cozy, Sunday-morning vibe. Trust me, this cake is so moist and flavorful, it’s hard to resist just one piece.
What to Serve It With
This lemon zucchini coffee cake is so versatile, I love serving it in various ways depending on the occasion. For breakfast, I’ll slice it up and pair it with a strong cup of coffee—trust me, it’s the kind of morning boost everyone loves. It’s also a hit at brunch, especially with some fresh fruit on the side—berries or sliced peaches look so pretty next to it. If you’re craving dessert, I’ll warm a slice and add a dollop of whipped cream or a scoop of vanilla ice cream—it’s deliciously indulgent without feeling heavy. Sometimes I sprinkle extra lemon zest or chopped nuts on top for presentation. This cake disappears fast at my house; it’s comfort food that feels like a little celebration, no matter the day.
Top Tips for Perfecting Your Lemon Zucchini Coffee Cake
Over the years, I’ve picked up a few tricks to make this cake absolutely foolproof. First, always squeeze out excess moisture from the grated zucchini—I do this by wrapping it in a clean kitchen towel and gently pressing. If your zucchini is watery, the batter could be a little too loose, and the top might brown unevenly. Next, be gentle when folding the wet and dry ingredients—overmixing makes the texture dense, and nobody wants that. When making the swirl look perfect, use a skewer or a butter knife to drag through the batter in a figure-eight pattern—this creates those gorgeous marbled effects.
For ingredient swaps, I’ve tested swapping out almond flour for half the all-purpose flour—results are just as tender, but it adds a slightly nuttier flavor. If you want to skip the glaze, dust the top with powdered sugar or a sprinkle of cinnamon sugar for a quick finish. The glaze itself can be customized—try adding a splash of limoncello or a dash of vanilla extract for a flavor twist. Baking times can vary depending on your oven, so start checking around the 35-minute mark. And don’t forget, every batch is a little unique—trust your nose and the toothpick test!
Storing and Reheating Tips
This cake stays fresh covered at room temperature for about 1-2 days. I usually wrap it tightly with plastic wrap or store in an airtight container — it’s just as good the next morning when toasted slightly in the oven or microwave. If you want it to keep longer, refrigerate it for up to 4 days—just lift off the glaze if you’re worried about it getting soggy. To freeze, wrap slices individually in plastic wrap, then foil, and store for up to 3 months. Thaw at room temperature or warm gently in the microwave. When reheating, I recommend adding a fresh drizzle of glaze or lemon zest for that just-baked freshness. The texture holds up surprisingly well, especially if you reheat slowly — don’t rush! It’s perfect for making ahead for brunch parties or weekend mornings when you want everything ready with minimal fuss.
Frequently Asked Questions
Final Thoughts
Honestly, this lemon zucchini coffee cake has become my go-to for just about any occasion—breakfast, brunch, or casual dessert. It’s a recipe I love because it’s forgiving, flexible, and always fills my home with a warm, inviting aroma. Every time I bake it, I feel like I’m sharing a little piece of my family’s magic—something homemade, fresh, and full of love. I hope you get as much joy making and eating this as I do. Remember, no two cakes are exactly the same, so feel free to experiment with flavors or add your own twist. And please, come back and tell me how yours turned out—I’d love to hear! Happy baking!
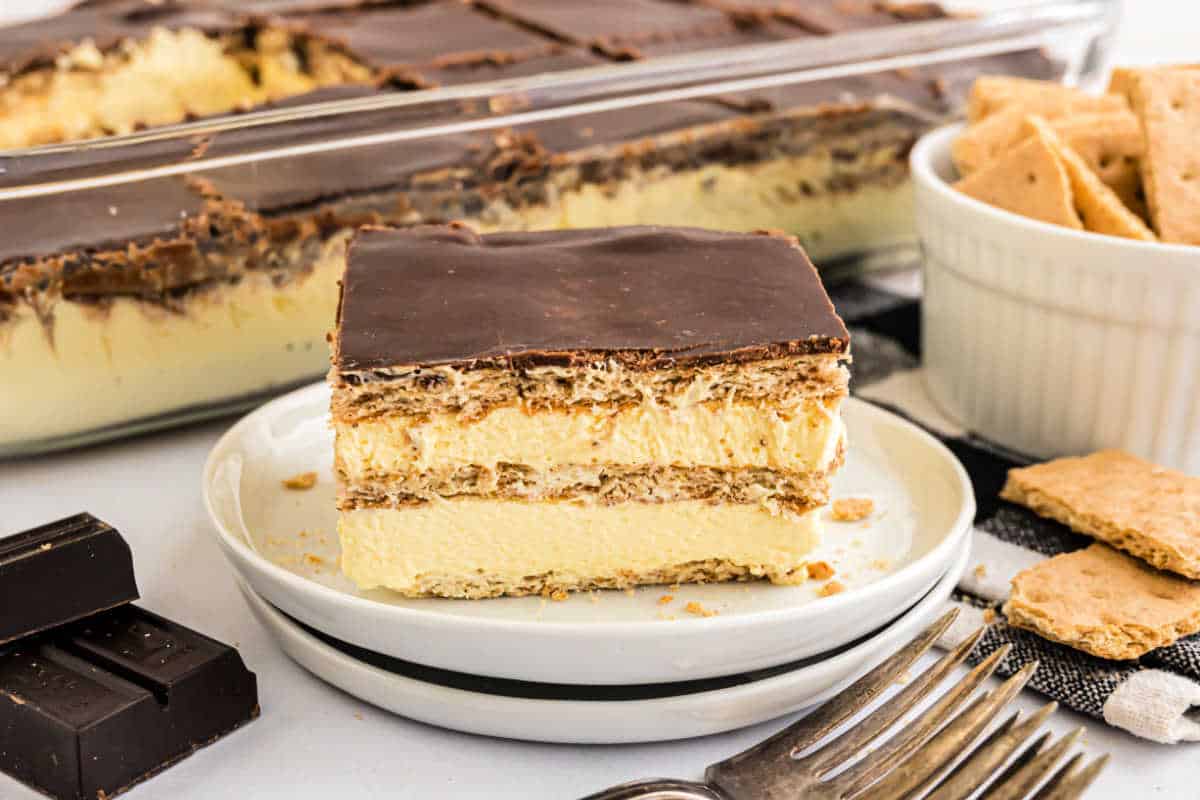
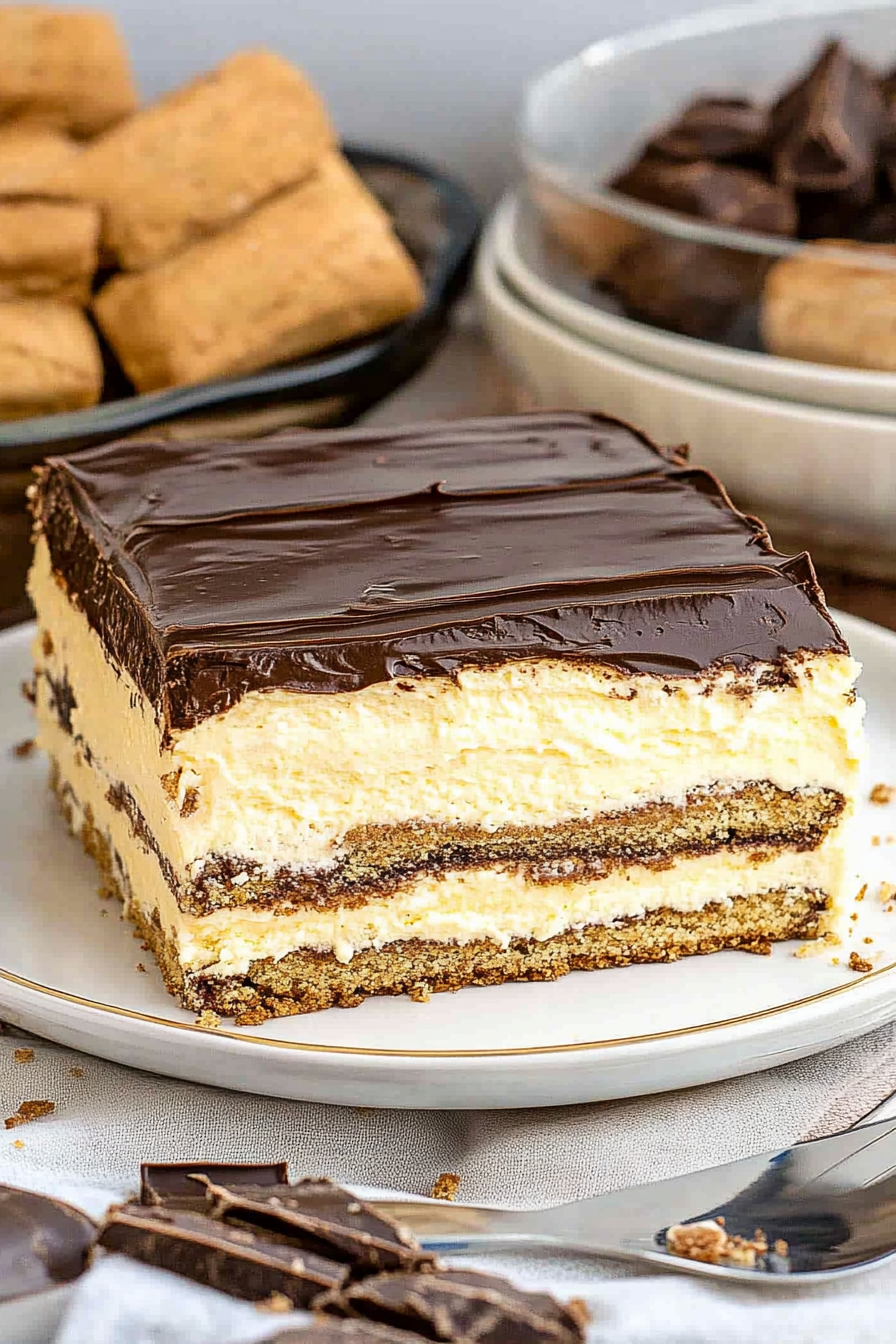
chocolate eclair cake
Ingredients
Method
- Mix pudding with milk in a medium size bowl. Fold in thawed cool whip.
- Layer in a 9x13 inch dish: graham crackers, pudding, graham crackers, pudding, graham crackers.
- For the homemade frosting, melt the unsweetened baking chocolate with corn syrup in a double boiler over medium heat. Stir until smooth. Add vanilla, butter, milk, and powdered sugar. Mix until thoroughly combined.
- Frost the top layer of graham crackers. Cover and refrigerate for at least 8 hours before serving.
Love this recipe! Reminds me of my grandma’s kitchen too. Perfect for cozy mornings.
I remember my grandma’s eclair cake too—such a comforting, rich treat. This recipe brings back so many sweet memories!
I love how this recipe brings back such sweet memories—thanks for sharing! My family will definitely enjoy it too.
I love the idea of a chocolate eclair cake—it’s such a nostalgic and comforting dessert! Does your grandma’s recipe use pudding or cream filling?
I’ve been craving something like this all week—your grandma’s recipe must be incredible! Can’t wait to try it.