

Easy Nutty Chicken Quinoa Bake
There’s something about baking a loaf that fills the house with this warm, sweet aroma that immediately makes me think of lazy Sundays and family gatherings. But a lemon zucchini cake? That’s a whole different level—like sunshine wrapped in a slice, with just a hint of bright citrus and that comforting veggie surprise hidden inside. I’ve tested countless recipes over the years, and I’m telling you, this one’s a lifesaver on busy nights or when I need a little treat that’s not overly sweet or complicated. My kids actually ask for this all the time, and it disappears in minutes at my house. Trust me on this — the smell alone will bring everyone to the kitchen. And the best part? It’s honestly so easy, I always do this when I want something homemade, flavorful, but without the fuss. Seriously, if you love a moist, tender cake that leaves you feeling cozy and inspired, keep reading — this one’s a keeper.
What is a Zucchini cake?
Think of it as a modern twist on a classic summer vegetable—zucchini—turned into pure bakery magic. It’s essentially a moist, tender cake packed with grated zucchini, which keeps it incredibly juicy and light. The lemon adds this fresh, tangy zing that cuts through the richness, making every bite feel like a burst of sunshine. The name comes straight from the ingredients, but I like to think of it as a cozy conversation between summer’s best produce and a simple, satisfying dessert. It’s like a quick hug in a slice — perfect for breakfast, a snack, or a sweet end to dinner. And honestly, it’s so forgiving and flexible; you can swap in different citrus or even add a handful of blueberries for an extra pop. Think of this as your new go-to for when you want something homemade and impressive but don’t have hours to spend in the kitchen.
Why you’ll love this recipe?
What I love most about this lemon zucchini cake is how surprisingly versatile and forgiving it is. You don’t need fancy ingredients or a fancy oven—just your trusty grater, a whisk, and some common pantry staples. The flavor? Bright and citrusy with this tender, almost melt-in-your-mouth crumb that keeps you coming back for more. Plus, the zucchini keeps it moist for days—you’ll find it only gets better the next day, which is pretty rare for baked goods. And let me tell you, it’s a real budget-friendly hero. No need for lots of butter or oil; I tested this with a little almond milk, and it actually made it even creamier and mellower. My kids ask for this all the time when they want a quick sweet treat after school, and I love how it’s healthy enough to feel good about. Honestly, I’ve made this more times than I can count—you get the hang of it fast, and the results are always delicious. It’s perfect when you’re craving something sweet at 10pm but don’t want to bake a whole cake. Plus, it’s a great way to sneak in some veggies—they never suspect a thing! Honestly, once you try it, you’ll be hooked on how easy and satisfying it is.
How do I make a lemon zucchini cake?
Quick Overview
This cake comes together quickly, with just a few simple steps. First, you grate your zucchini and squeeze out the excess moisture—trust me, this little step makes a big difference. Then, you mix your dry ingredients—flour, baking powder, a pinch of salt—and set that aside. In a separate bowl, whisk together eggs, sugar, oil, lemon zest, and juice until smooth. Mix the wet and dry ingredients just until combined, careful not to overmix. Fold in the grated zucchini, pour the batter into your prepared pan, and swirl in some reserve of filling or extra zest for a marbled effect. Bake until a toothpick comes out clean, cool it, then drizzle with the creamy lemon glaze. The whole process takes maybe 45 minutes, and the best part? It’s so forgiving—you’ll probably find yourself making this on a whim because it’s just that simple.
Ingredients
For the Main Batter:
– 2 cups grated zucchini (about 2 small zucchinis, washed and grated)
– 1 1/2 cups all-purpose flour (or a gluten-free blend if you prefer)
– 1 teaspoon baking powder
– 1/2 teaspoon baking soda
– 1/4 teaspoon salt
– Zest of 1 large lemon
– Juice of 1 lemon (~3-4 tablespoons)
– 3 large eggs
– 1 cup granulated sugar or honey (if you want a bit more caramel flavor)
– 1/3 cup vegetable or light olive oil
– 1 teaspoon vanilla extract (optional but recommended)
For the Filling (optional but highly recommended):
– 2 tablespoons lemon curd or a dollop of ricotta mixed with lemon zest
– Fresh blueberries or raspberries (for a fruity surprise)
For the Glaze:
– 1 cup powdered sugar
– 2-3 tablespoons fresh lemon juice
– A touch of milk or cream if you want a thinner consistency
Step-by-Step Instructions
Step 1: Preheat & Prep Pan
Set your oven to 350°F (175°C). Grease a loaf pan or line it with parchment paper for easy removal. I always do this step first because it keeps everything flowing smoothly once the batter is ready.
Step 2: Mix Dry Ingredients
In a medium bowl, whisk together the flour, baking powder, baking soda, salt, and lemon zest. This ensures everything is evenly distributed — trust me, it makes a difference in the final rise and texture.
Step 3: Mix Wet Ingredients
In a large bowl, beat the eggs, sugar, and lemon juice until fragrant and slightly frothy. Add in the oil and vanilla, mixing until smooth. The citrus smell is divine at this stage — it’s like you’re already tasting sunshine.
Step 4: Combine
Gradually add the dry ingredients into the wet, stirring gently until just combined. Avoid overmixing—this keeps your cake tender and fluffy. If you overmix, it can turn out dense or rubbery, and nobody wants that.
Step 5: Prepare Filling
If you’re using a filling, spoon it into your batter now. I love dolloping lemon curd in the center for that bright, sweet surprise. Or a handful of blueberries works beautifully if you want extra flavor and color.
Step 6: Layer & Swirl
Pour half the batter into the pan, add your filling, then cover with the remaining batter. Use a skewer or knife to swirl gently, creating a marbled look. I love this because it’s almost like a little artwork—just don’t overdo it or you’ll lose the pattern.
Step 7: Bake
Pop it into the oven and bake for 40-45 minutes. Test with a toothpick — it should come out clean and the top will be golden brown. If it starts browning too quickly, tent with foil and keep an eye on it.
Step 8: Cool & Glaze
Let it cool in the pan for about 15 minutes, then transfer to a wire rack. Whisk your glaze ingredients until smooth, then drizzle generously over the cooled cake. The glaze adds this lovely zing and makes it look just a bit more fancy.
Step 9: Slice & Serve
Slice with a sharp serrated knife to keep it neat. I like serving this warm, with extra lemon zest or a dusting of powdered sugar if I’m feeling fancy. It’s excellent with a cup of tea or iced coffee — a little slice of sunshine whenever you need it.
What to Serve It With
Honestly, this cake is so flexible. For breakfast or brunch, I love serving it with a dollop of Greek yogurt and fresh berries, alongside a strong cup of coffee. It’s also pretty fantastic as a casual afternoon snack, enjoyed with a glass of iced tea or lemonade on a warm day. When I serve it as dessert, I tend to add extra lemon zest or a drizzle of honey for that extra sparkle. My family’s favorite is to enjoy a warm slice with a scoop of vanilla ice cream — talk about a comfort combo! On weekends, I love making a little platter with some assorted cheeses, crunchy nuts, and fresh fruit. It’s a laid-back, beautiful way to end a meal or gather around the table. Honestly, this cake has become a staple in my home, especially when I want something homemade that feels special but is actually pretty simple. You’ll find it’s great for everything from an impromptu teatime to a small dinner party—everyone always asks for seconds.
Top Tips for Perfecting Your Lemon Zucchini Cake
Over the years, I’ve learned a few tricks that make all the difference. First, always squeeze out as much moisture as possible from your grated zucchini. Wet zucchini can make your cake dense or soggy — no thank you! I usually wrap it in a clean kitchen towel and give it a good squeeze, then toss it into the batter right before baking. I tested this with different zucchinis, and fresh is always best — the flavor’s so much brighter. Second, don’t overmix once you combine everything—stuff gets tough if you do. Just fold until you see no streaks of flour, and you’ll have a fluffy crumb. When swirling your filling or zest, go slow and gentle — I used to rush and muddle the pattern, but trust me, patience creates that beautiful marbled look. For ingredient swaps, you can easily substitute honey for sugar or swap almond flour for regular flour—just watch your ratios and adjust baking time slightly if needed. As for baking, I’ve learned to keep an eye on the cake’s edges—if the edges look dark but the center is still wet, just cover loosely with foil and keep an eye on it. Similarly, when glazing, I prefer a slightly runny glaze—thick enough to stay on top but thin enough to drip beautifully. A touch of vanilla or a pinch of cardamom can also elevate the flavor, so don’t be afraid to experiment. The main thing is to trust your nose and eye — baking is part science, but mostly it’s about feeling your way through it.
Storing and Reheating Tips
This cake keeps surprisingly well. If you’re serving it within a day or two, store it covered at room temperature—such as under a clean cloth or foil—where it’ll stay moist and fresh for about 2-3 days. If you want to keep it longer, pop it in an airtight container in the fridge for up to 5 days. I like to bring slices back to room temp before serving to get that fresh-baked feeling again. For freezing, wrap the whole cake tightly in plastic wrap, then foil, and store for up to 3 months. Thaw in the fridge overnight, then bring to room temp before glazing. If you’ve added the glaze ahead of time, just give it a quick reheat in the oven at low temp or microwave. I’ve even frozen individual slices—I find that’s perfect for those late-night cravings when I want something sweet but effortless. The glaze can be added after reheating for that fresh, glossy look. In short, this cake is resilient—just a little care and it can be enjoyed over several days, making it a true weekender.
Frequently Asked Questions
Final Thoughts
Honestly, I can’t tell you how many times this lemon zucchini cake has saved me. It’s not just a recipe; it’s almost like a little tradition that I love sharing with friends or family. Its fragrant lemon tang paired with the tender zucchini crumb feels like comfort food but elevated enough to serve at a casual dinner or a weekend brunch. Plus, it’s such a flexible, forgiving bake—over the years, I’ve tweaked it here and there, swapped ingredients, and every version has still turned out wonderful. I always keep grated zucchini in my fridge now because I know I can whip up this cake whenever I need a quick hit of sunshine. So grab your zucchinis, zest that lemon, and let’s get baking — I promise, once you try this, it’ll become a household favorite. And I’d love to hear how yours turns out—leave a comment or tag me on social media. Happy baking, friends!
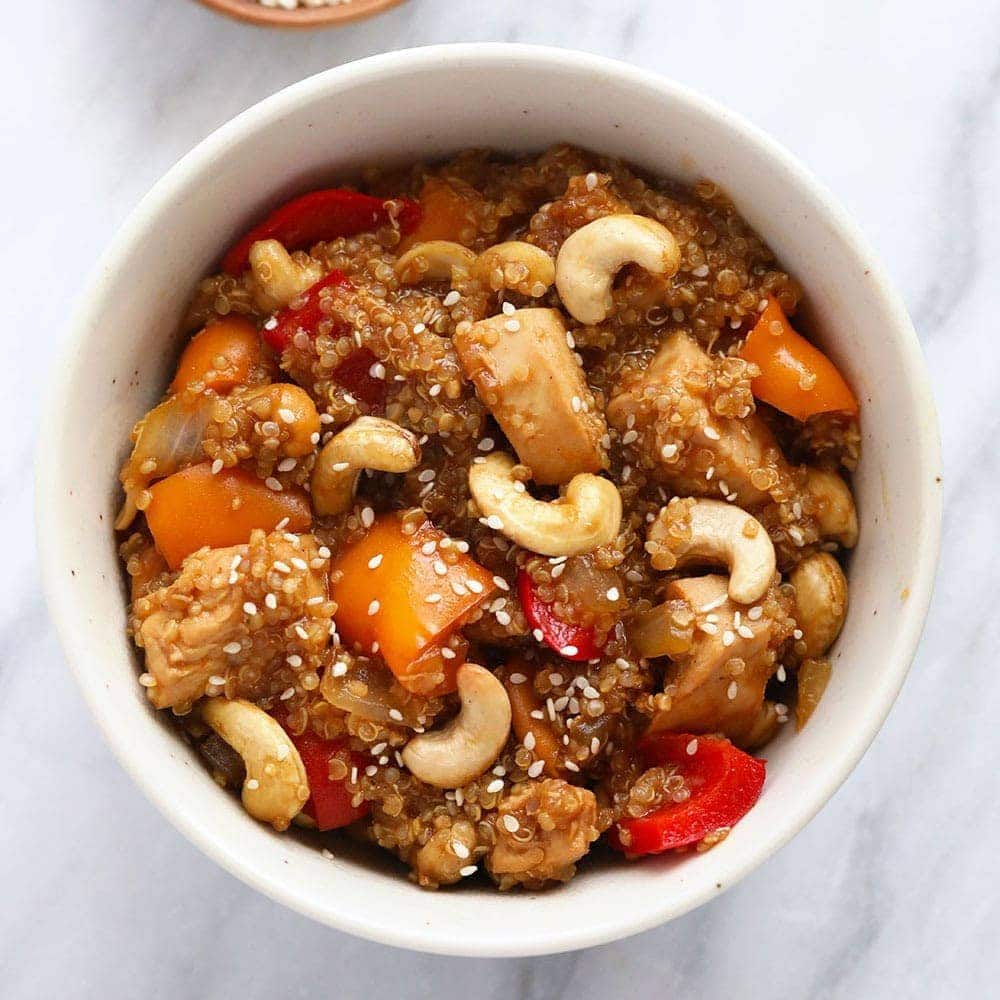
Cashew Chicken
Ingredients
Method
- Cook rice according to package instructions. Set aside.
- Heat vegetable oil in a large skillet over medium-high heat. Add diced chicken and cook until no longer pink, about 5-7 minutes.
- Add garlic and ginger to the skillet and cook for 1 minute until fragrant.
- Add broccoli and red bell pepper to the skillet. Stir-fry for 4-5 minutes until vegetables are tender-crisp.
- Mix soy sauce and hoisin sauce in a small bowl. Pour over the chicken and vegetables. Stir to combine and cook for 2 minutes.
- Add roasted or raw cashews to the skillet, mixing well. Serve the stir-fry over cooked rice.


This sounds amazing! I love how baking fills the house with such cozy aromas. Can’t wait to try this recipe.
This sounds amazing! I love how comforting baked meals can be. Do you think the lemon zucchini adds a fresh twist to the nutty flavor?
This sounds amazing—perfect comfort food! I love how baking brings such cozy, inviting vibes to any weekend.
Love this recipe! It sounds perfect for a cozy weekend dinner with the family.