
Hearty Rolled Oats Cookies Recipe
I still remember the first time I made these zucchini cupcakes — it was late one Saturday afternoon, and I’d just realized I had a mountain of fresh zucchini from our garden. My kids were begging for a treat, and I didn’t want to turn to the usual cookies or brownies. That’s when these cupcakes, with their hidden veggie goodness and irresistible cream cheese swirl, became my go-to. The smell alone — warm cinnamon, sweet vanilla, and just a hint of zucchini — makes the whole house feel cozy. Plus, they’re not overly sweet, so they’re actually kind of healthy-ish, right? I always do this when I want something sweet but don’t want to feel guilty afterward, and trust me, these disappear in minutes at my house. I’ve tested this with sunflower oil, almond milk, and even coconut sugar — and honestly, each twist makes it a little more special. Whether you’re baking for a crowd or just craving something comforting after a long day, these zucchini cupcakes are like a warm hug you can eat. Grab a coffee, and let’s get baking together!—you’re going to love how easy and comforting these are.
What is Zucchini Cupcakes with Cream Cheese Swirl?
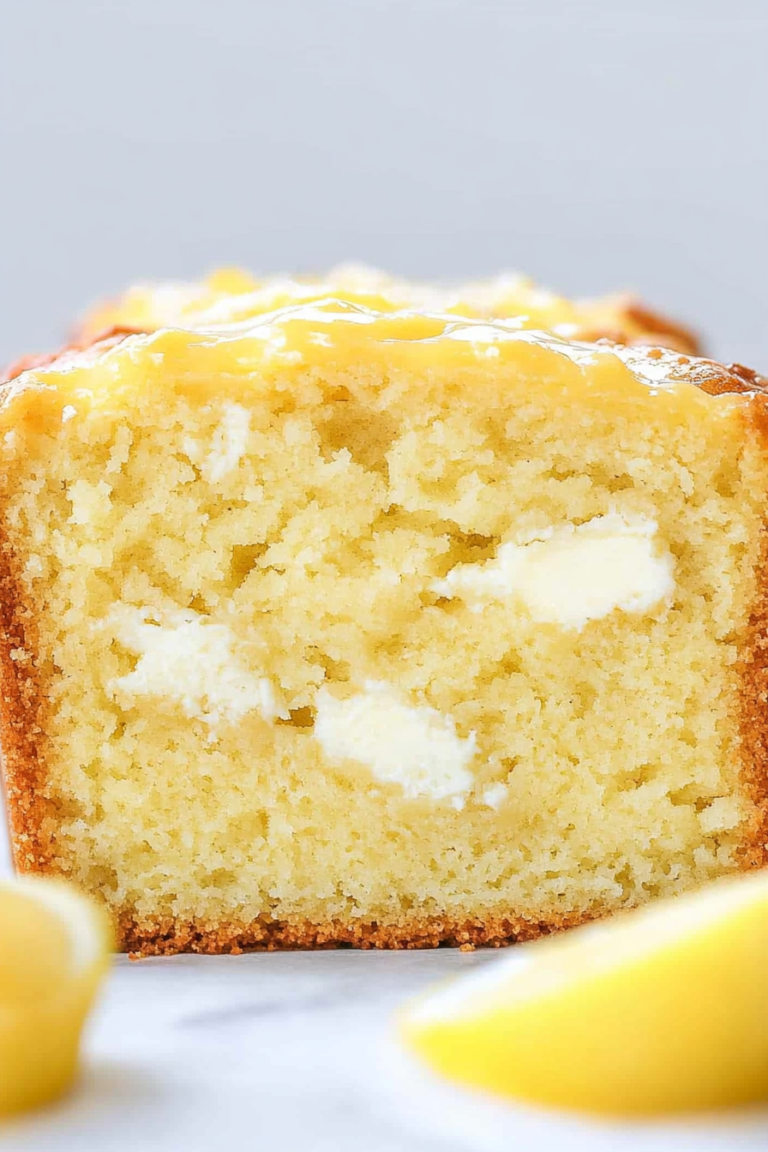
Think of zucchini cupcakes with cream cheese swirl as a fluffy, moist little cake disguised as a veggie snack — it’s essentially a hybrid of a soft muffin and a mini dessert. The name itself hints at a clever trick: zucchinis, which are usually seen on dinner plates or in salads, lend moisture and a subtle earthy flavor without making the cupcakes taste veggie-heavy. It’s a sneaky way to sneak in some greens, especially if you have kids who turn up their noses at anything green on their plate! The swirl of cream cheese on top adds a tangy richness and a beautiful visual contrast. It’s kind of like a cheesecake muffin, but way simpler to make and way less intimidating. I love calling this “comfort food with a twist,” because it hits all the right notes of cozy sweetness and wholesome ingredients. Plus, honey, I’ve made these countless times, and they’re always a hit. Trust me, once you try this combination, you’ll be dreaming up different fillings, tweaks, and flavor combos in no time.
Why you’ll love this recipe?
What I love most about these zucchini cupcakes is how effortlessly they come together — no fancy equipment needed, just good old mixing bowls and a spoon. The flavor? It’s a perfect blend of warm cinnamon, vanilla, and just enough sweetness to satisfy that midnight craving without feeling overindulgent. The zucchini keeps these super moist and tender, and honestly, they’re a lifesaver on busy nights when you want something quick but comforting. And let’s talk about versatility — you can swap in whole wheat flour or even gluten-free mixes if you’re feeling health-conscious. I’ve added chopped walnuts, cinnamon chips, even chocolate chunks for a different vibe, and as long as you keep the ratio of wet to dry, they turn out beautifully every time. They’re also budget-friendly because zucchinis are cheap, and you probably already have most of the ingredients in your pantry. This recipe has become a staple in my house because it’s equally loved by picky kids and adults who just want a little sweet treat with a side of good conscience. I love that it’s a sneaky way to add veggies, and honestly, since the zucchinis bake down so nicely, no one even notices. It’s a little healthy, a little indulgent, and a whole lot of comforting — my kind of dessert!
How do you make Zucchini Cupcakes with Cream Cheese Swirl?
Quick Overview
In a nutshell, these cupcakes start with a simple batter whipped together in one bowl, then folded with grated zucchini, which keeps them extra moist. The batter goes into a lined muffin tin, topped with dollops of tangy cream cheese mixture, and swirled for pretty marbling. A quick bake later, and you’ve got fluffy cupcakes that smell like warm cinnamon and vanilla — all topped off with a luscious cream cheese swirl. The best part? They’re straightforward, foolproof, and perfect for any baking skill level. You can whip these up in under an hour, and they’re honestly better than most store-bought treats, especially when you add your own little twists. What makes this method special is how the zucchini adds moisture naturally, so you never get dry cupcakes, and layering the cream cheese on top creates the perfect little after-dinner treat or afternoon snack. Trust me — once you try this, it’ll become a regular in your rotation. It’s comfort food with a healthy twist, and I promise, everyone will be asking for seconds!
Ingredients
For the Main Batter:
- 1 ½ cups all-purpose flour (or whole wheat for extra nutrition)
- 1 teaspoon baking powder
- ½ teaspoon baking soda
- ½ teaspoon cinnamon (more if you love that cozy spice)
- ¼ teaspoon salt
- ⅓ cup sugar (honey or maple syrup works beautifully too)
- ⅓ cup neutral-flavored oil (vegetable, canola, or melted coconut oil)
- 2 large eggs
- 1 teaspoon vanilla extract
- 1 cup grated zucchini (squeeze out excess moisture)
For the Filling:
- 4 oz cream cheese ( softened)
- 2 tablespoons powdered sugar or honey (to sweeten the cream cheese)
- 1 teaspoon vanilla extract
- Optional: lemon zest or a sprinkle of cinnamon for extra flavor
For the Glaze:
- Optional: a drizzle of honey, maple syrup, or a dusting of powdered sugar
- Alternatively, a light lemon glaze works great if you want a bit more zing
Step-by-Step Instructions
Step 1: Preheat & Prep Pan
Set your oven to 350°F (175°C) and line a muffin tin with paper liners — I like these because they keep the cupcakes moist and make clean-up a breeze. Make sure the oven rack is in the middle for even baking. While preheating, give your zucchini a good rinse, then grate it and gently squeeze out the excess moisture with a clean dish towel. This part is key: too much water, and your cupcakes can turn out dense or flat. Trust me, I’ve learned this the hard way! Grease your liners lightly if you’re not using paper—just a touch of butter or spray keeps them from sticking.
Step 2: Mix Dry Ingredients
In a large bowl, whisk together the flour, baking powder, baking soda, cinnamon, and salt. This step ensures everything is evenly distributed, which helps the cupcakes rise nicely and have a consistent flavor. I always do this first — it’s like setting a good foundation for the cupcakes to turn out perfect every time.
Step 3: Mix Wet Ingredients
In another bowl, beat the eggs with sugar, oil, and vanilla until combined. The mixture should look slightly frothy and smooth. I love doing this by hand with a whisk — it makes me feel like I’m old-school baking. If you’re feeling fancy, you can use an electric mixer, but honestly, a good whisk does the trick. Stir in the grated zucchini until evenly coated.
Step 4: Combine
Pour the wet ingredients into the dry bowl and gently fold until just combined — don’t overmix! Overmixing can make the cupcakes dense or rubbery, which we definitely want to avoid. The batter will be thick but scoopable, almost like muffin batter. If it feels too stiff, a splash of milk can loosen it up.
Step 5: Prepare Filling
In a small bowl, beat the softened cream cheese with powdered sugar, vanilla, and your optional zest until smooth and creamy. I like this to be soft enough to swirl easily but firm enough to hold its shape. If you want a tangier or sweeter filling, adjust the sugar accordingly.
Step 6: Layer & Swirl
Spoon about 2/3 of the cupcake batter into each liner. Using a small spoon or piping bag, dollop a teaspoon of the cream cheese mixture in the center of each. Then, add the remaining batter on top. Take a toothpick or skewer and gently swirl through the batter and cream cheese — this creates that beautiful marbled effect and a little surprise in every bite.
Step 7: Bake
Pop the tray into your preheated oven and bake for about 18–20 minutes, or until a toothpick inserted in the center comes out clean. Every oven is a little different, so start checking around the 18-minute mark. You’ll love how they smell — a warm, spicy aroma that fills the kitchen. Keep an eye on the edges; they should turn golden brown.
Step 8: Cool & Glaze
Transfer the cupcakes to a wire rack and let them cool completely before glazing. If you add the glaze too early, it melts into the cupcake and doesn’t look as pretty. I usually wait about 15 minutes — patience, I know! Once cooled, drizzle with honey or dust with powdered sugar, or try a quick lemon glaze if you’re feeling citrusy.
Step 9: Slice & Serve
The best part! These are amazing at room temperature or slightly warm. Use a sharp knife to get clean slices, and I highly recommend serving them with a cup of tea or coffee. My kids ask for these all the time, and honestly, they’re just as good the next day — if they last that long! The cream cheese swirl peaks through each slice, making them pretty enough to serve for a brunch or a casual get-together.
What to Serve It With
This recipe is incredibly adaptable. For breakfast, I love pairing these mini cupcakes with a strong cup of coffee or a glass of fresh orange juice. They make a fantastic addition to a brunch spread—think alongside scrambled eggs, fresh fruit, and maybe some yogurt. My family always asks for these as a sweet ending to Sunday brunch. When it’s just a casual afternoon snack, I serve them with cold milk or a warm cup of tea, depending on the mood. And if you’re feeling fancy, add a dusting of powdered sugar or a smear of lemon curd for some extra zing. These cupcakes also double as a little dessert after dinner, especially when topped with a berry compote or a drizzle of caramel. I love keeping a stash in the fridge, especially when friends stop by unexpectedly or the kids have friends over. They just feel like a cozy, homemade treat that everyone can’t resist.
Top Tips for Perfecting Your Zucchini Cupcakes with Cream Cheese Swirl
I’ve made these dozens of times, and each tweak has led to a better version — I want to share my best tips with you:
- Zucchini Prep: Make sure to squeeze out as much moisture as possible. I use a clean dish towel to gently press out the water after grating. Too much moisture can make your cupcakes dense, so don’t skip this step!
- Mixing Advice: Overmixing the batter? Big mistake. Mix just until the ingredients are barely combined. Remember, a lumpy batter yields the best fluffy cupcakes.
- Swirl Customization: For a prettier swirl, scoop your batter and cream cheese alternately. Use a skewer or toothpick to create a marbled pattern — don’t overdo it, or it’ll blend into a muddy mess.
- Ingredient Swaps: Feel free to swap honey for sugar or coconut oil for neutral oil. The texture might shift slightly, but the taste remains fabulous. I’ve even tried almond flour, but you’ll want to add a touch more liquid for best results.
- Baking Tips: My oven runs hot, so I always check a minute or two early. Ovens vary, so start testing around 18 minutes. The cupcakes are done when the tops are domed and a toothpick comes out clean.
- Glaze Variations: Looking for a different finish? Try a chocolate drizzle or a dusting of cinnamon sugar. For a zing, lemon glaze with a hint of zest makes the flavor pop.
Honestly, the key is patience and experimenting with your ingredients — each tweak brings its own magic. These cupcakes are forgiving, and once you dial in your oven and ingredients, you’ll be baking them like a pro.
Storing and Reheating Tips
So, what do you do once the cupcakes are done and you’re trying to keep them fresh? I’ve found a few tricks that help:
- Room Temperature: Store in an airtight container for up to 2 days. I usually cover them with a paper towel to avoid condensation, which keeps them from getting soggy.
- Refrigerator Storage: These last about a week in the fridge if stored in a sealed container. Just give them a quick 10-second zap in the microwave if you want to enjoy them warm again — it’s like rediscovering their cozy magic all over.
- Freezer Instructions: Wrap each cupcake tightly in plastic wrap, then place in a freezer bag for up to 3 months. Thaw overnight in the fridge or at room temp for a quick treat. I actually love freezing the leftovers — it’s like having cupcakes on demand!
- Glaze Timing: Keep the glaze or topping separate if you’re freezing. Add it right before serving for the freshest look and taste.
Every method preserves the moistness and flavor, so don’t worry if you’re making these ahead. They’re resilient, and with just a quick reheat, they’re just as delicious as fresh out of the oven.
Frequently Asked Questions
Final Thoughts
If there’s one recipe that reminds me of home, it’s these zucchini cupcakes with cream cheese swirl. They’re cozy, versatile, and honestly, a little bit sneaky — because no one suspects how healthy they are until they taste that moist crumb and luscious topping. Over the years, I’ve tweaked and experimented, discovering that the key is balancing moisture and flavor. Every batch has a little personality of its own, but the core idea stays the same: an easy, tender cupcake packed with veggie goodness and finished with a tangy, sweet swirl. They’re perfect for mornings, weekend brunch, or even a quick dessert on busy weeknights. I always say, baking should be fun, not complicated — and these cupcakes are just that. I hope you try them and find your own little twists. Sharing this recipe feels like passing along a secret family favorite. Happy baking — and I can’t wait to hear how yours turn out! Don’t forget to leave a comment below, share photos, or tell me about your favorite variations—this is meant to be a little celebration of good food and good company.
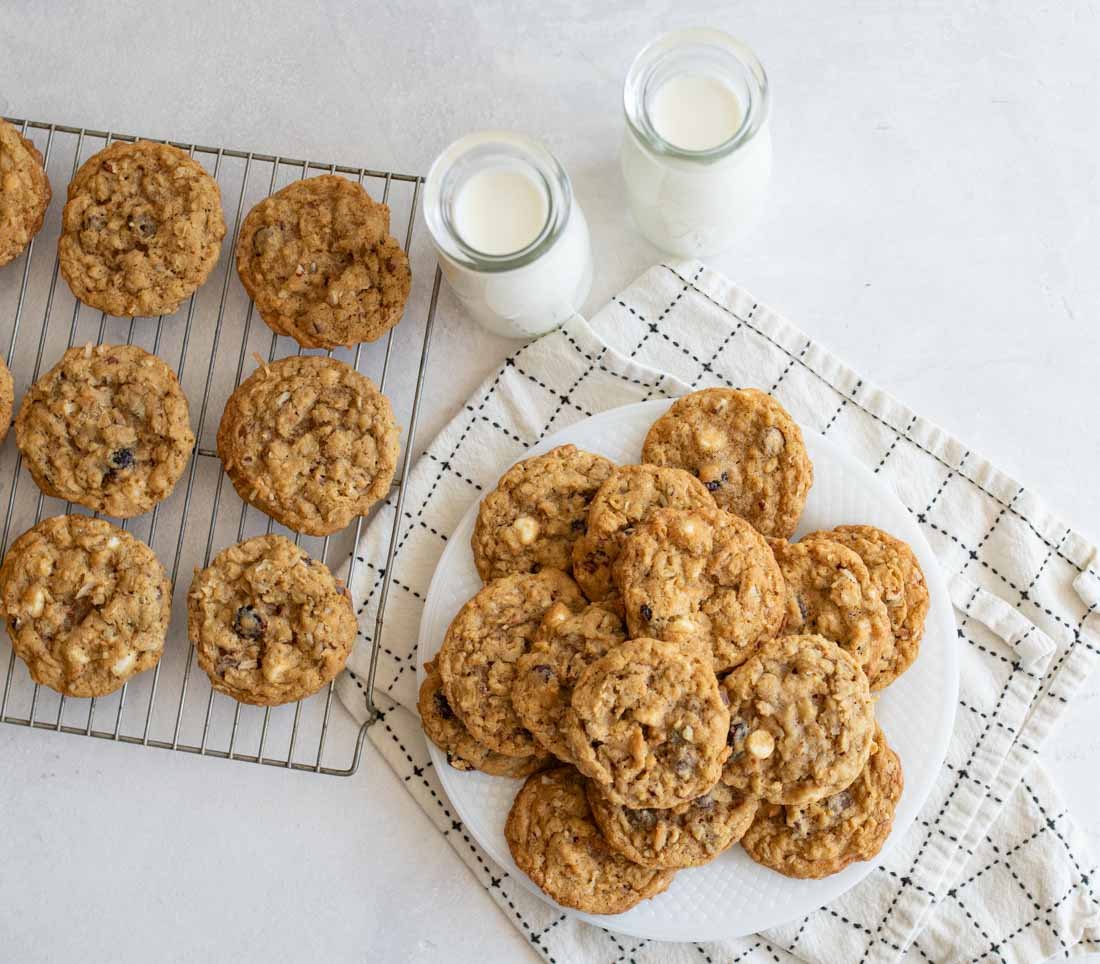
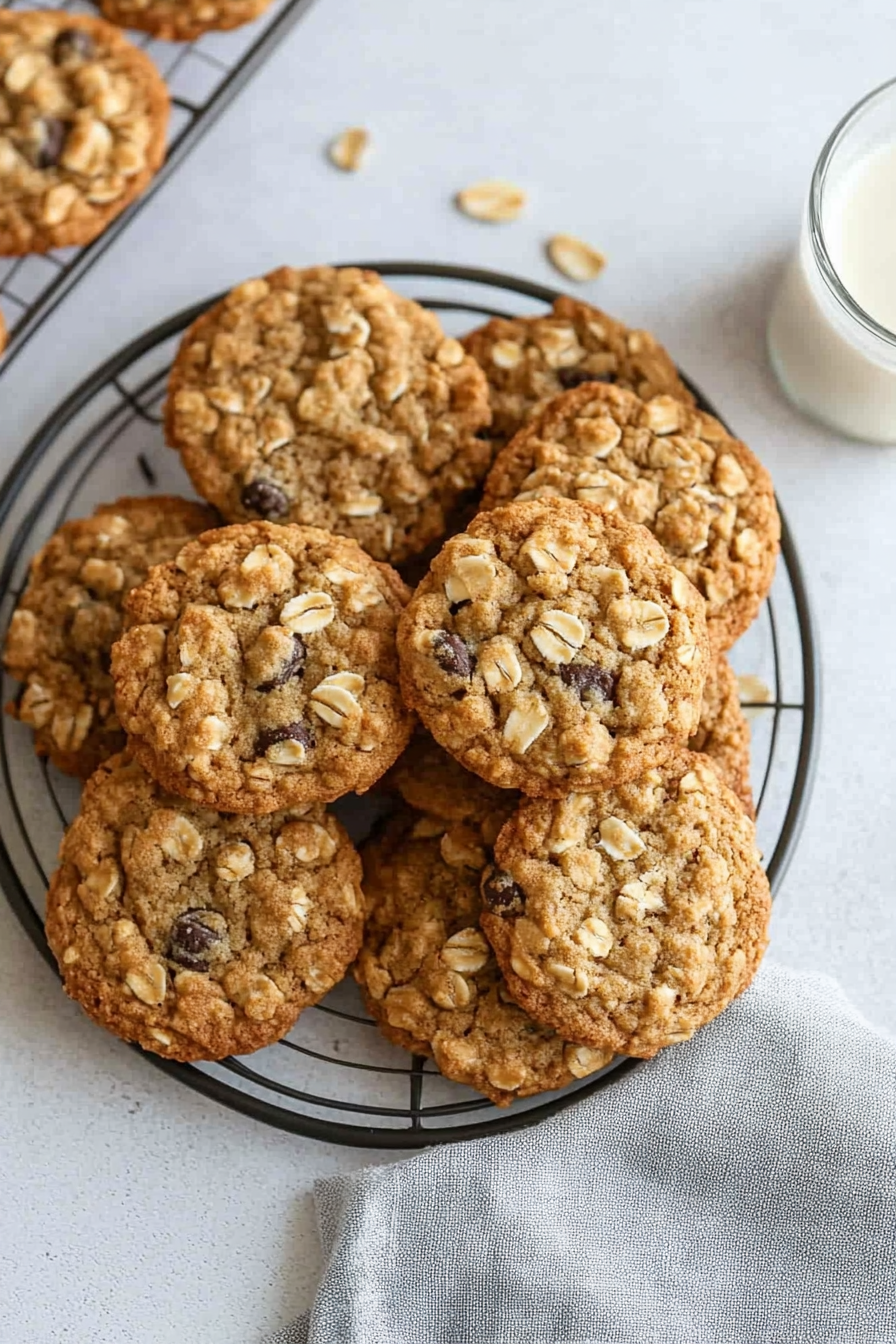
oatmeal cookies
Ingredients
Method
- Preheat the oven to 350°F and line a baking sheet with parchment paper or a baking mat.
- In a medium mixing bowl, beat together butter, brown sugar, and granulated sugar until light and fluffy, about 3 minutes.
- Add the molasses, eggs, and vanilla, and beat until well combined.
- Add the flour, baking soda, salt, cinnamon, and stir to combine well.
- Add both kinds of oats and stir until combined.
- Stir in cranberries, coconut, pecans, milk chocolate chips, and white chocolate chips.
- Using 1 large tablespoon of dough, roll into balls and place on the prepared baking sheet about 2.5 inches apart.
- Bake for 10 minutes, or until the cookies are golden and no longer shiny on top.
- Allow cookies to cool on the baking sheet for 5 minutes, then transfer to a wire rack to cool completely.
- Repeat with the remaining dough. Enjoy cookies warm or store in an airtight container for up to 3 days.

This recipe looks amazing! I’ve been looking for something hearty and healthy to make for my family, and these cookies are perfect. Can’t wait to try them!
These cookies sound delicious! I love how comforting oatmeal cookies can be — perfect for a cozy afternoon.
This recipe sounds comforting and nostalgic! I love how it brings back memories of cozy baking moments.
This recipe sounds comforting! I love how cozy homemade cookies can be — reminds me of baking with my grandma.
This recipe sounds amazing! I love how simple yet comforting rolled oats cookies can be.